Create an Office
Introduction:
Videos are best viewed full screen at 1080p resolution.
Video Duration: 08:20
Step by Step Instructions:
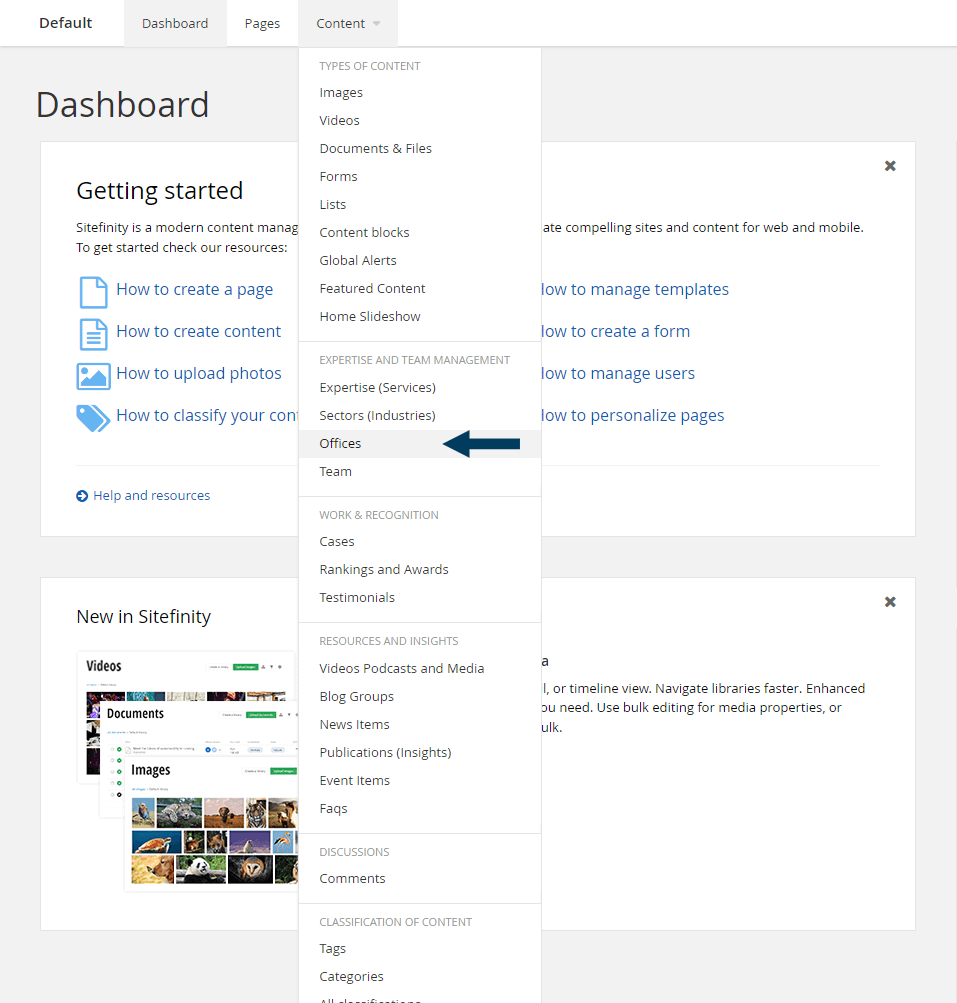
Step 1: From the top navigation, click on the Content drop-down and then Offices.
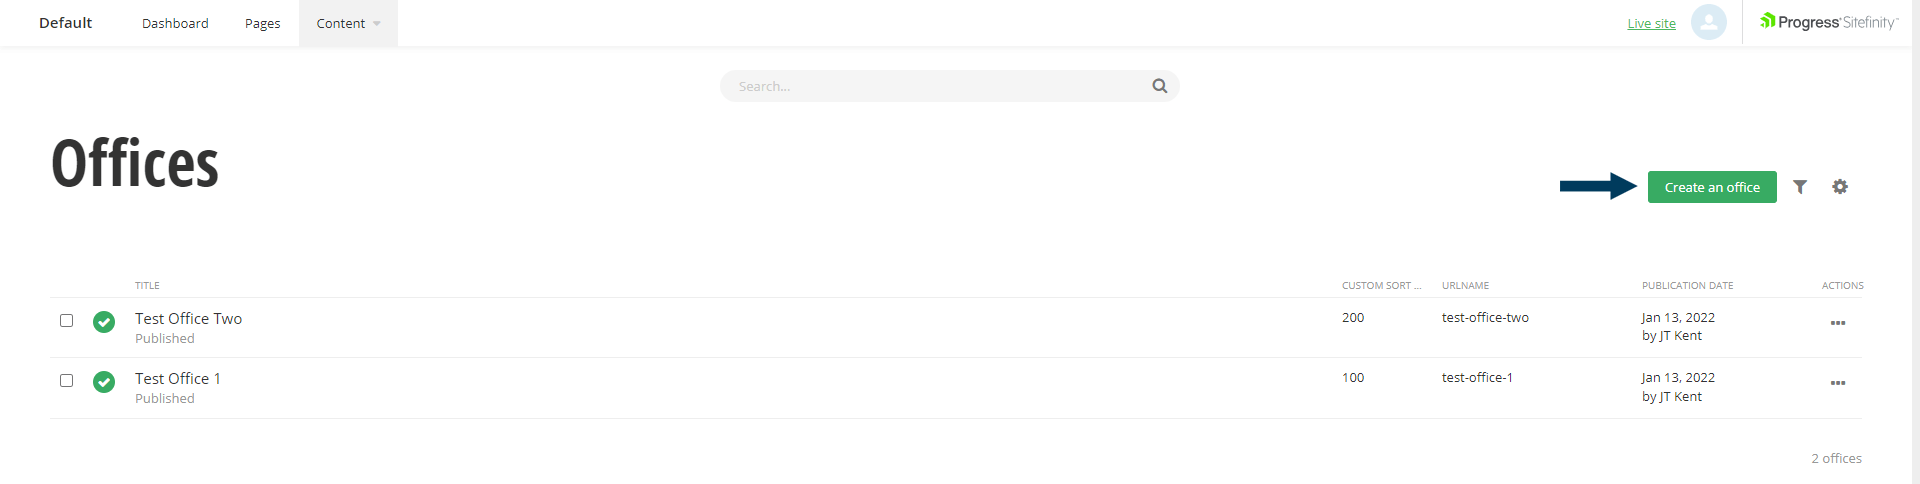
This will bring up the listing page that shows all items.
Step 2: To create an Office item, click on the Create an Office button. The Create dialog will appear.
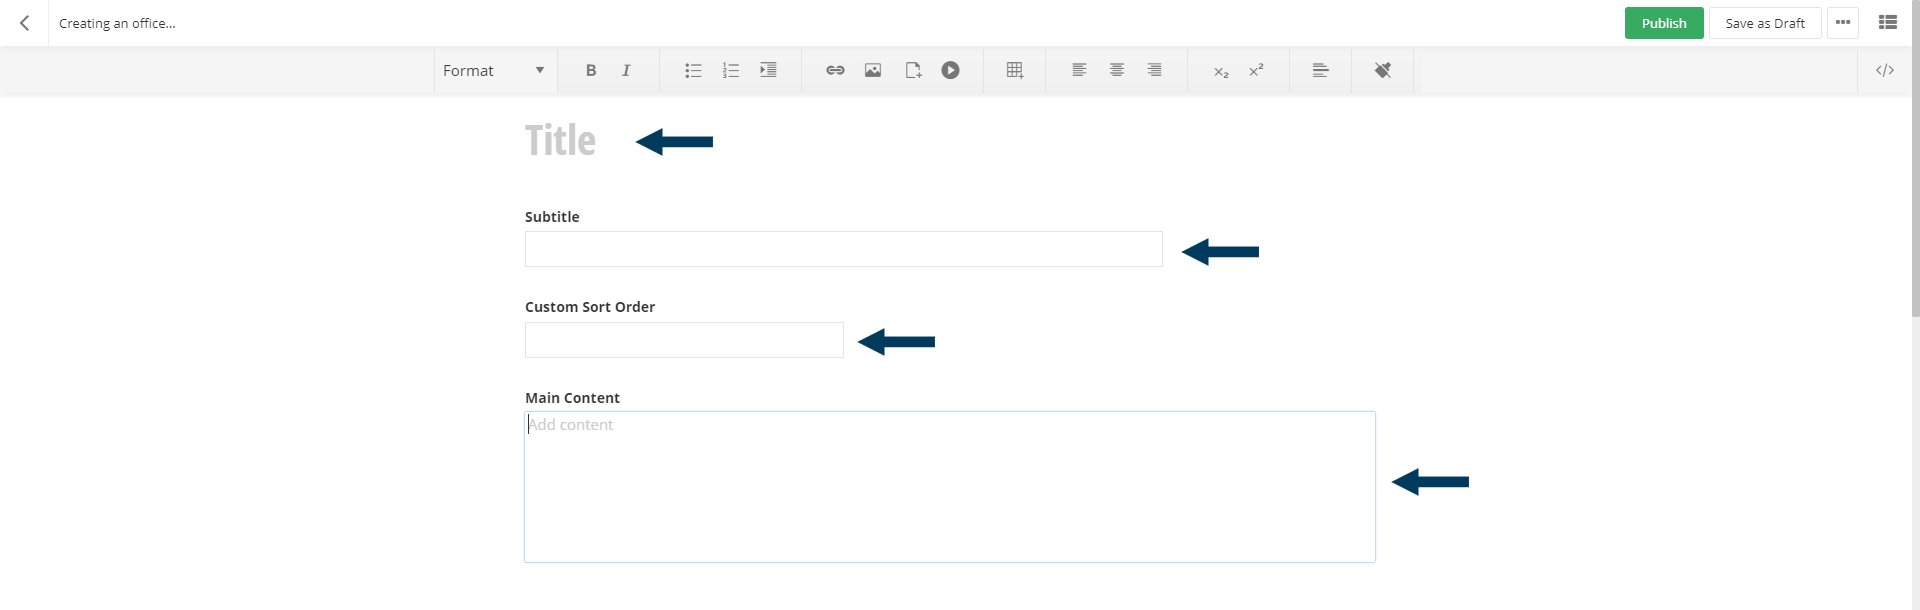
Step 3a: Fill out the main fields.
First, Title your Office (example: Head Office). The Subtitle field is optional. Custom Sort Order determines the placement of the office on a page with other office locations also displayed. A low number in this field would make this office appear before any offices with a higher number here. Main Content is also optional.
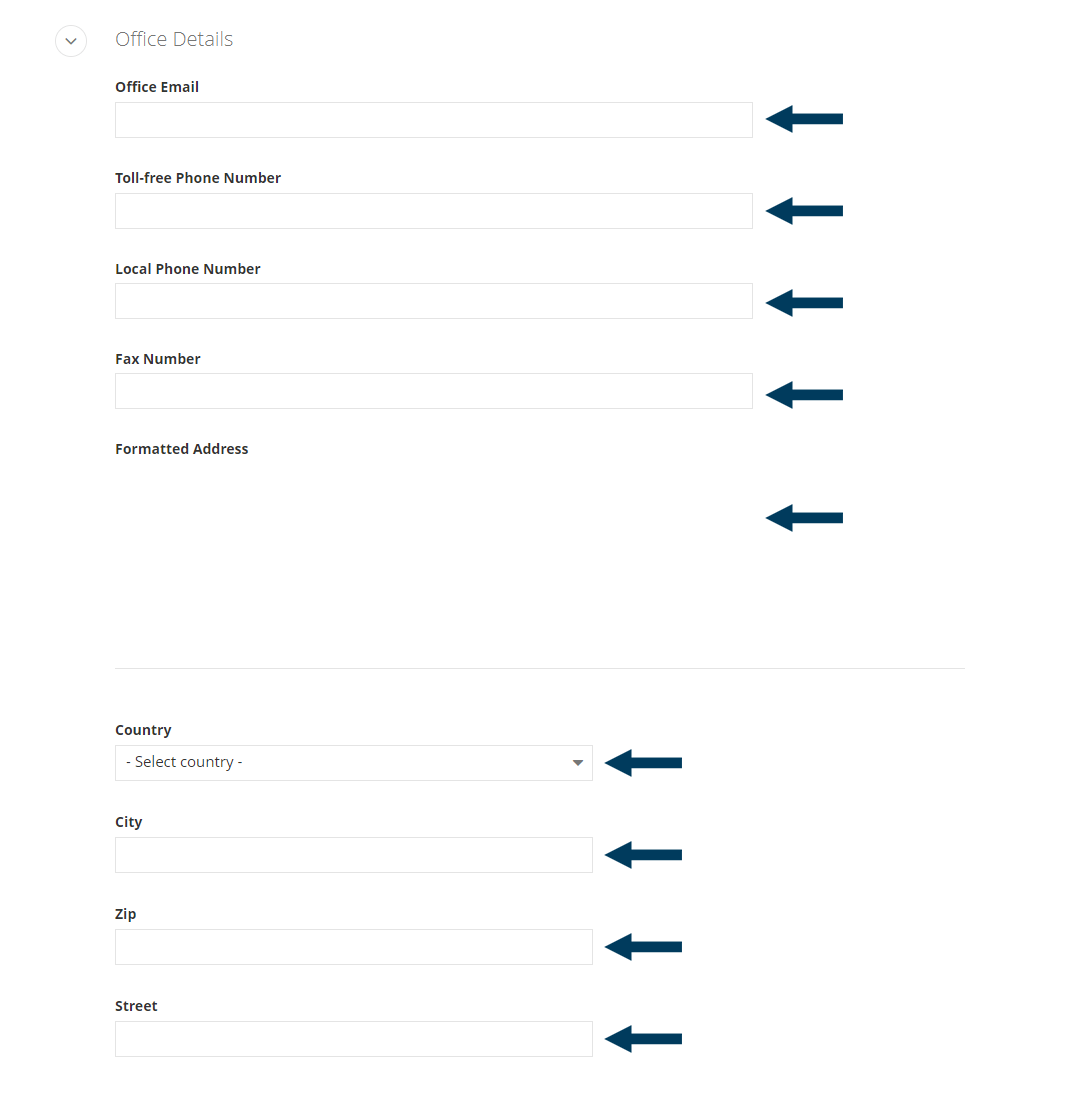
Step 3b: Fill out the office location details.
These fields are optional. The first part of this section is displayed on your pages (where offices are set to display). How you fill out the Formatted Address field is exactly how the address will display on the page - it's still important to fill out the Country, City, Zip (Postal Code), and Street fields.
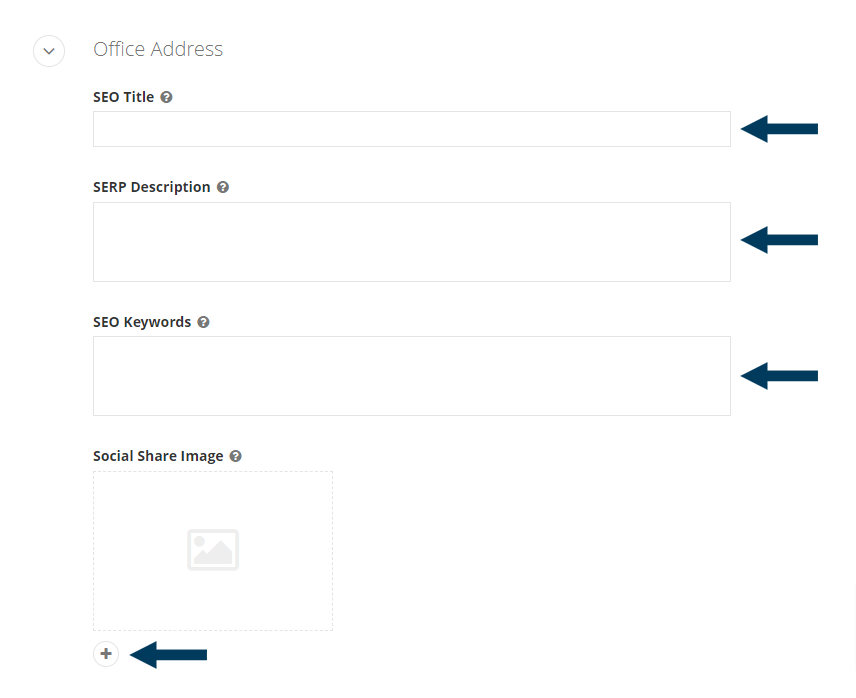
Step 3c: Fill out the optional SEO/Social fields.
Step 4: Status the Content
Using the status bar, make the content live on your website by clicking the Publish button.
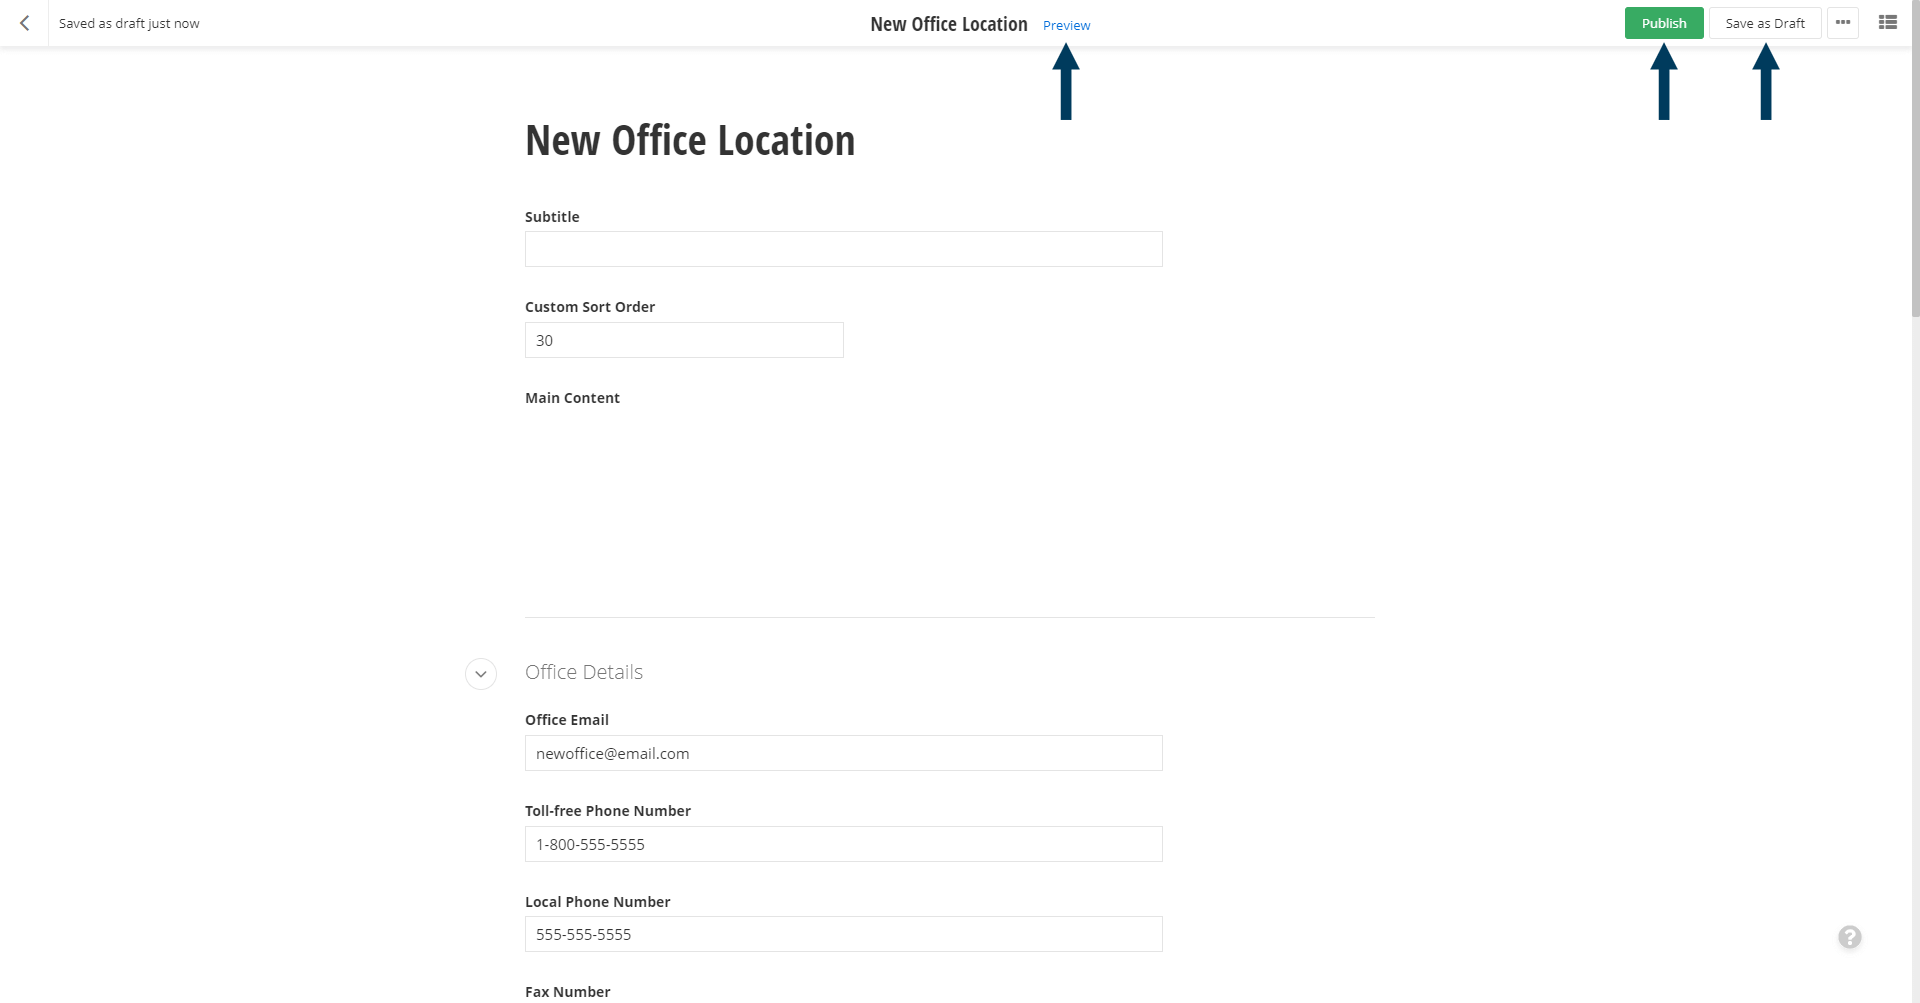
Note: To view the content prior to publishing, you can use the preview feature. This will show exactly how the content will look once published. To preview, click the Preview button (content must be statused as draft prior to previewing).
