Create a Form
Introduction:
Videos are best viewed full screen at 1080p resolution.
Video Duration: 07:05
Step by Step Instructions:
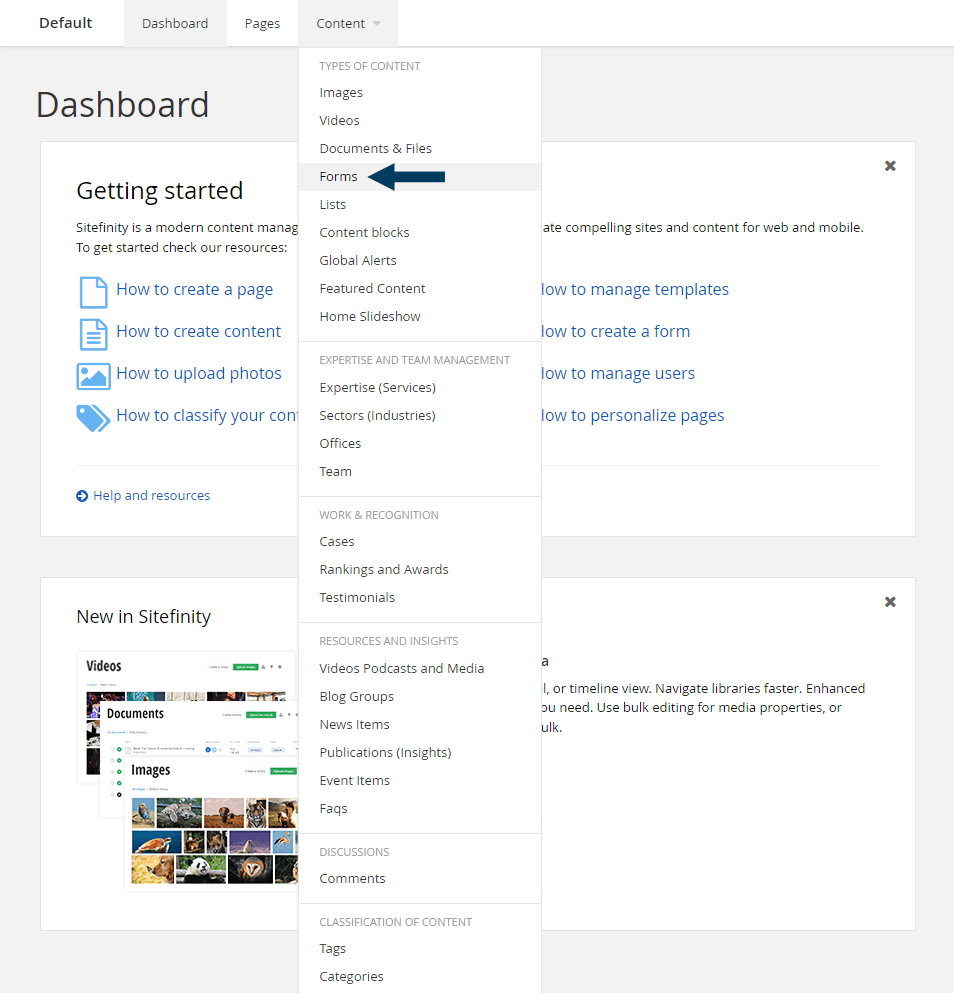
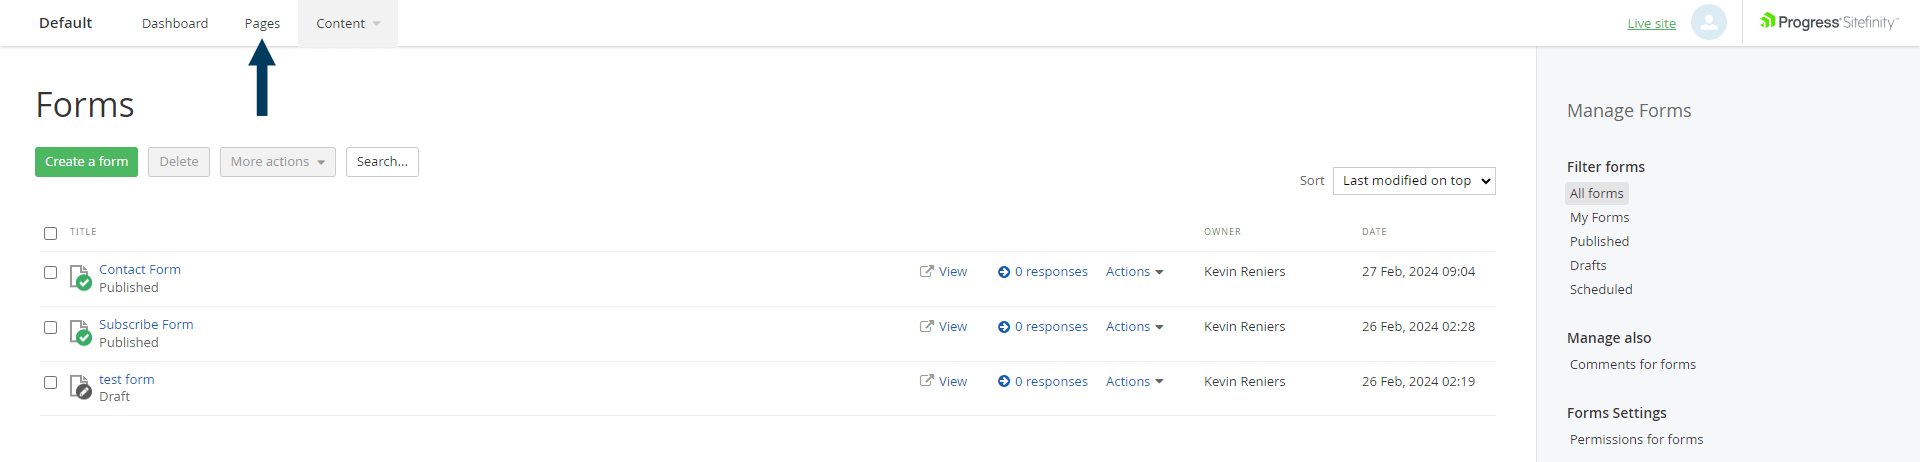
Step 1: From the top navigation, click on the Content tab and then Forms from the drop-down menu under Types of Content. This will bring up a list of all forms within your CMS.
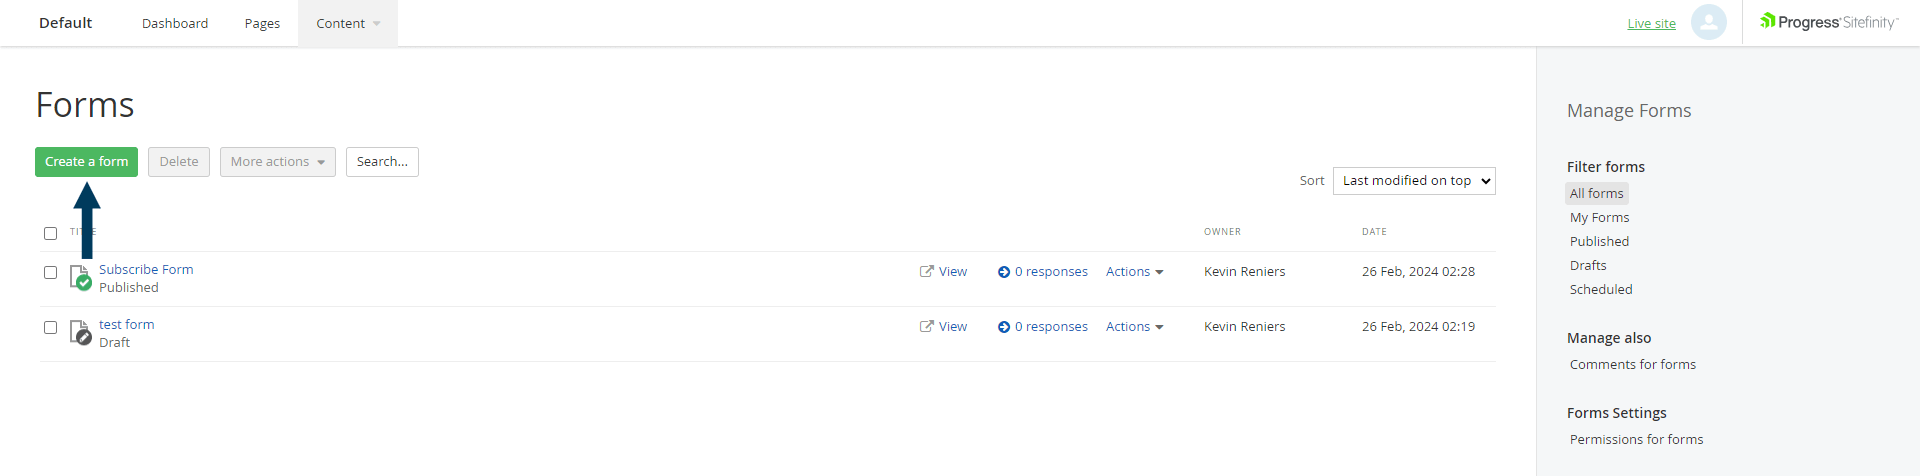
Step 2a: Create a Form
Click on the Create a Form button to start creating a new form.
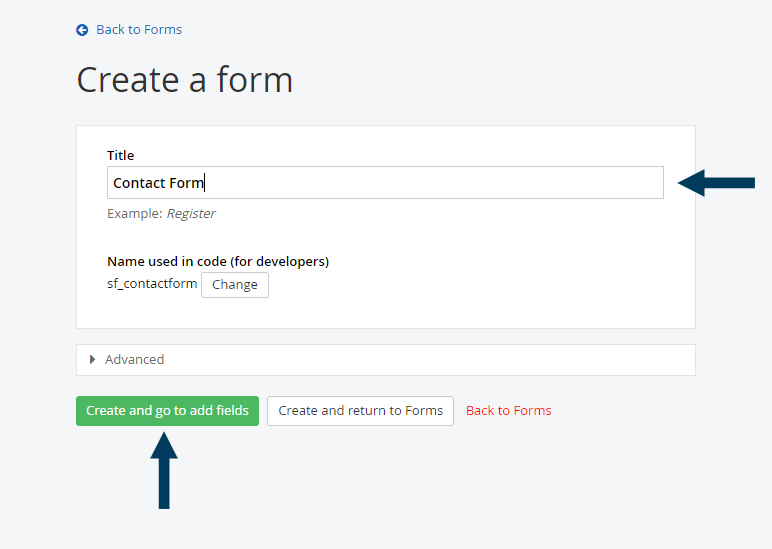
Step 2b: Title the Form
Enter a title for your new form, then click the Create and go to the Add Fields button.
Step 3a: Add form fields (text boxes, etc.)
Add form fields to your form - for example textboxes.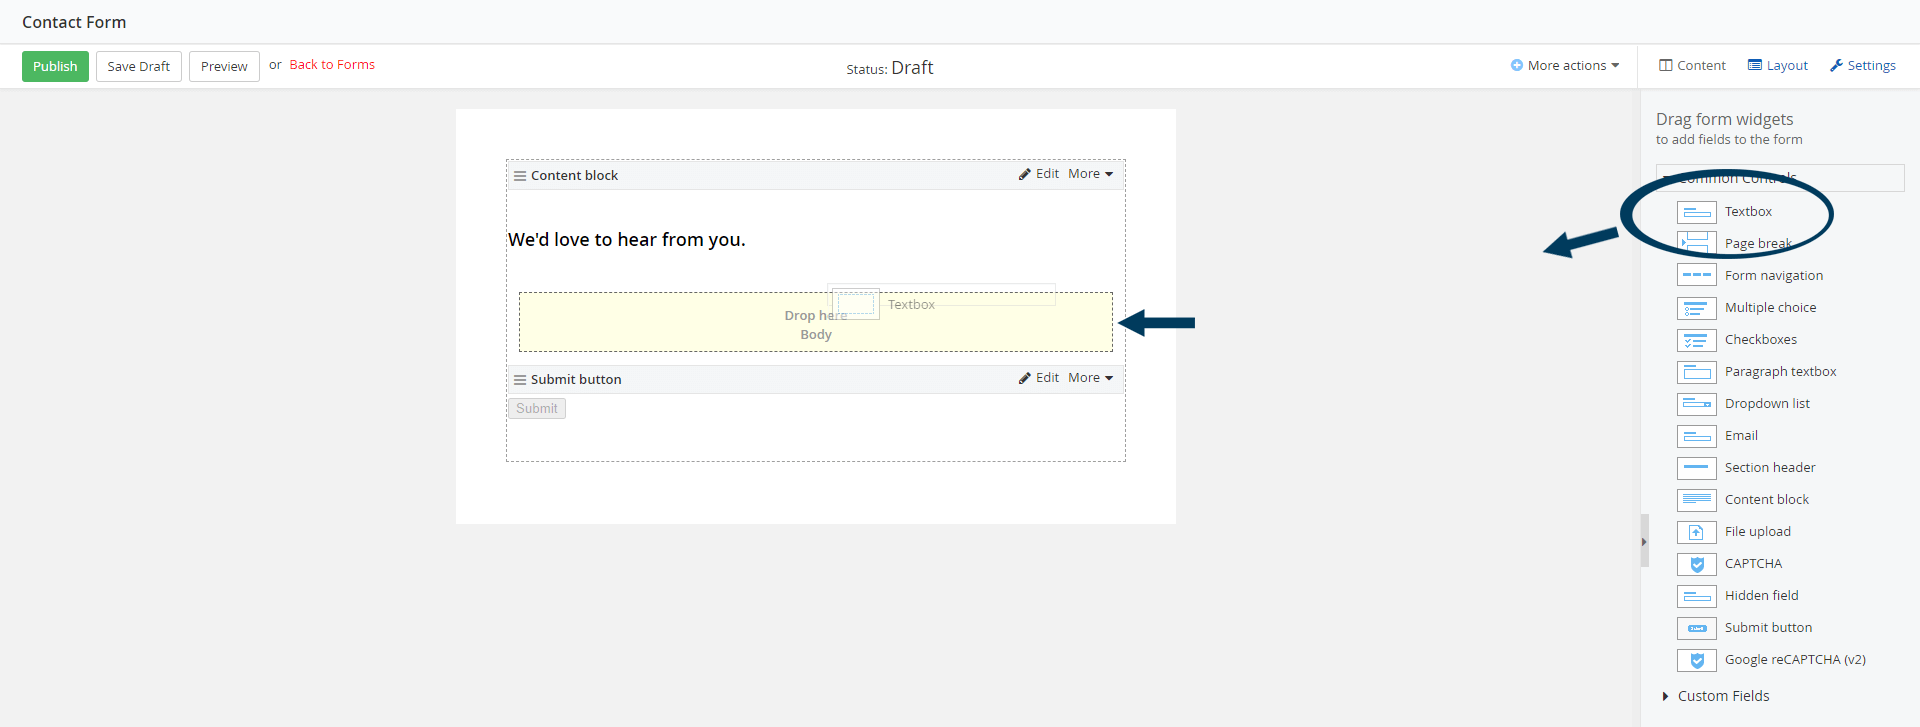
Step 3b: Edit the fields
Once you've placed a form field onto the form, click 'edit' to configure it. First, label or title the field. If it is a multiple choice, check box, or dropdown list - this is when you would add the choices/options for a user to select from. You can also mark a form field as 'required', meaning a user cannot skip that form field, it must be completed to submit the form. Click the save button for the form field once you are finished configuring it.

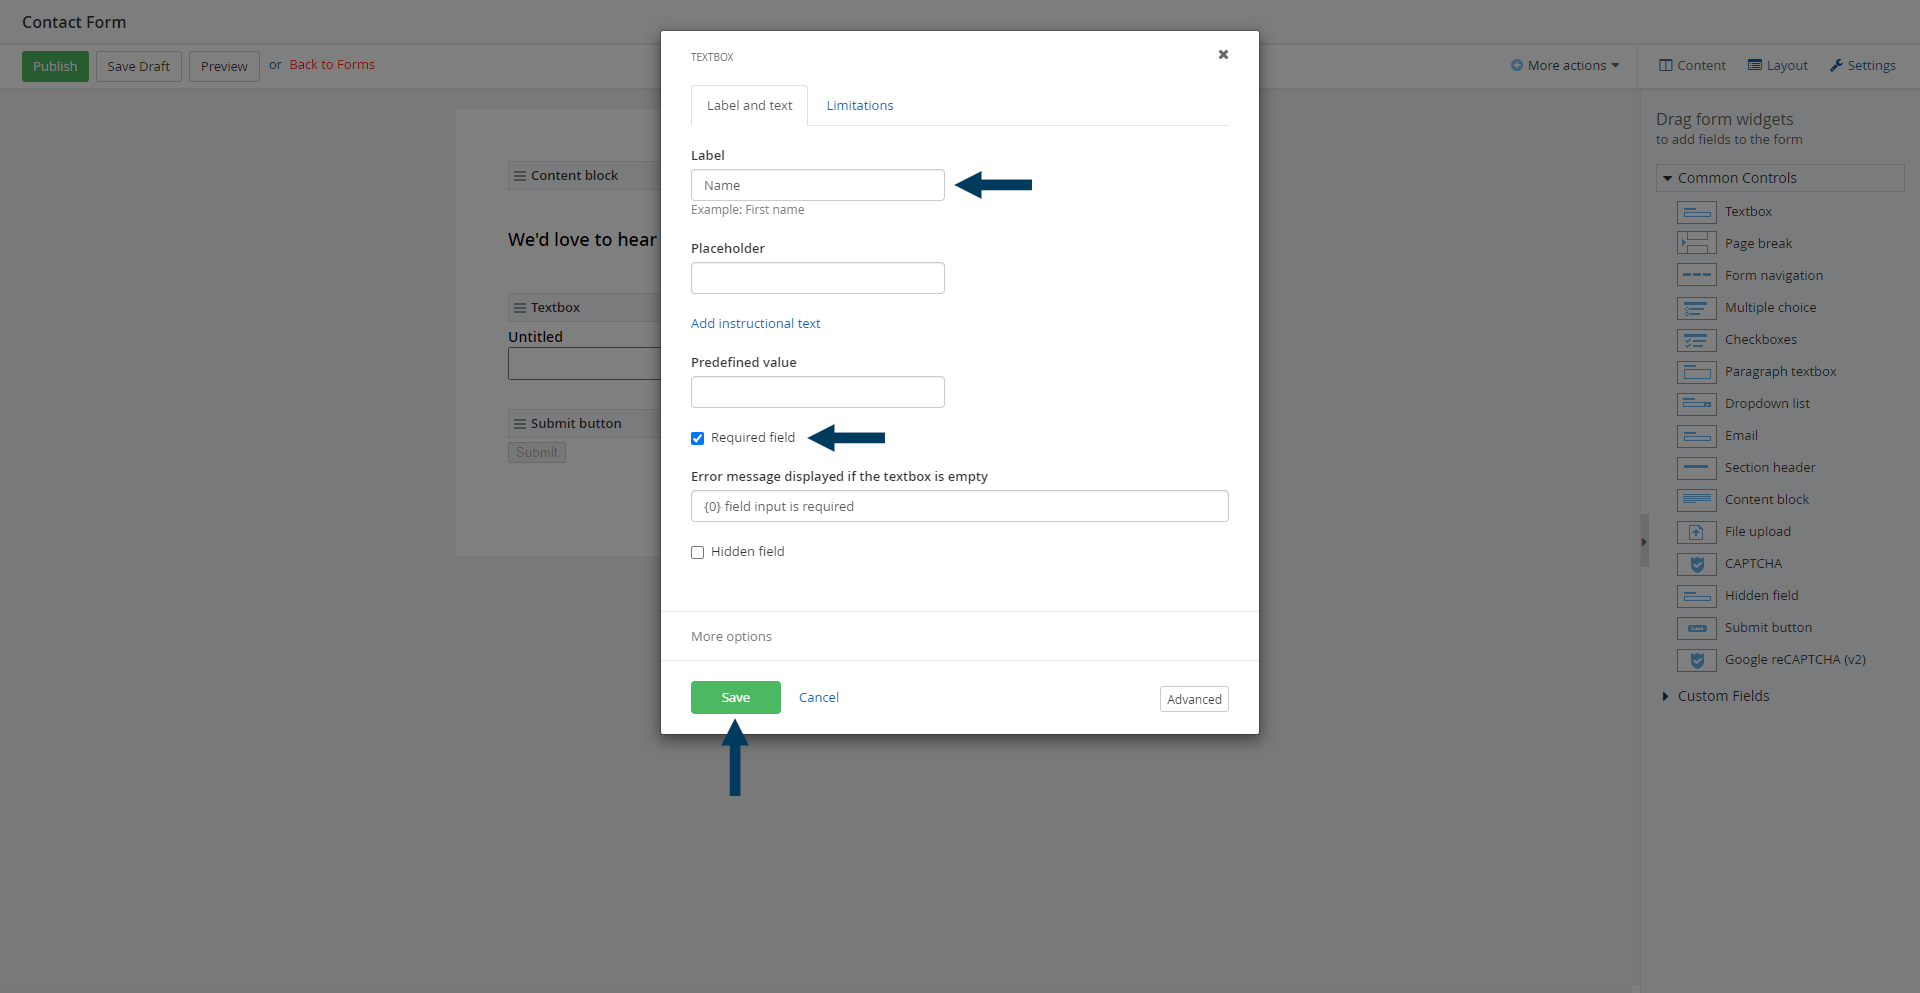
Repeat this step as necessary for each form field you need to create.
Step 4: Save/Status the form
You could save the form as a draft and then preview it. Then, publish the form to make it available for use on a page.
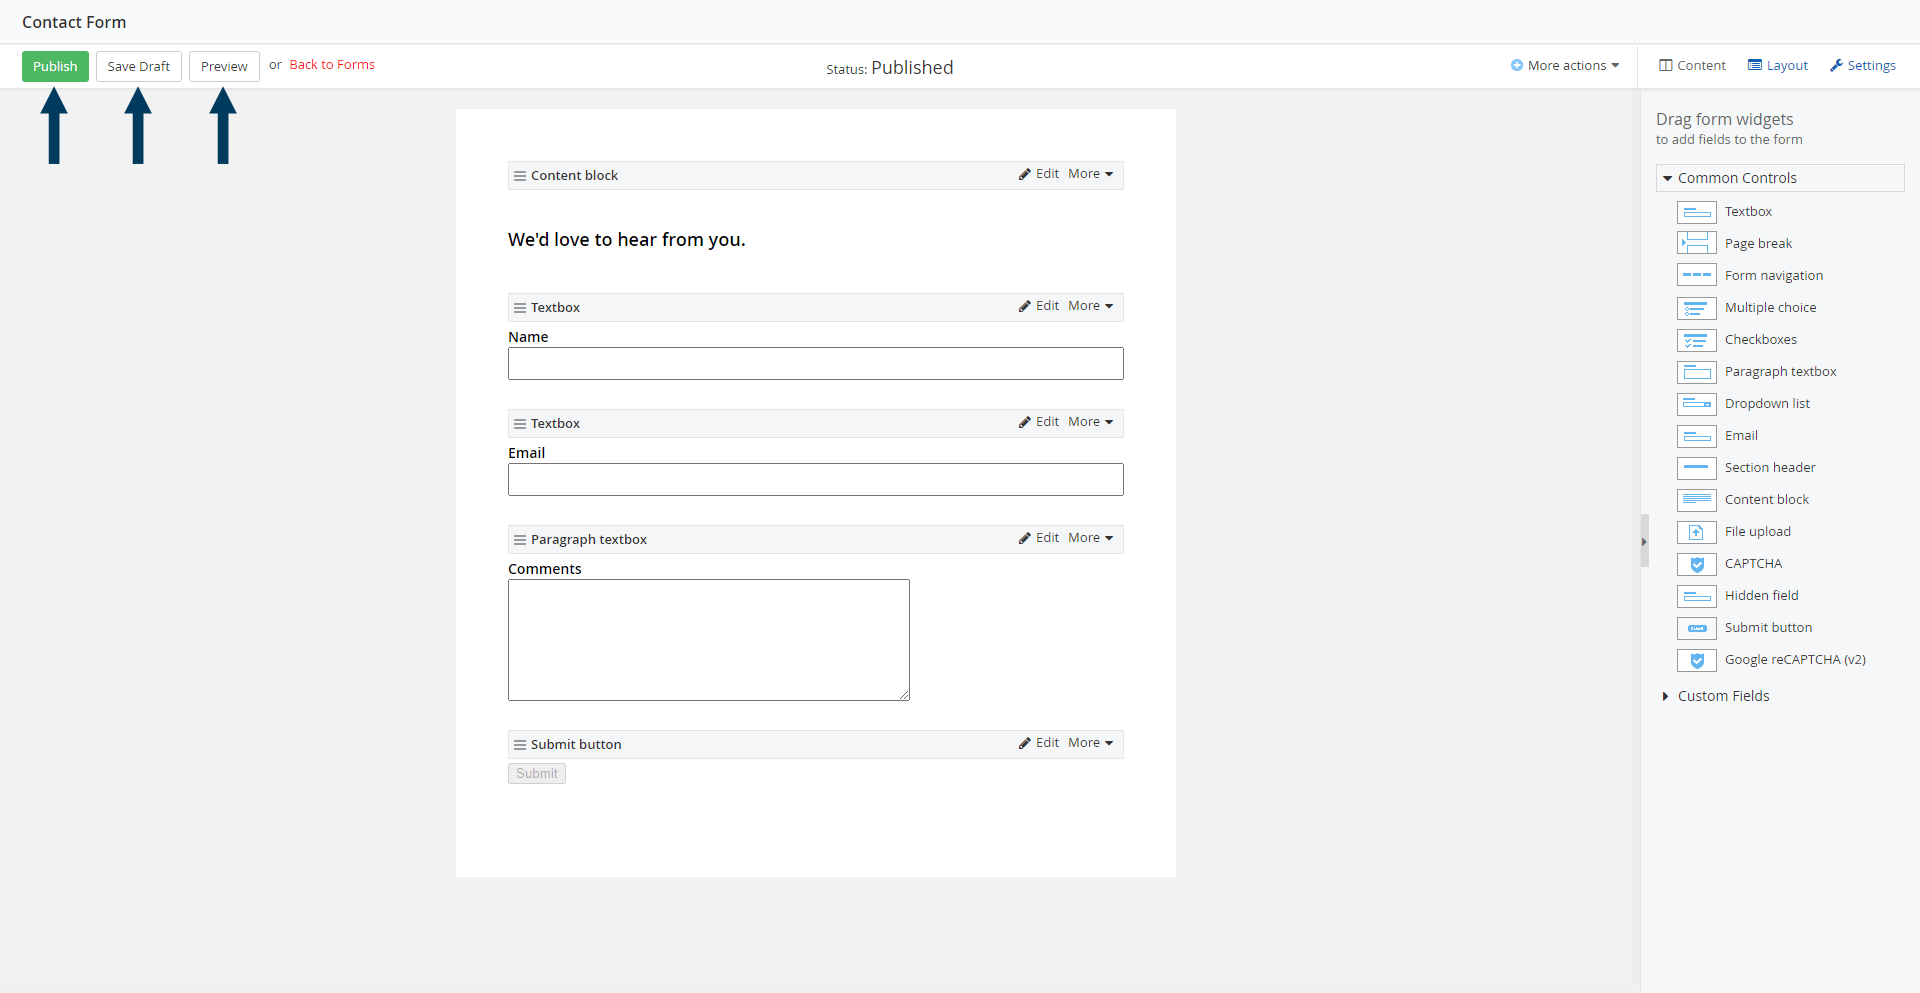
Publishing the form will return you to the form list screen, and you should see your new form in the list.
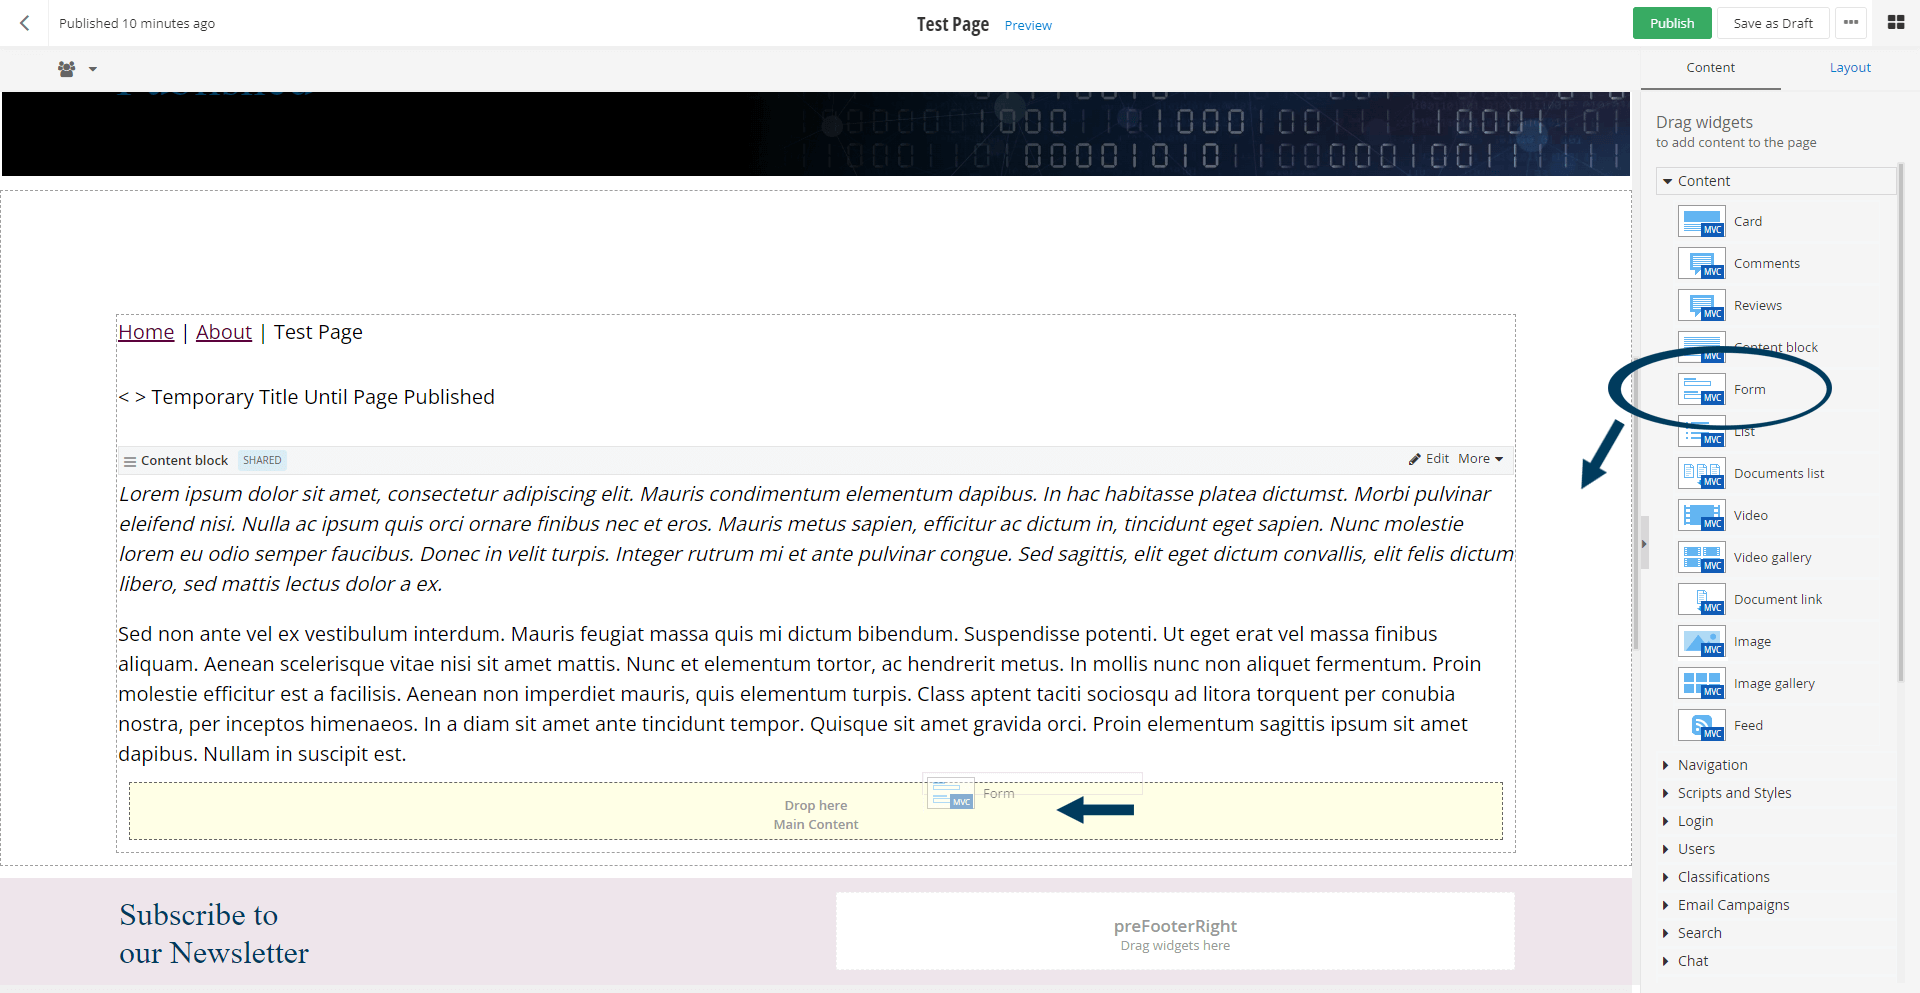
Step 5a: Add the Form to a page
Now that the form is created, you must place it on a page. Click on the Pages in Sitefinity's navigation menu to bring up a list of pages within your website. Open one in edit mode by clicking on the page title.
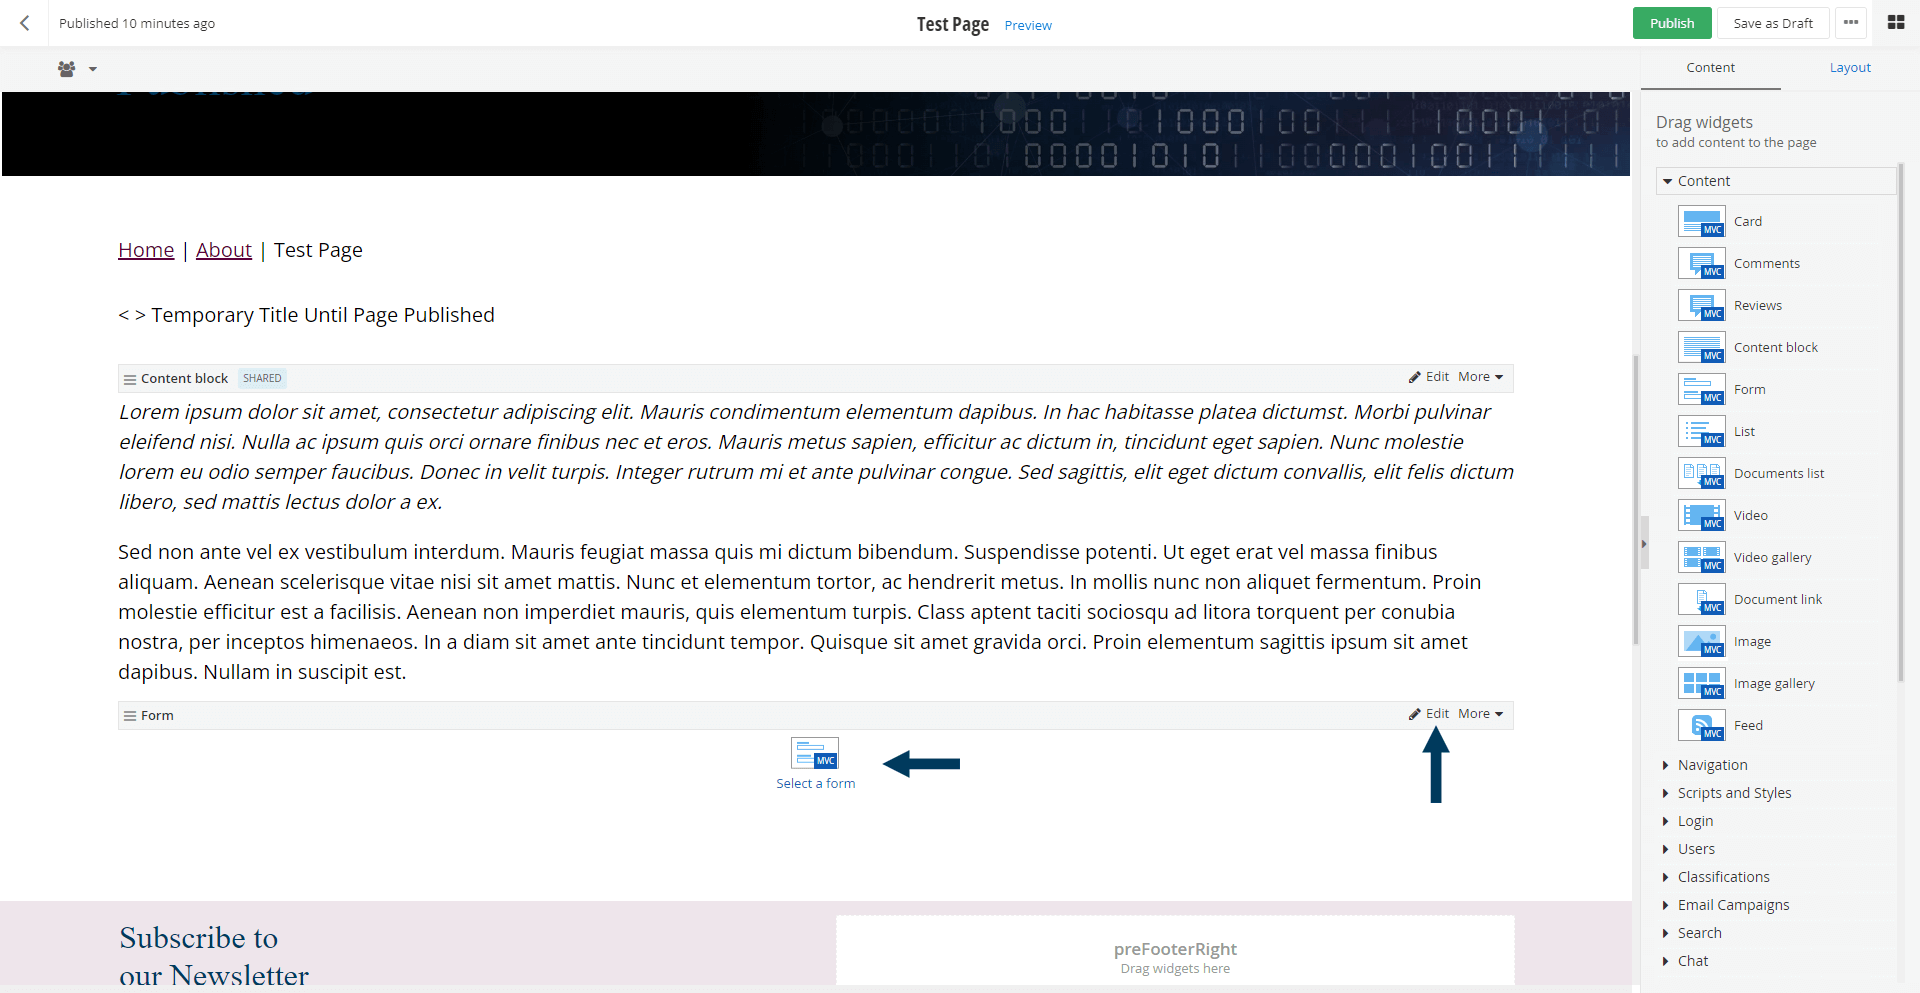
Step 5b: Place a Form Widget on the page
From the Content panel, drag a 'Form' widget onto the page where you want it to appear.
Step 5c: Select a Form/Edit the Form Block
Either click on the 'Select a Form' icon in the middle of the form box or 'Edit' in the form box title bar.
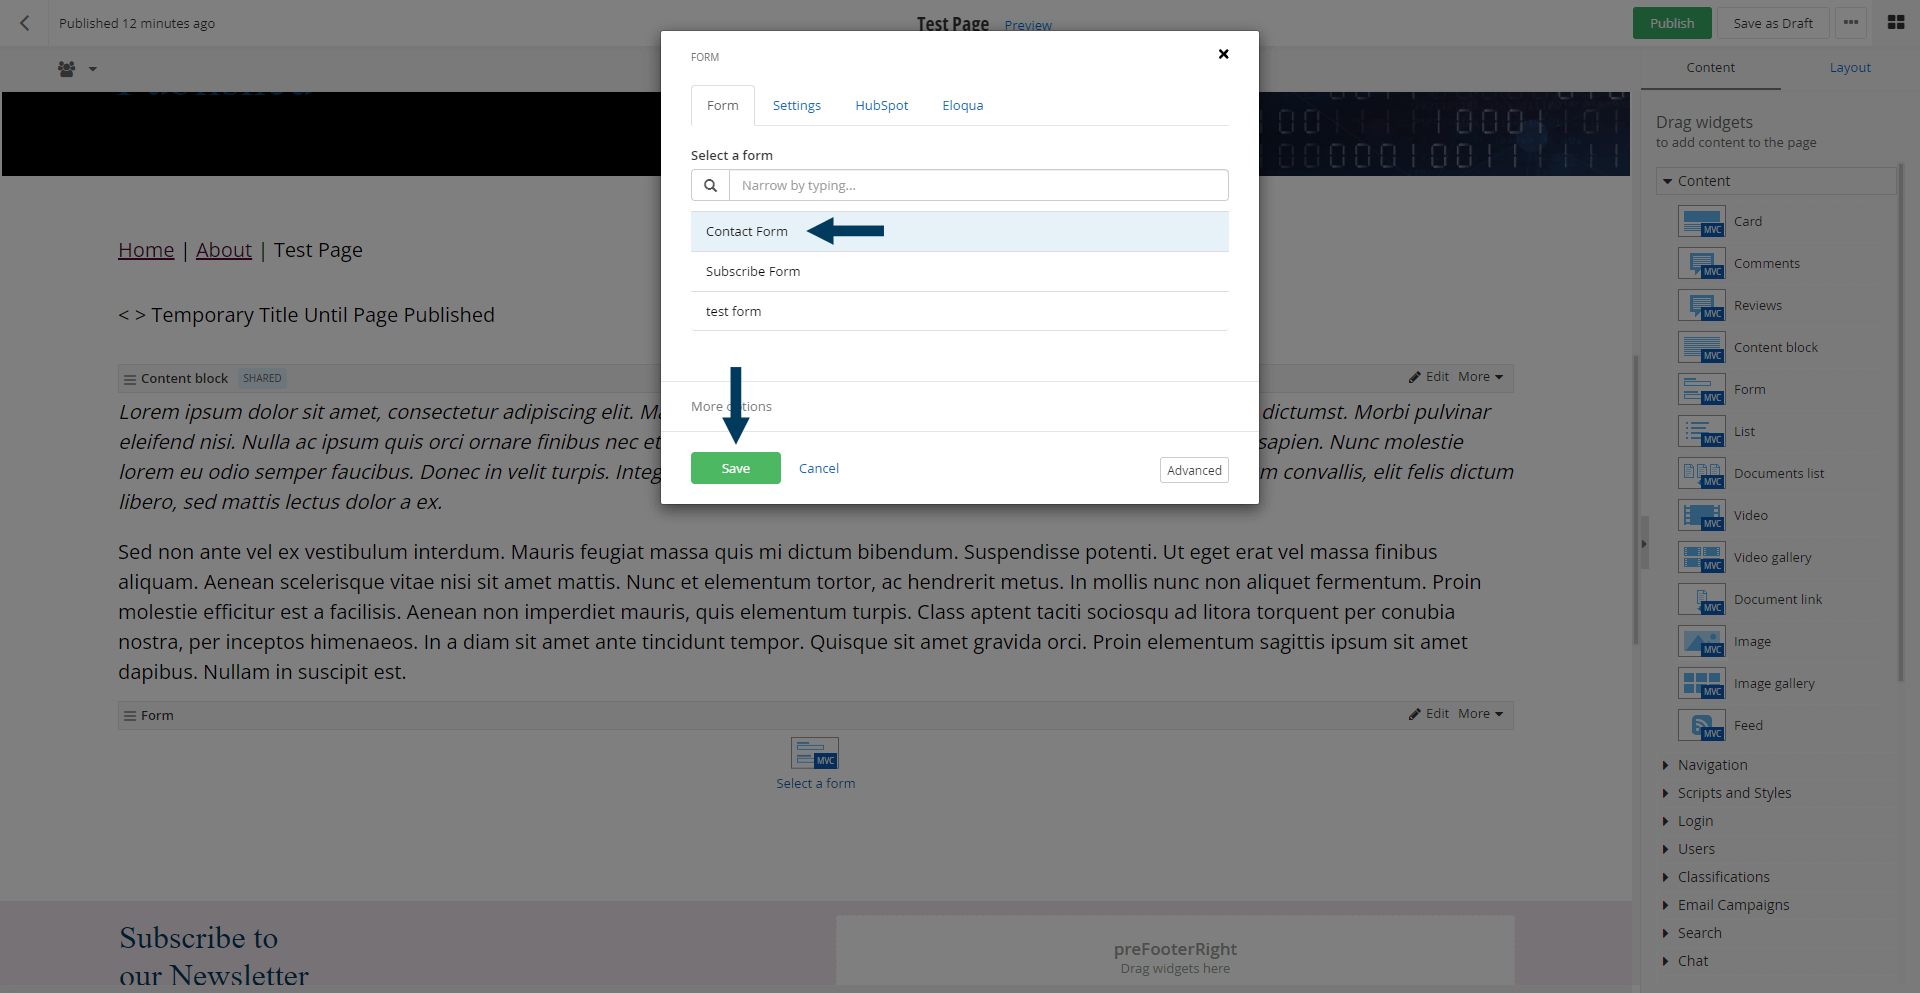
Step 5d: Select which form to display
From the list of forms, highlight the form you wish to display on the page by clicking on the title row. If you do not see the form in this list, you can use the search function. Once you have the form name highlighted, click Save.
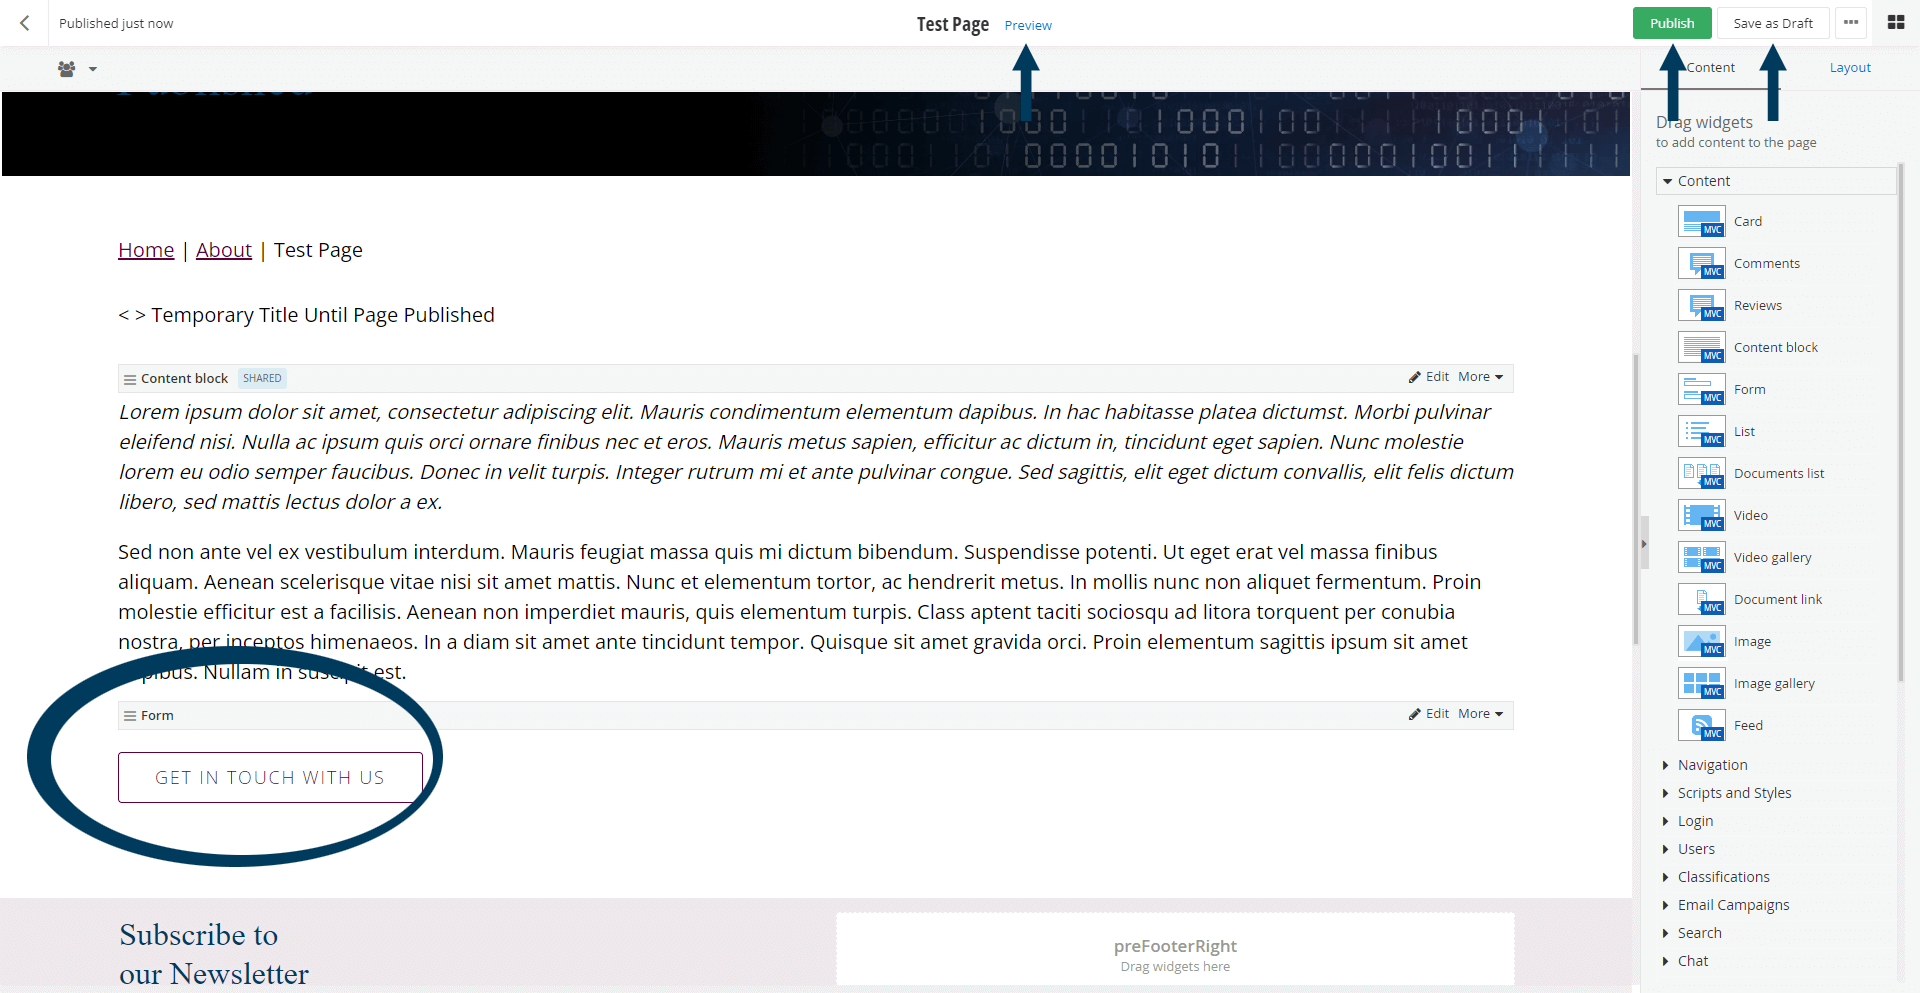
Step 6: Status the page
Using the status bar, click the Publish button to make the content live on your website. If you want to save your changes without making them live, click the Save as Draft button.
Note: To view the page prior to publishing, you can use the preview feature. This will show exactly how the page will look once published. To preview, click the Preview button (Page must be statused as draft prior to previewing).
Related Videos
-
 02:29
02:29
