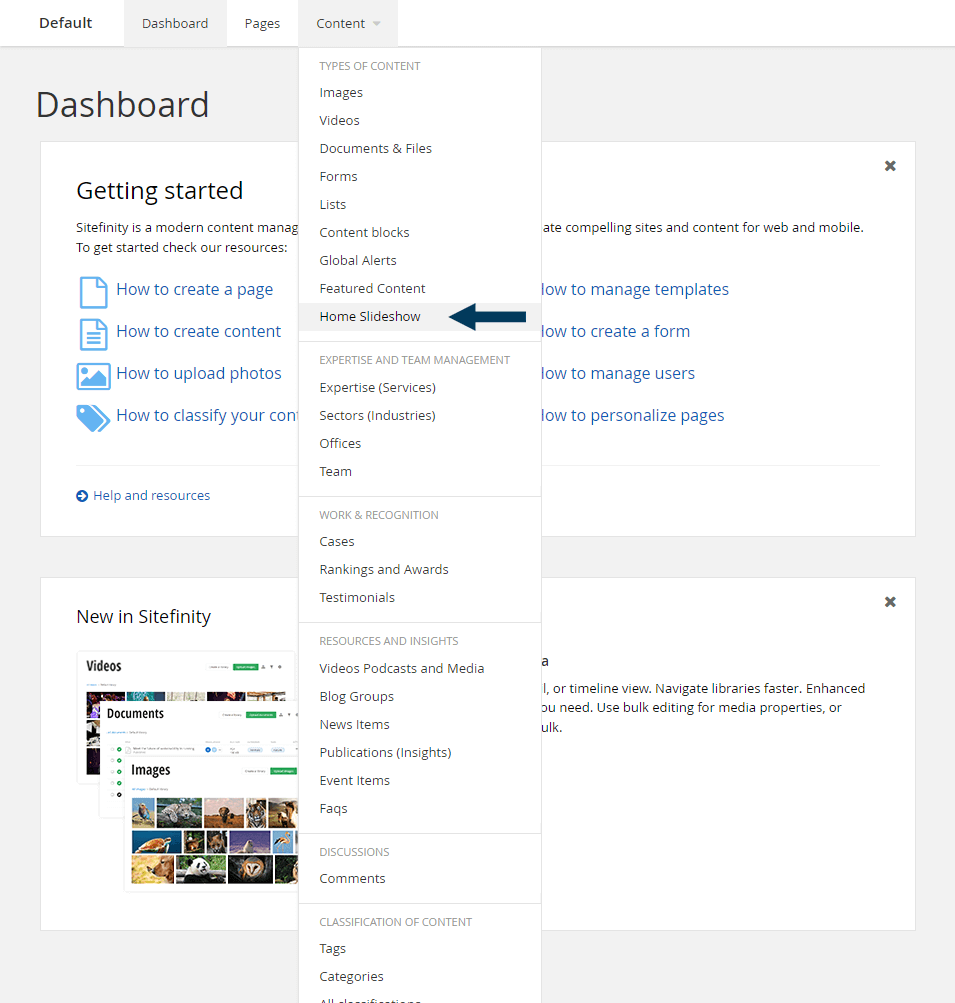
Step 1: From the top navigation, click on the Content drop-down and then Home Slideshow.

This will bring up the listing page that shows all items.
Step 2: To create a Slide item, click the Create a slide button. The Create dialog will appear.

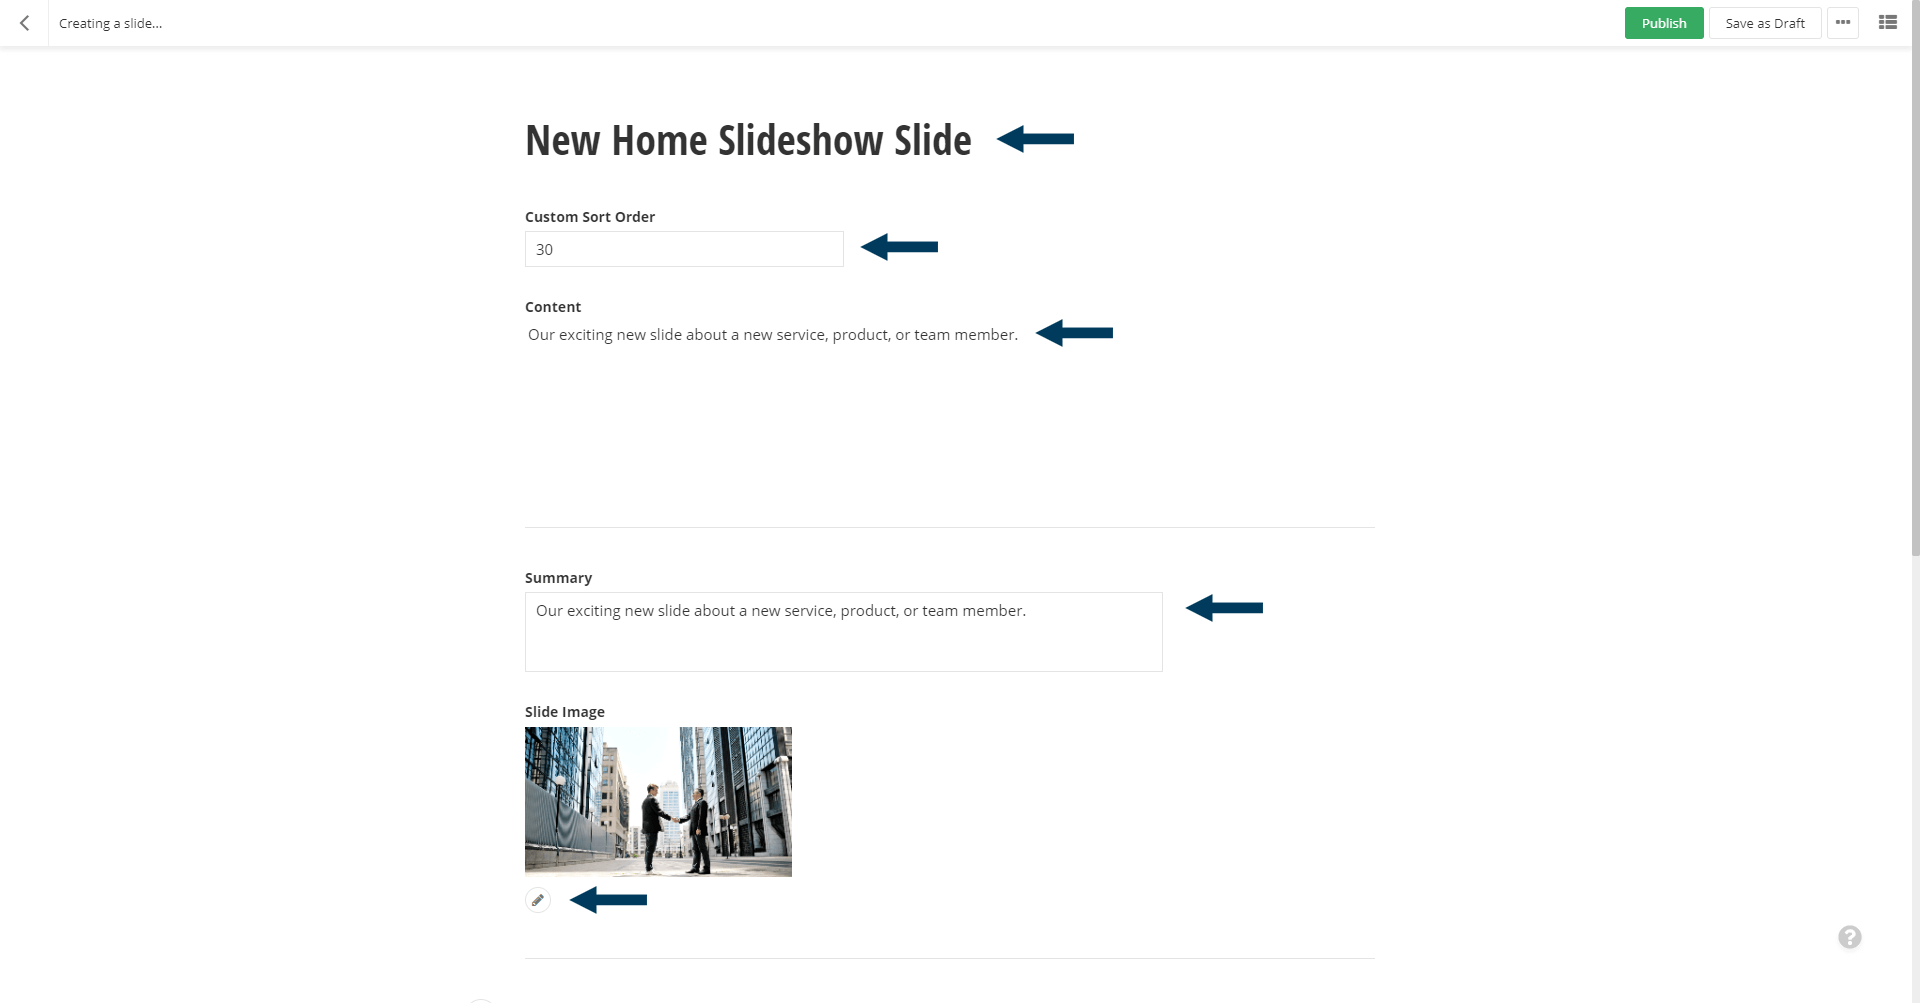
Step 3a: Fill out the fields.
Title your slide. Custom Sort Order determines the placement of the slide in your slideshow. A low number in this field would make this slide appear before any slides with a higher number here. The Content box would be the text of your slide; the Summary field is optional. Then select a Slide image by clicking on the pencil icon and either choosing an image from a library or uploading a new image. This image will appear behind all the slide content.

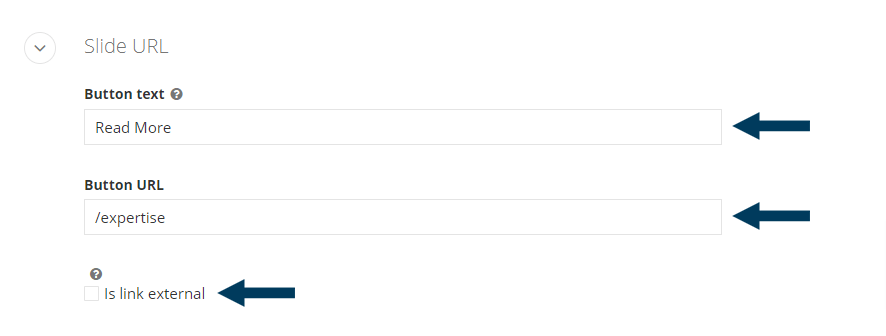
Step 3b: Setup your Slide button.
Enter the text you wish to display on your slide Button and enter a URL for the button to direct users to. If you are directing users to an external website ,clicking the checkbox next to Is link External will open the URL in a new browser tab.

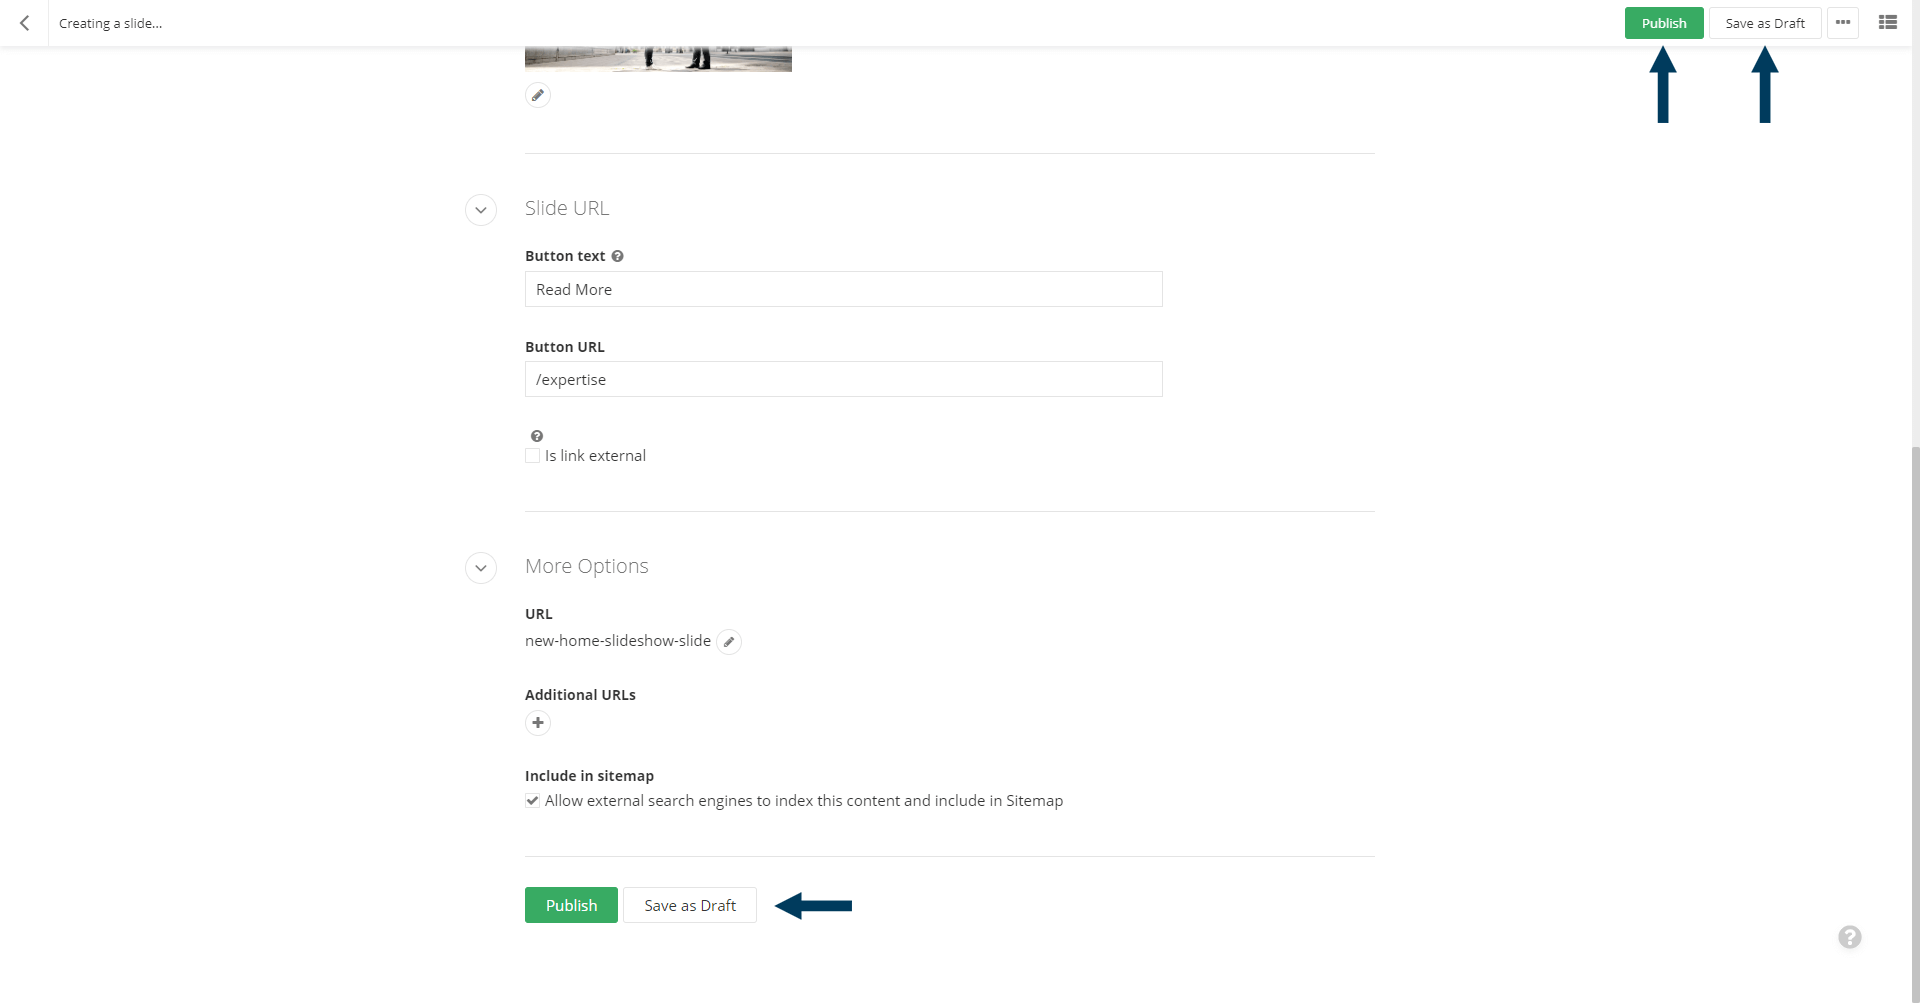
Step 4: Status the Content
Using the status bar, make the content live on your website by clicking the Publish button.

Note: To view the content prior to publishing, you can use the preview feature. This will show exactly how the content will look once published. To preview, click the Preview button (content must be statused as draft prior to previewing).