Step 1: Go to the Content Item that you wish to add the relationship on. (Example: You want to relate an Expertise to a new or existing News Item)
From the top navigation, click on Content drop down and then News Items, Search for an existing News Item or create a new one. This will bring you to the Create/Edit News Item Dialog.
Step 2: Select Expertise.
Under the Related Content section click the + button under Related Expertise to bring up the hierarchical list of services within the CMS.

Step 3a: Select the Expertise(s).
From the list of expertises select click on the title of the expertise/service you want to relate the content to.
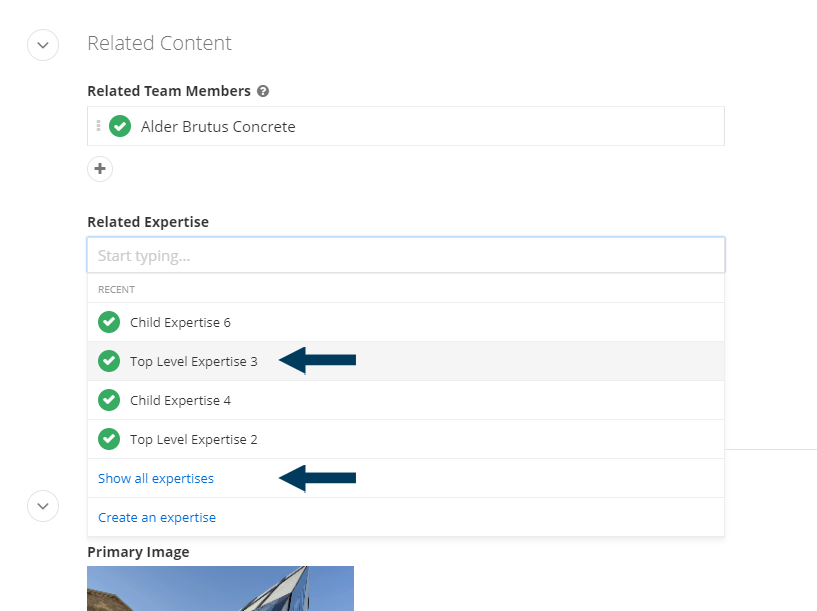
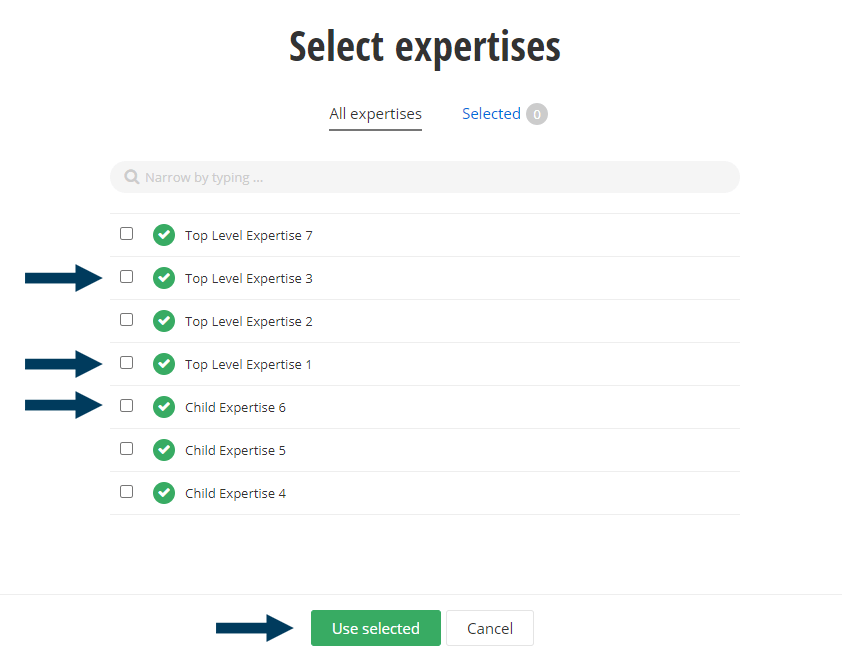
Step 3b: Repeat step 3a as needed, or use the 'Show all expertises' option to bring up a list that you can select multiple expertises from at one time by click the check boxes next to the expertise's name, and then clicking the Use Selected button.
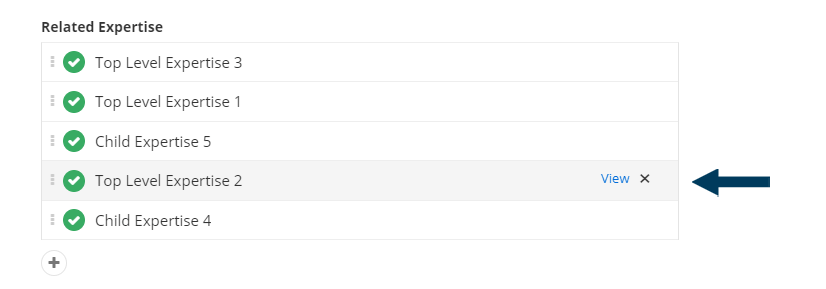
Note: To remove a Related Expertise click the X button next to the service title. You may need to hover over the expertise you want to remove for the X button to appear.
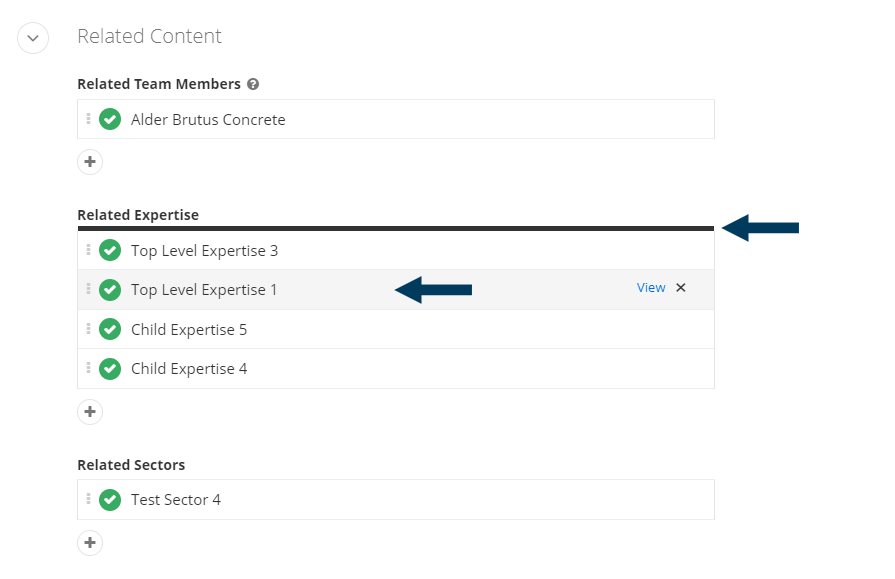
Note: To reorder a Related Expertise click, hold, and drag the item up or down in the list. Release once you see a thick black line where you wish the item to be displayed in the list.
Step 4: Status the Content.
Using the status bar make the content live on your website by clicking the Publish button. If you want to save your changes without making them live click the Save as Draft button.
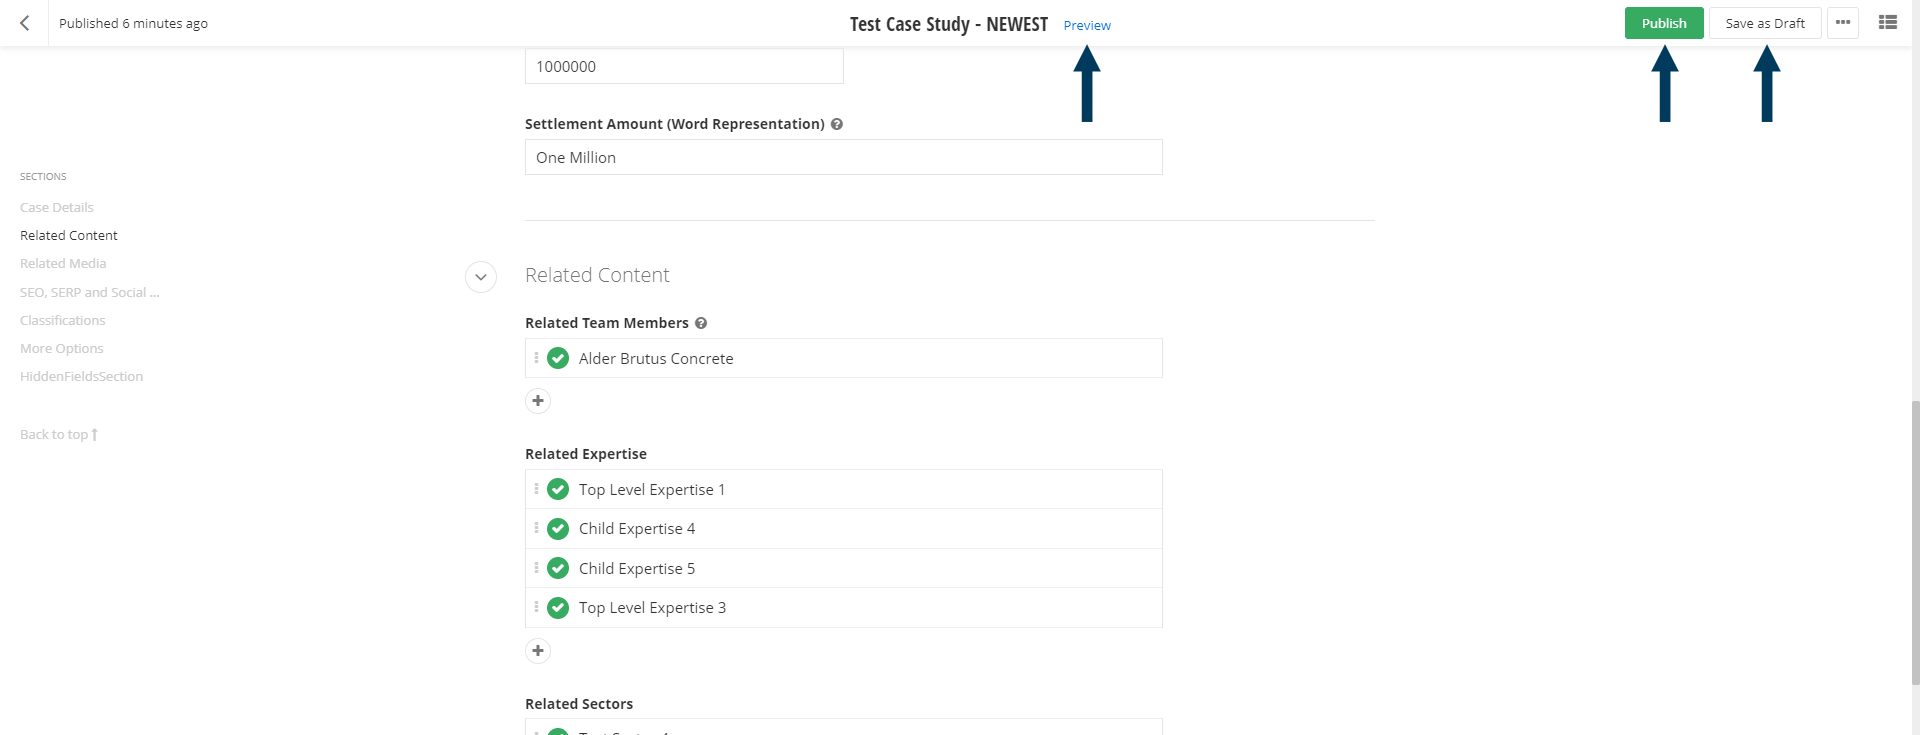
Note: To view the content prior to publishing, you can use the preview feature. This will show exactly how the content will look once published. To preview, click the Preview button (content must be statused as draft prior to previewing).


