Interlink/Relate Content and Media to Team Member
Introduction:
Videos are best viewed full screen at 1080p resolution.
Video Duration: 05:51
Step by Step Instructions:
The above video is an overview of the previous three videos.
For step-by-step instructions refer to the following:
- Interlink/Relate Service to Team Member
- Interlink/Relate Team Member to Industry
- Add an Assistant to an Existing Team Member
Step 1: From the top navigation, click on Content drop down and then Team.
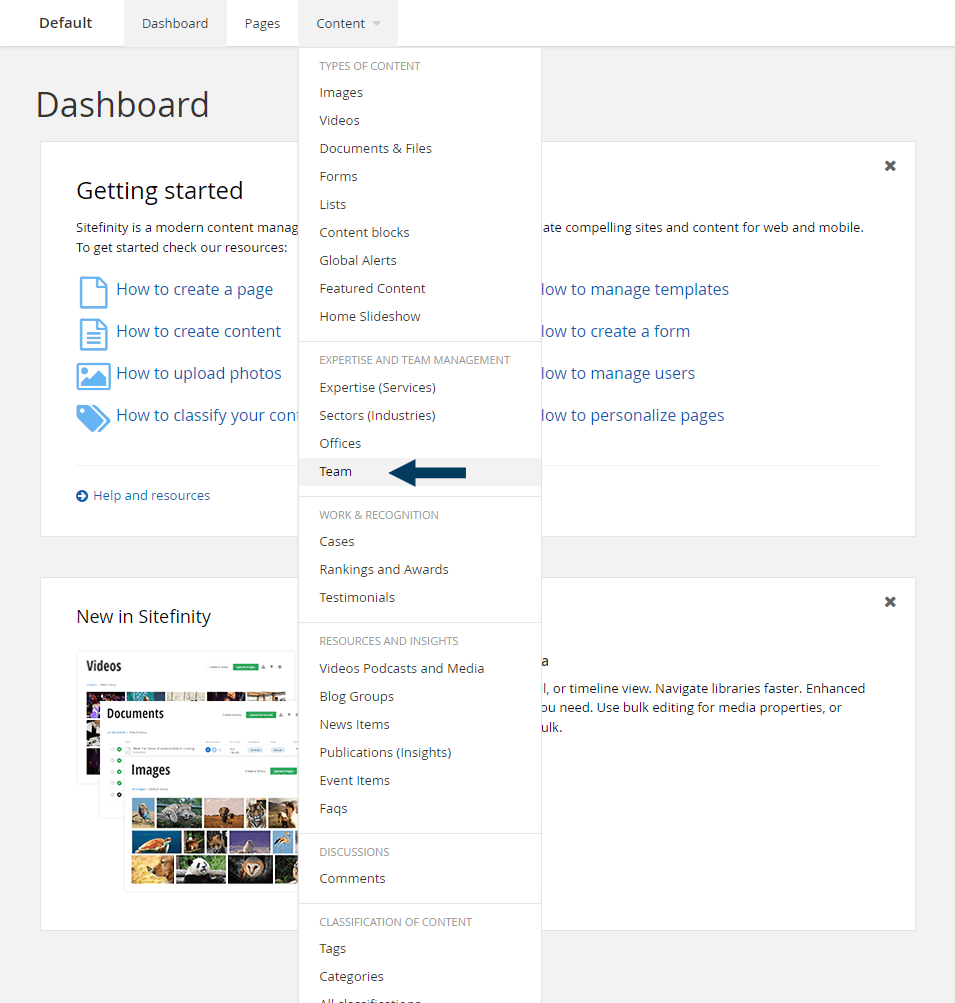 This will bring up the Team listing page view that shows all Team Members.
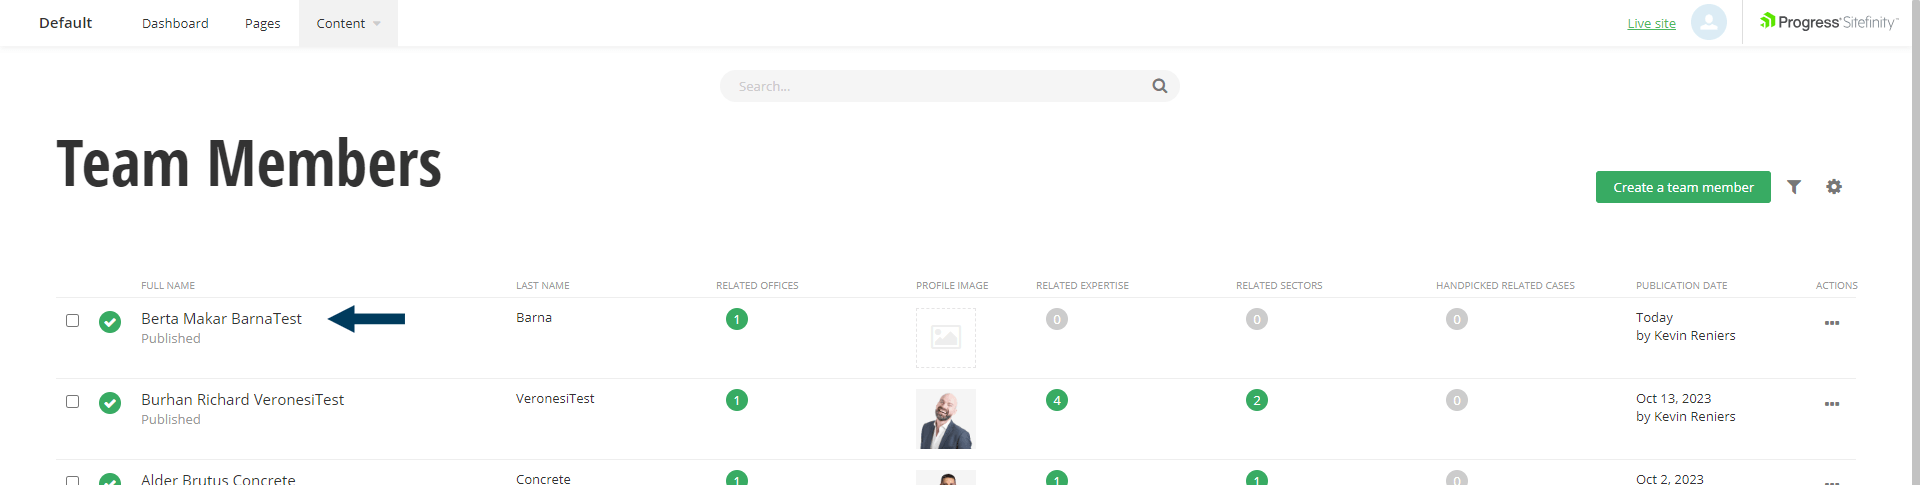
Step 2a: Find the Team Member you wish to relate an image to.
If you have a small team, it may be easy to see the team member in the default/all list.
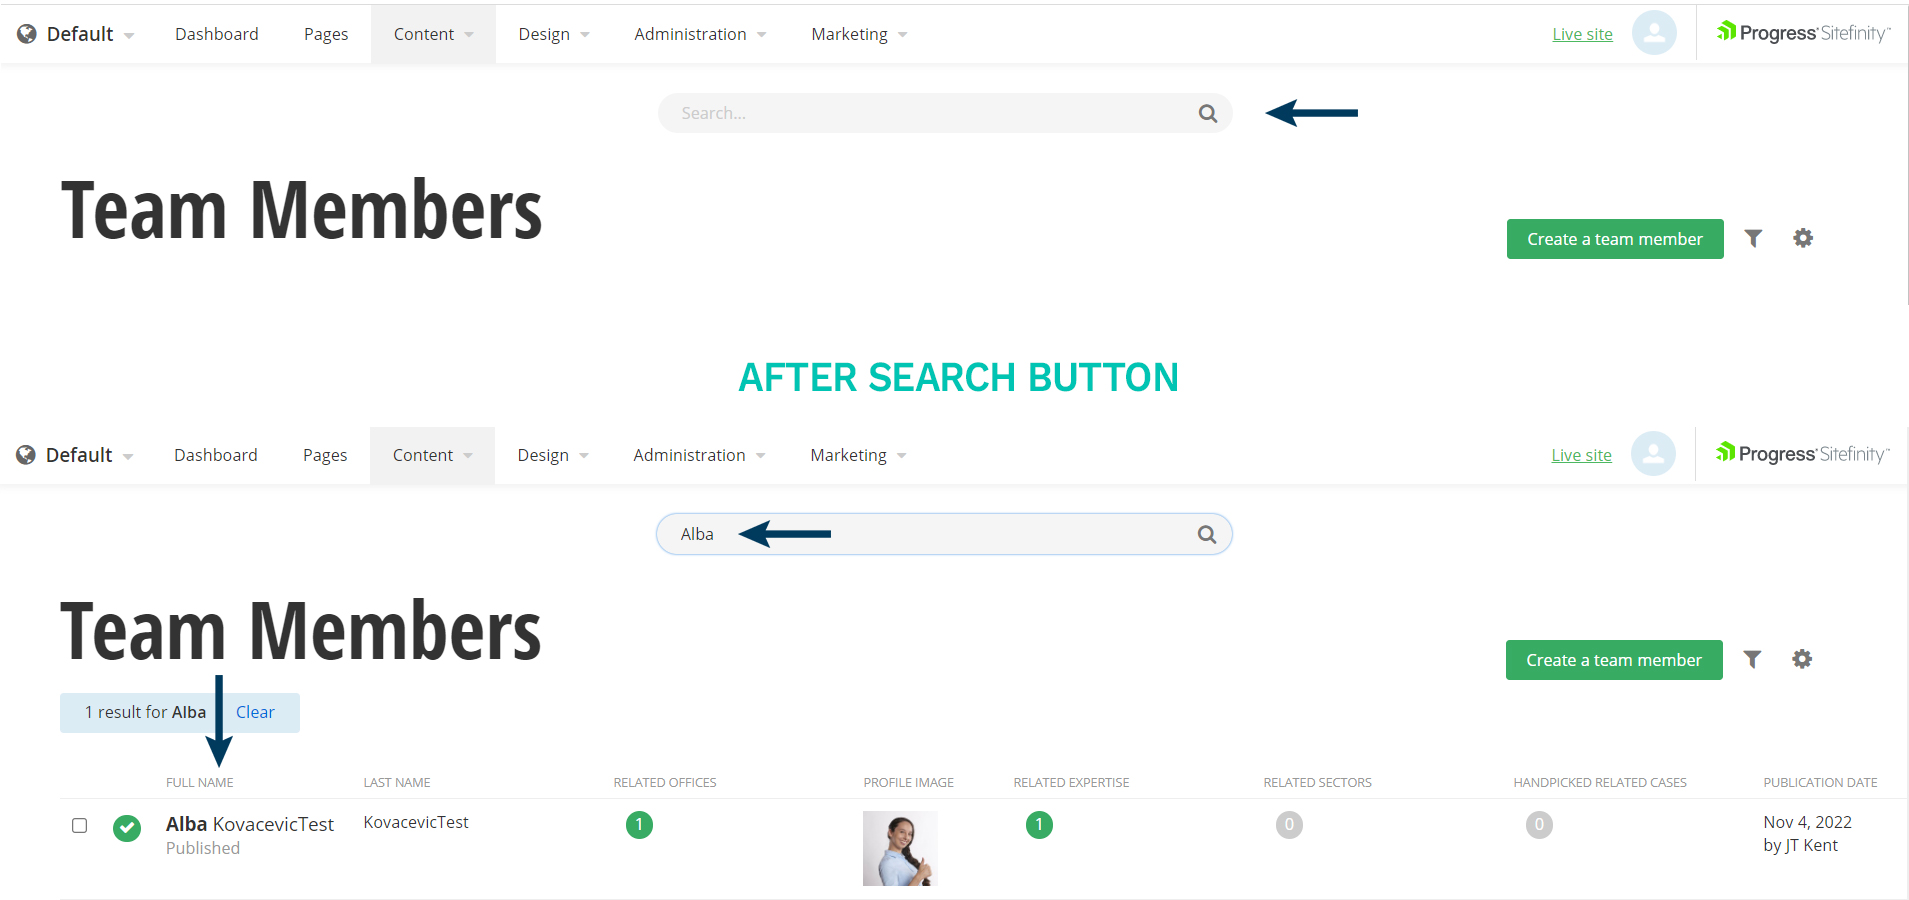
Step 2b: Search for the Team Member you wish to relate an image to.
Clicking on the search button will bring up the search input field. Type the partial name and then click the Search button again. The newly filtered list of Team Members will appear showing those matching your search criteria.
Step 3: To edit a team member, click on the name of the person. This will bring the Team Member into Edit mode.
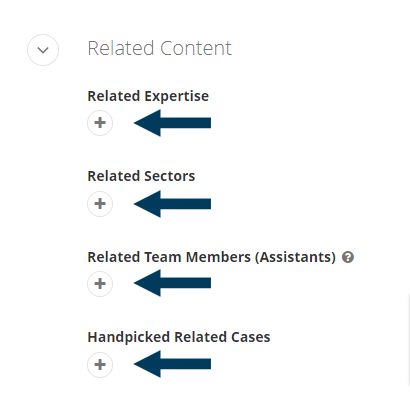
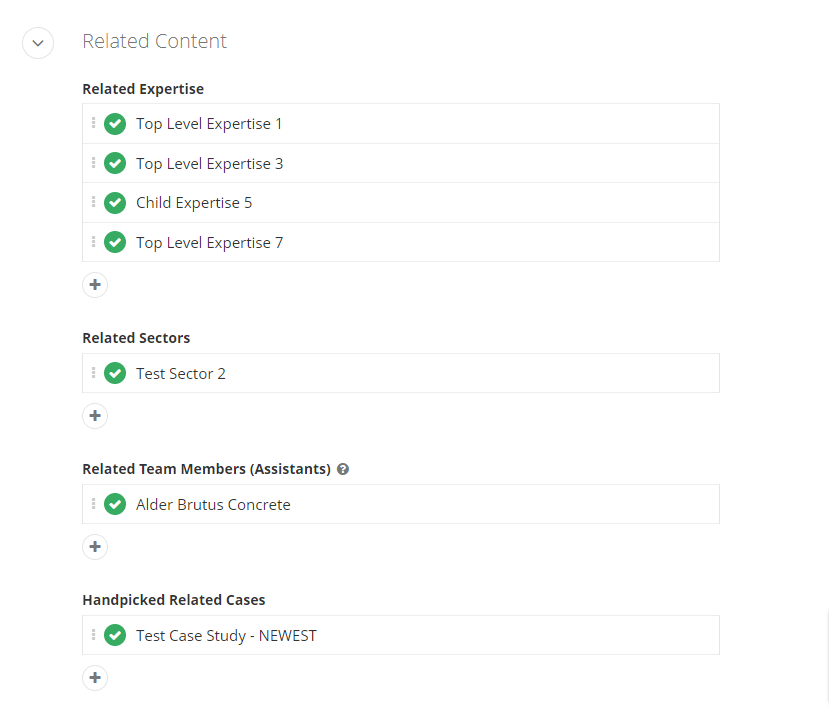
Step 4a: Relate Content to the Team Member
Under the Related Content section click the + button underneath either Related Expertise, Related Sectors, Related Team Members (Assistants), or Related Cases. The instructions that follow will use Related Expertise as an example, but the steps would be the same for Sectors, Team Members (Assistants) or Cases.
Step 4b: Select the Related Expertise
Select the Expertise you wish to relate to the team member from the recent list or click the 'Show All Expertise' option to get a complete list.
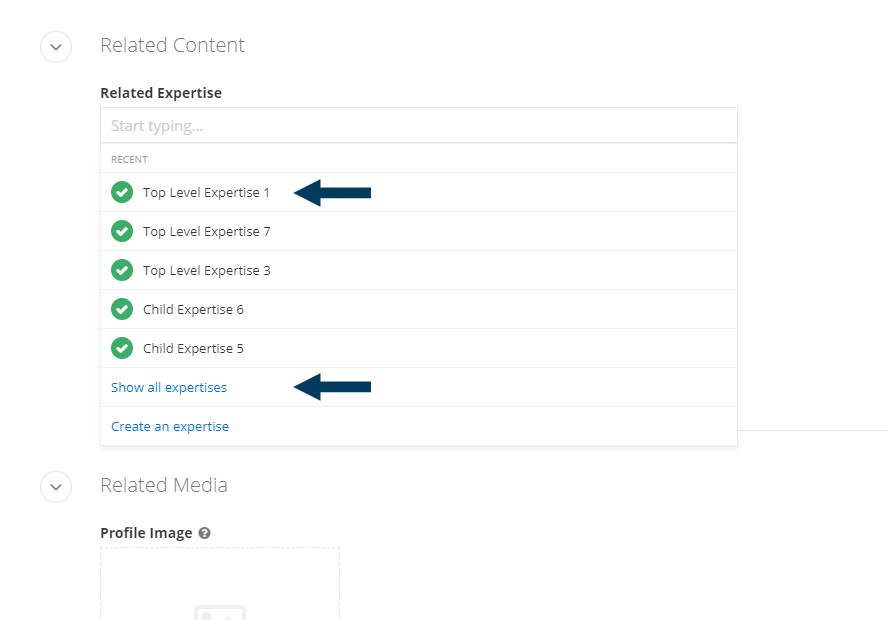
You can repeat this step as many times as you like, relating multiple expertise to the team member.
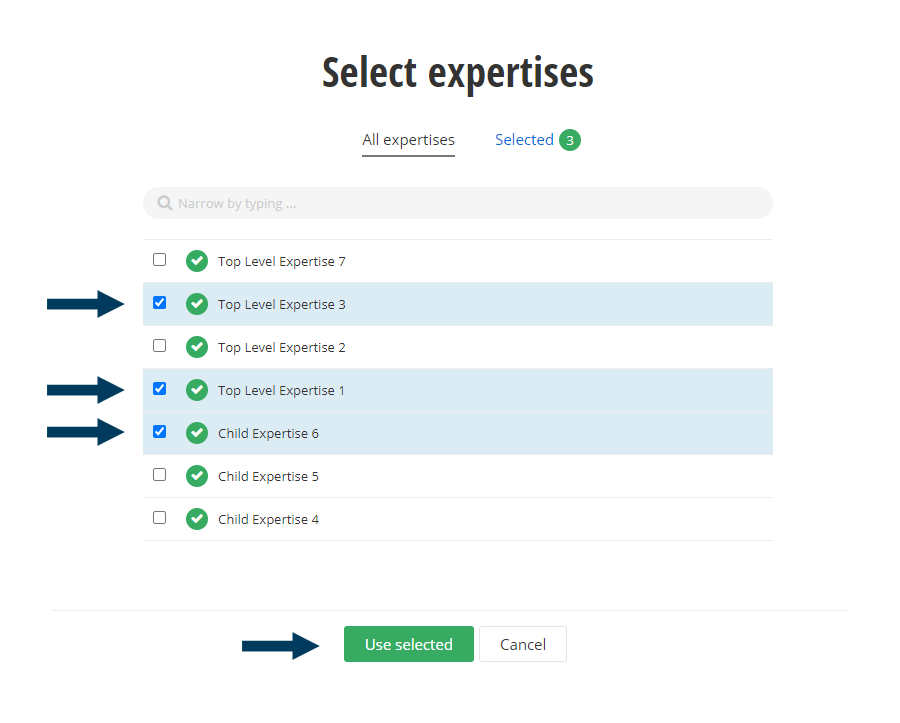
Step 4c: Show all expertise option
If you choose this option to select related expertise, you can select multiple items at once and then click the Use Selected button.
Note: To reorder the related content, click on the item you want to move up or down, hold, and drag the item up or down to the position in the list you wish it to be.
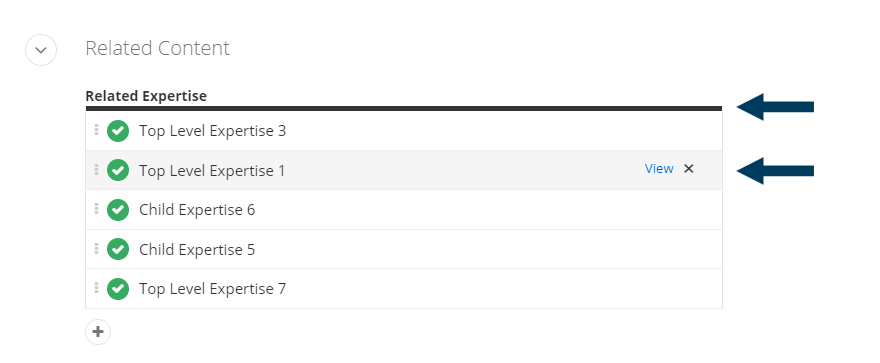
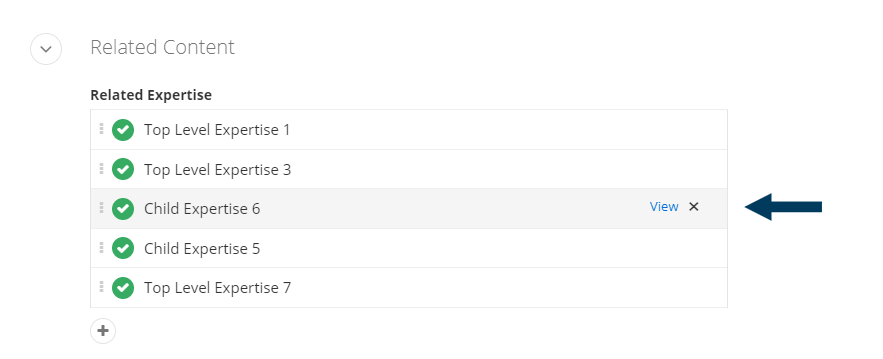
Note: To remove a related content item, click the X button on the right side of the content item row. You may have to hover over the item for the X button to appear.
Here is an example of how your team member profile could look in edit mode with related expertise, sectors, team members and cases selected:
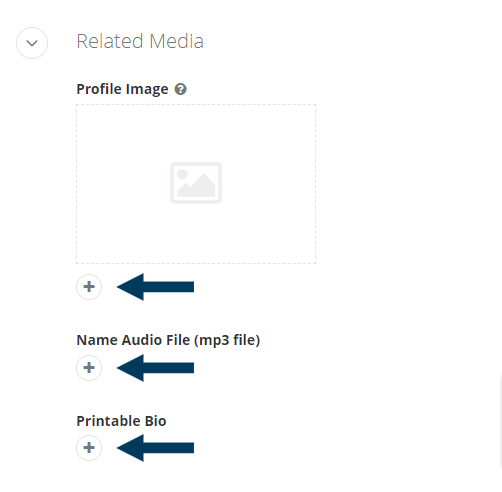
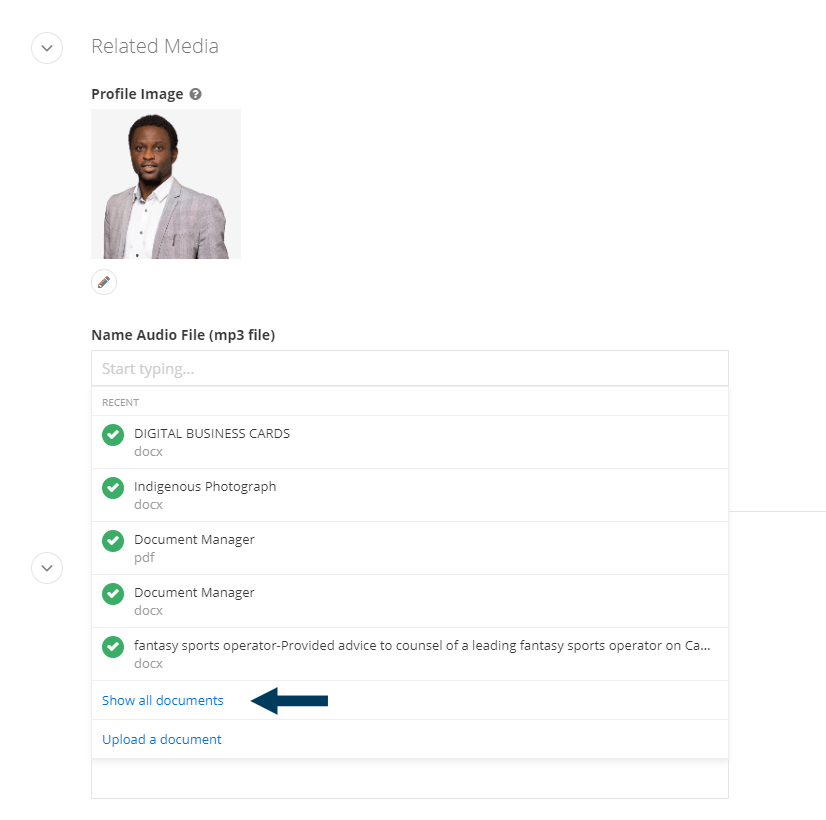
Step 5: Related Media to the Team Member
Under the Related Media section click the + button underneath either the profile image placeholder graphic, audio file, or printable bio sub-sections.
Step 6a: Relating an Image to the Team Member Either browse and select an image in your libraries or upload a new image to relate to the team member. If the image you wish to relate to has already been uploaded to your CMS, choose the 'Select an image from library' option and browse your libraries. Or, you could upload a new image by clicking on the 'Upload an image from your computer' button.

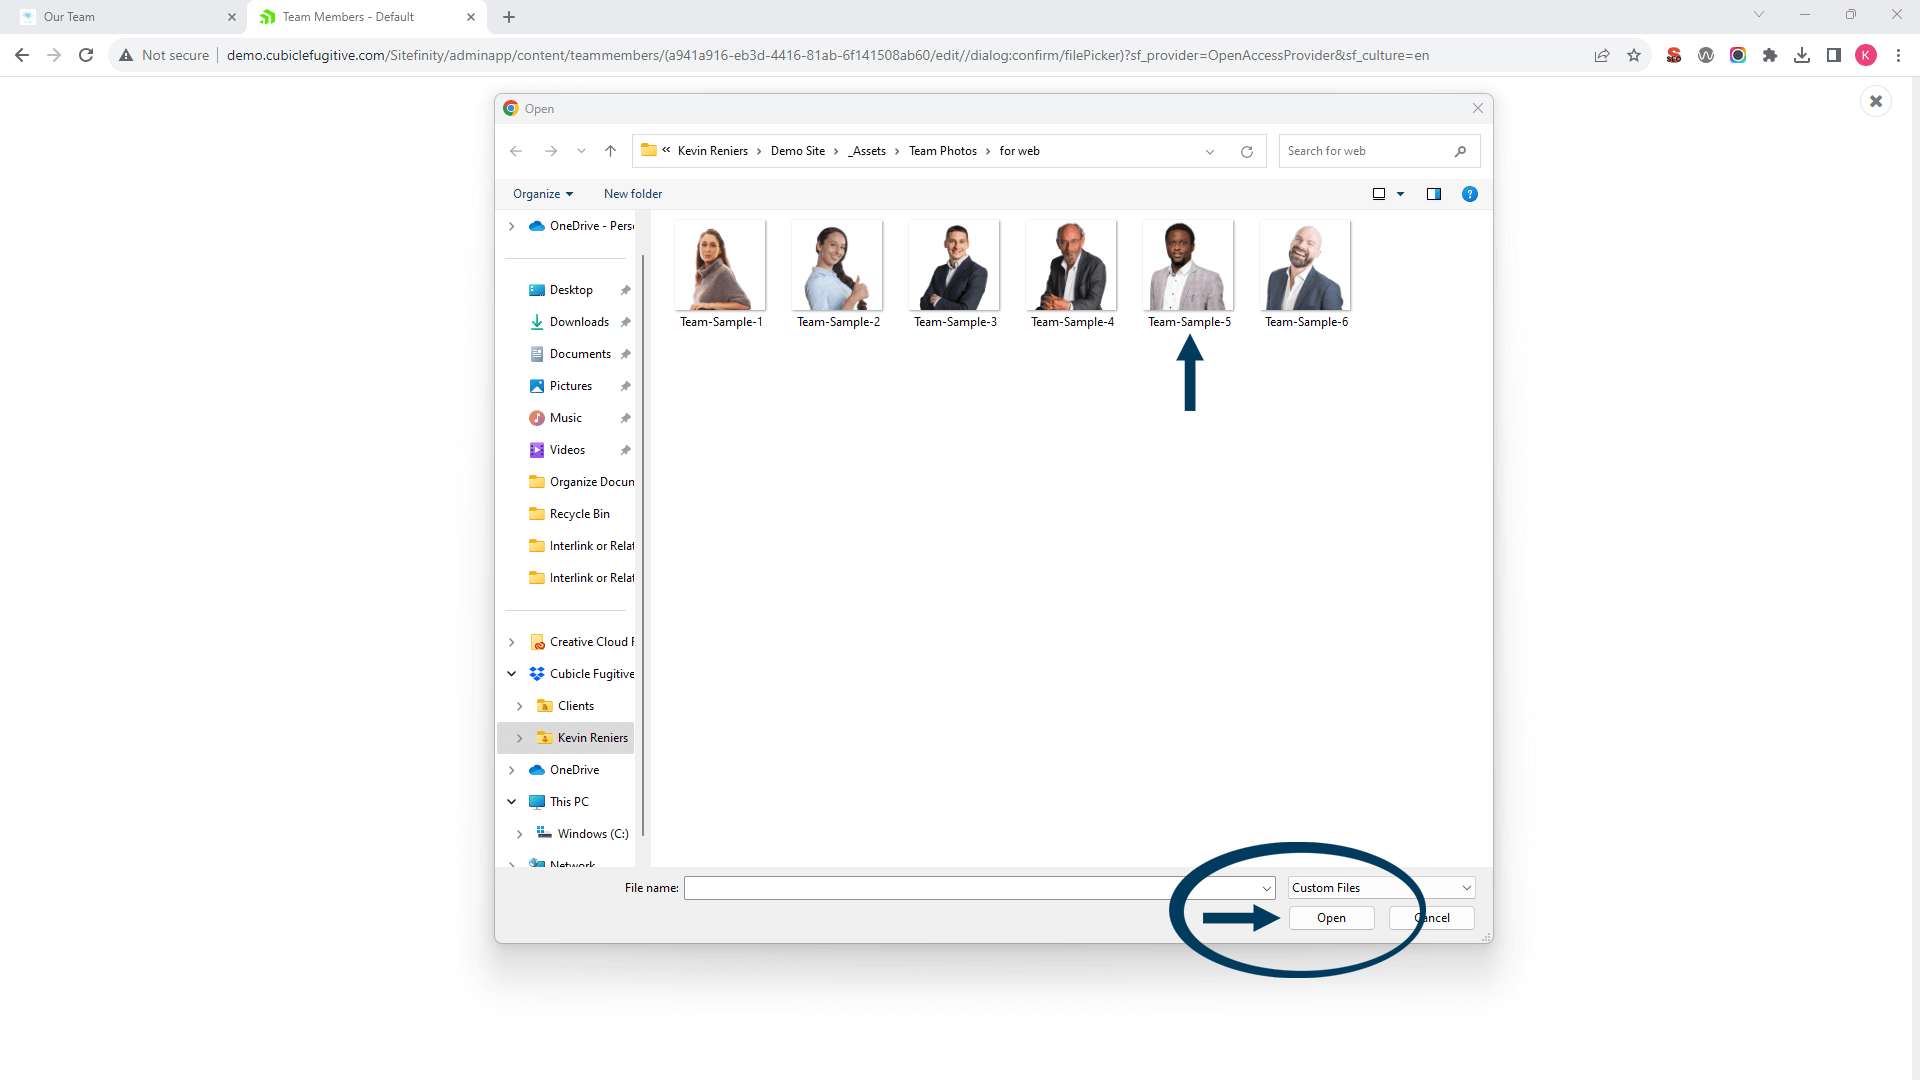
Step 6b: Uploading an image to relate to the team member.
Browse your computer to find the image to upload. Once selected, click the Open button.
Step 6c: Next, you choose the image library to store the image inside. Usually, you have a library for team photos. Also, fill in the image title and alternative text fields with the team member's name.
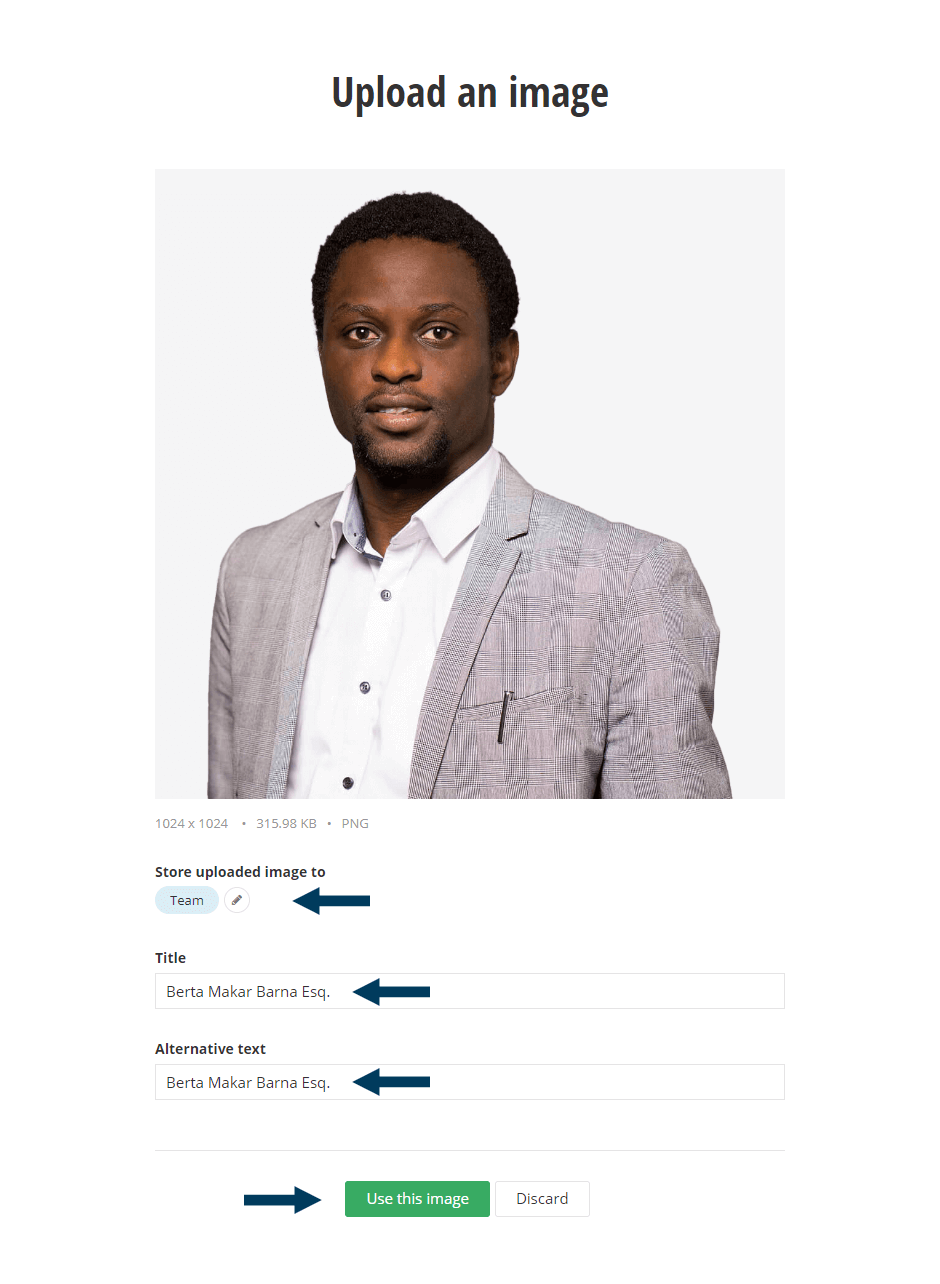
Step 6d: After filling in the title and alternative text fields, click the Use this image button.

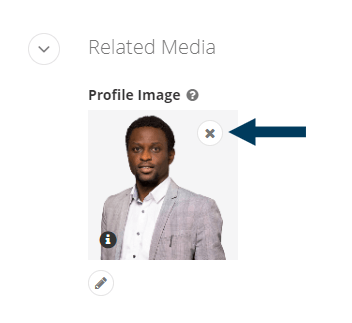
Note: To remove a related Image, click the X button in the top right corner of the image.
Step 7a: Relating an Audio File
After clicking the + button under 'Name Audio file,' select the audio file from the list of recent items. If you do not see the audio file in this list, you could use the search function by typing in part of the file name or select the 'Show all documents' option to bring up a complete list
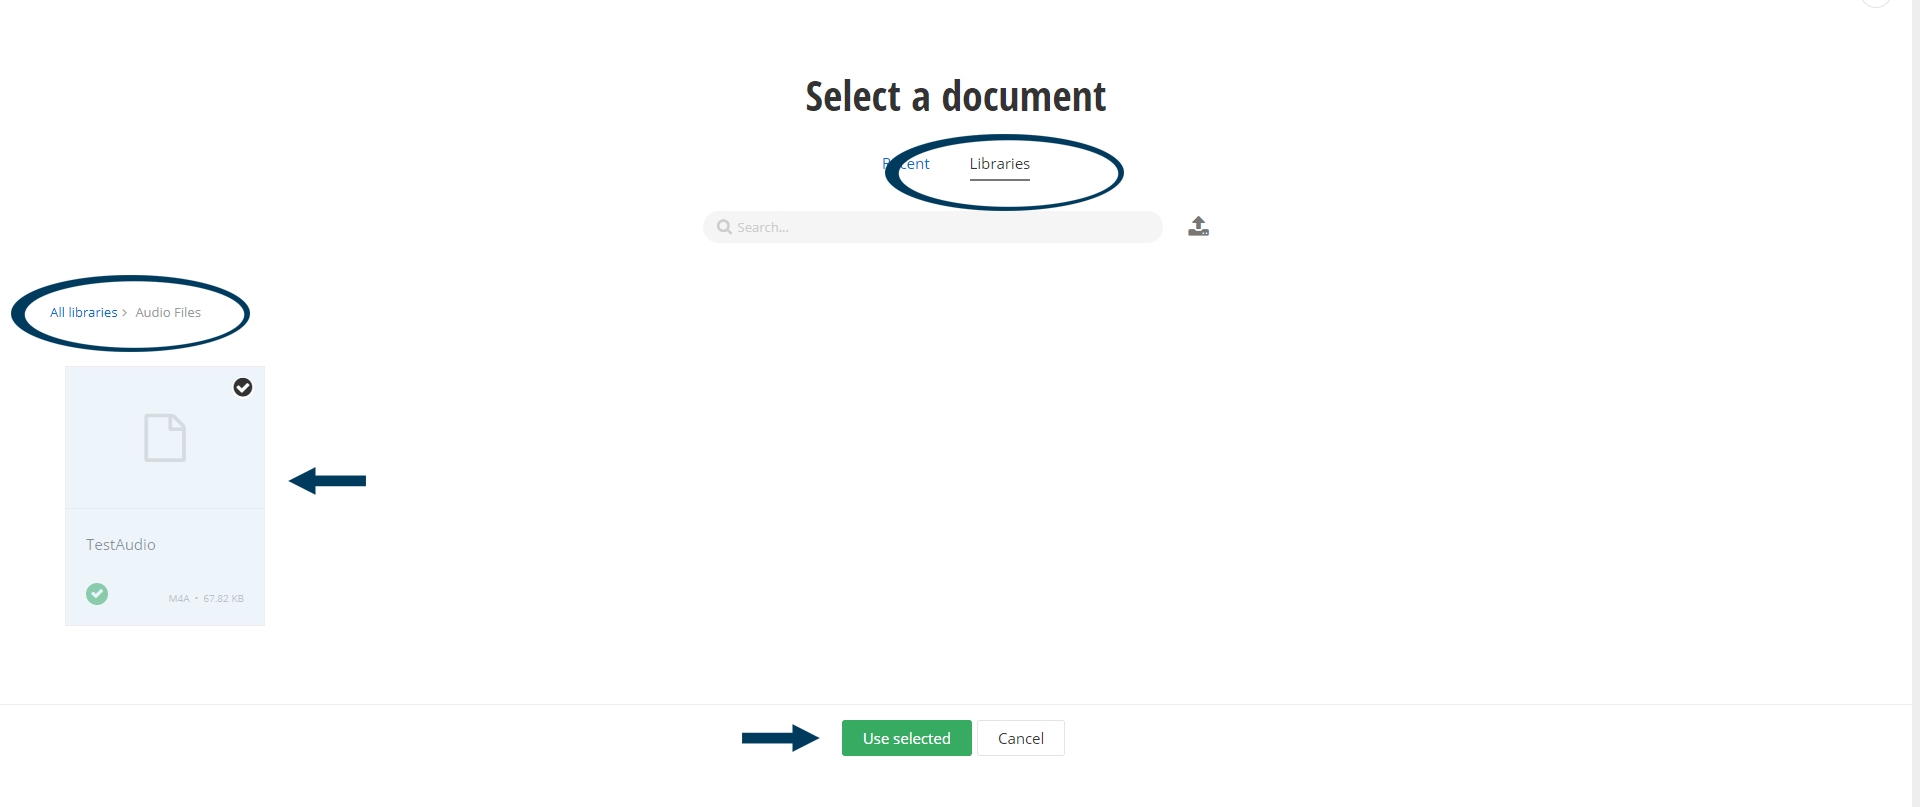
Step 7b: Show all documents optionIf you chose this option, browse to the library with your audio files. Click on the file you wish to relate to and then click the Use selected button.
Step 8: Relating a Printable Bio file.
After clicking the + button under 'Printable Bio', browse to the library your print file is held in, select the file, and then click the Use selected button.
Step 9: Status the Content.
Using the status bar, click the Publish button to make the content live on your website. If you want to save your changes without making them live, click the Save as Draft button.
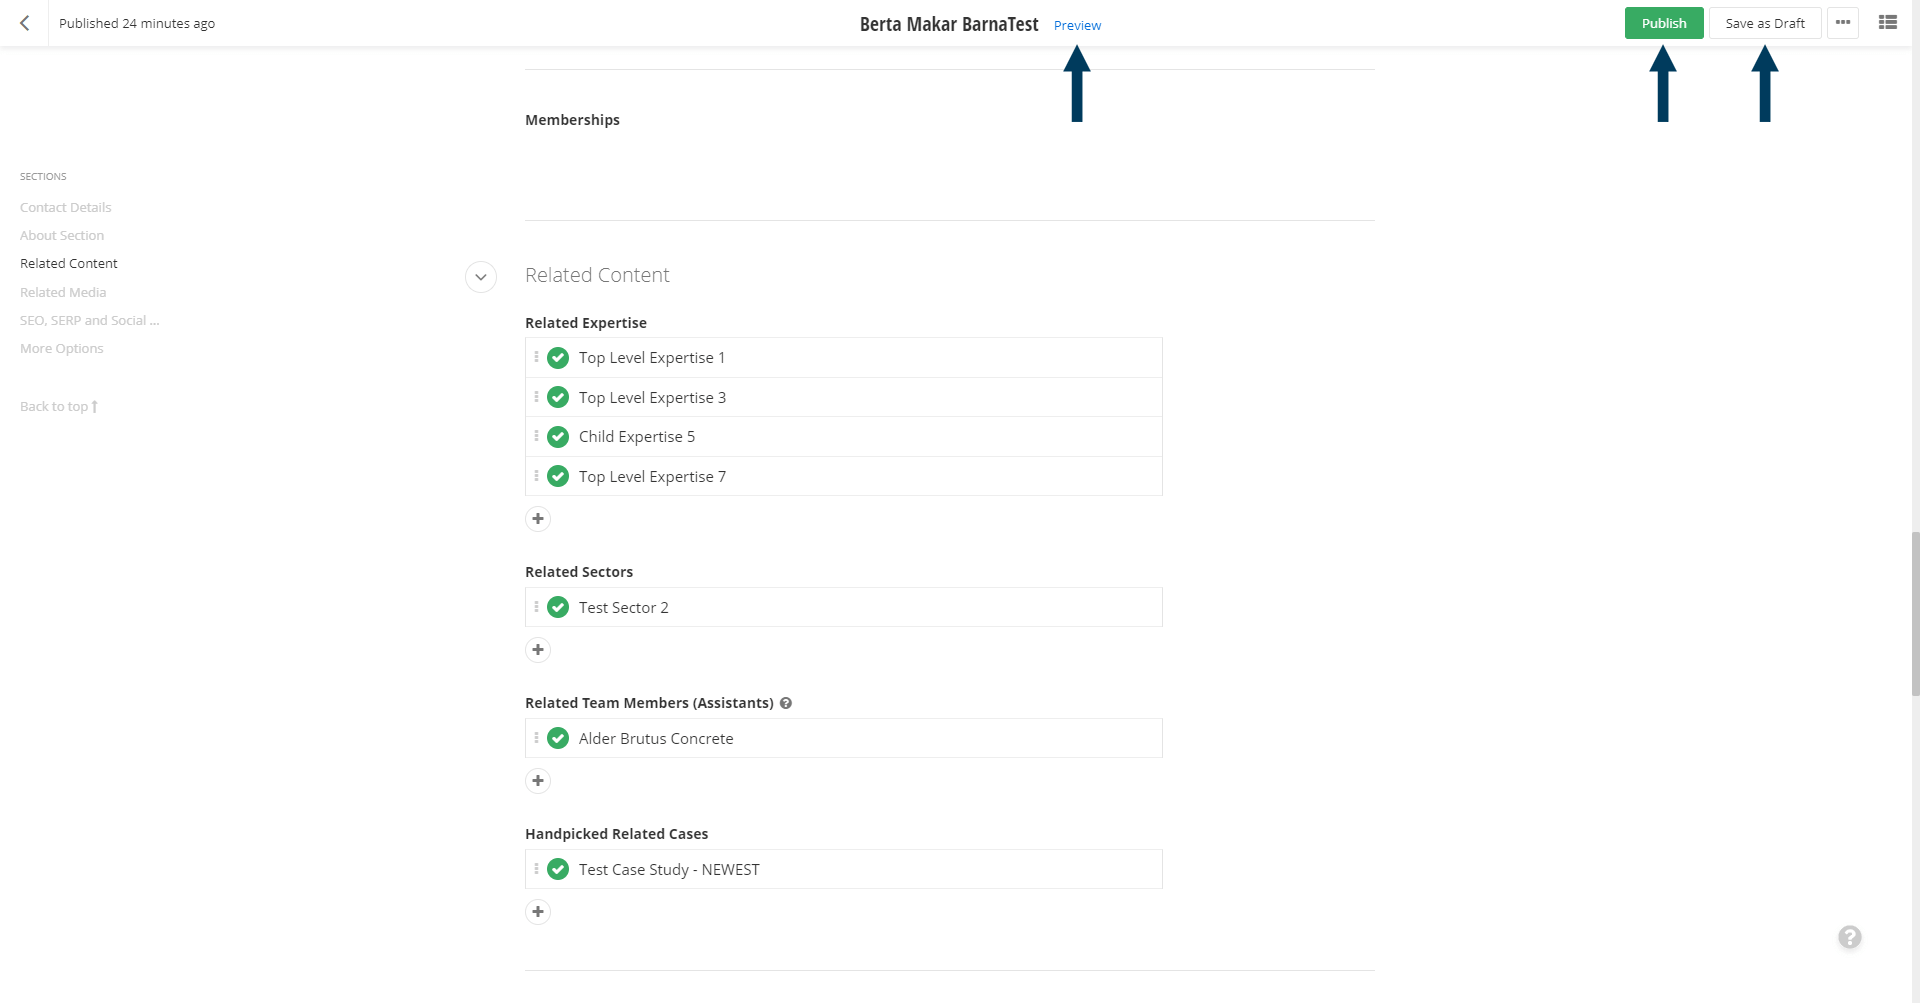
Note: To view the content prior to publishing, you can use the preview feature. This will show exactly how the content will look once published. To preview, click the Preview button (content must be statused as draft prior to previewing).


