Step 1: Drag on a "Content Block" widget or start editing a "Rich Content" field inside of a module and bring it into "Edit" mode.
Note: If you are editing "Rich Content" inside a module input it is already in Edit mode.
Step 2: Add an image by clicking the Image Manager icon. This will bring up the dialogue that allows you to select from previously uploaded images (or upload from your computer). The first option will be discussed below.
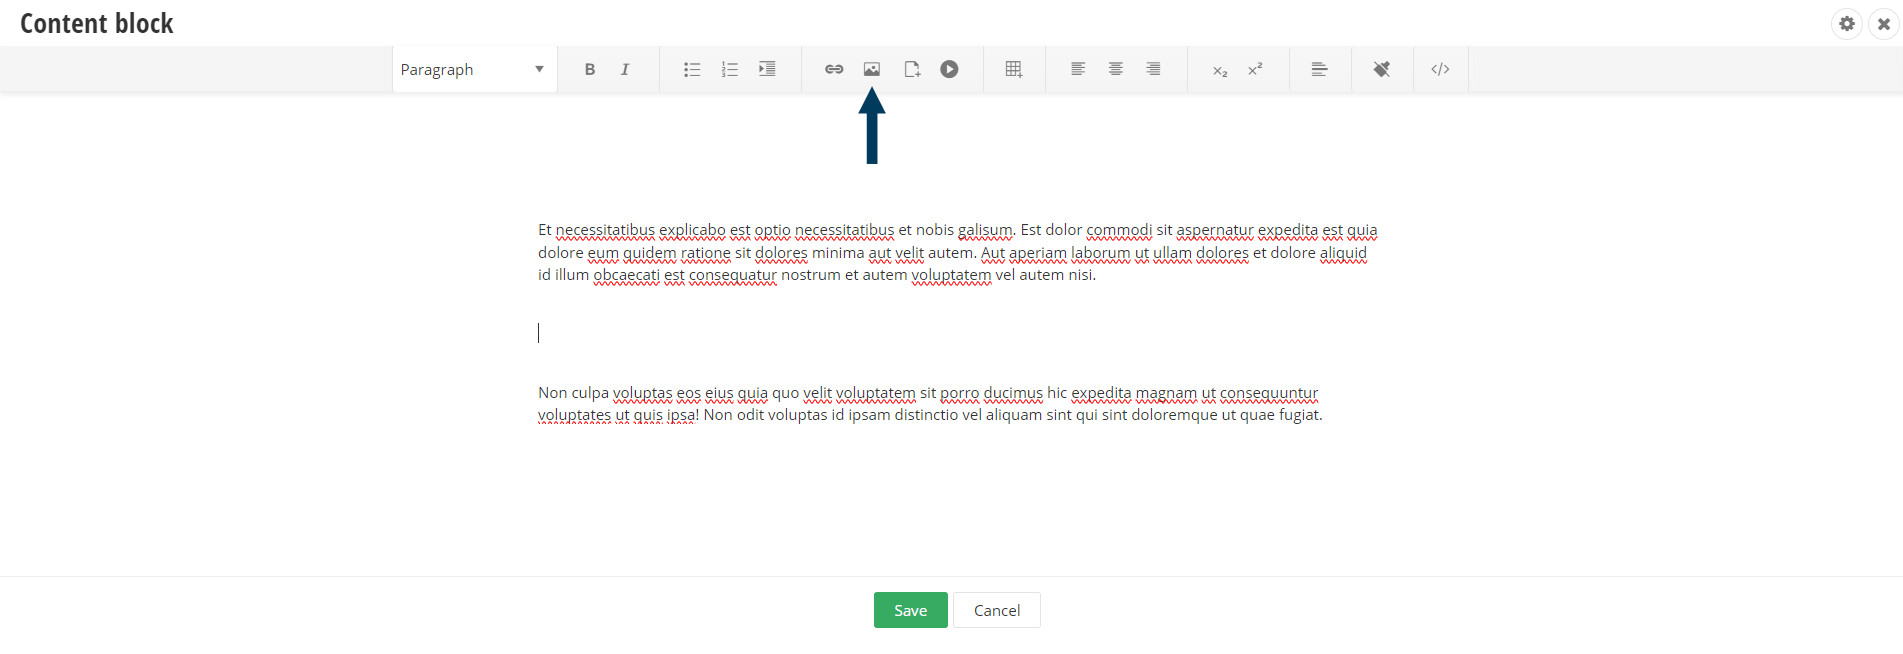
Note: Uploading images inline (ie: uploading from your computers hard drive) is discussed in the Upload an Image Inline video.
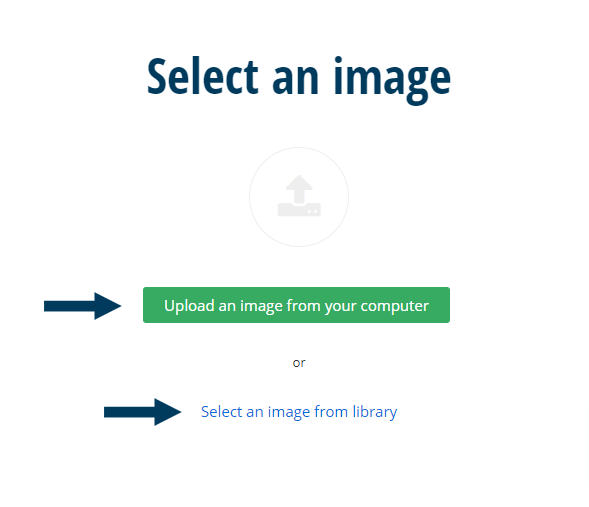
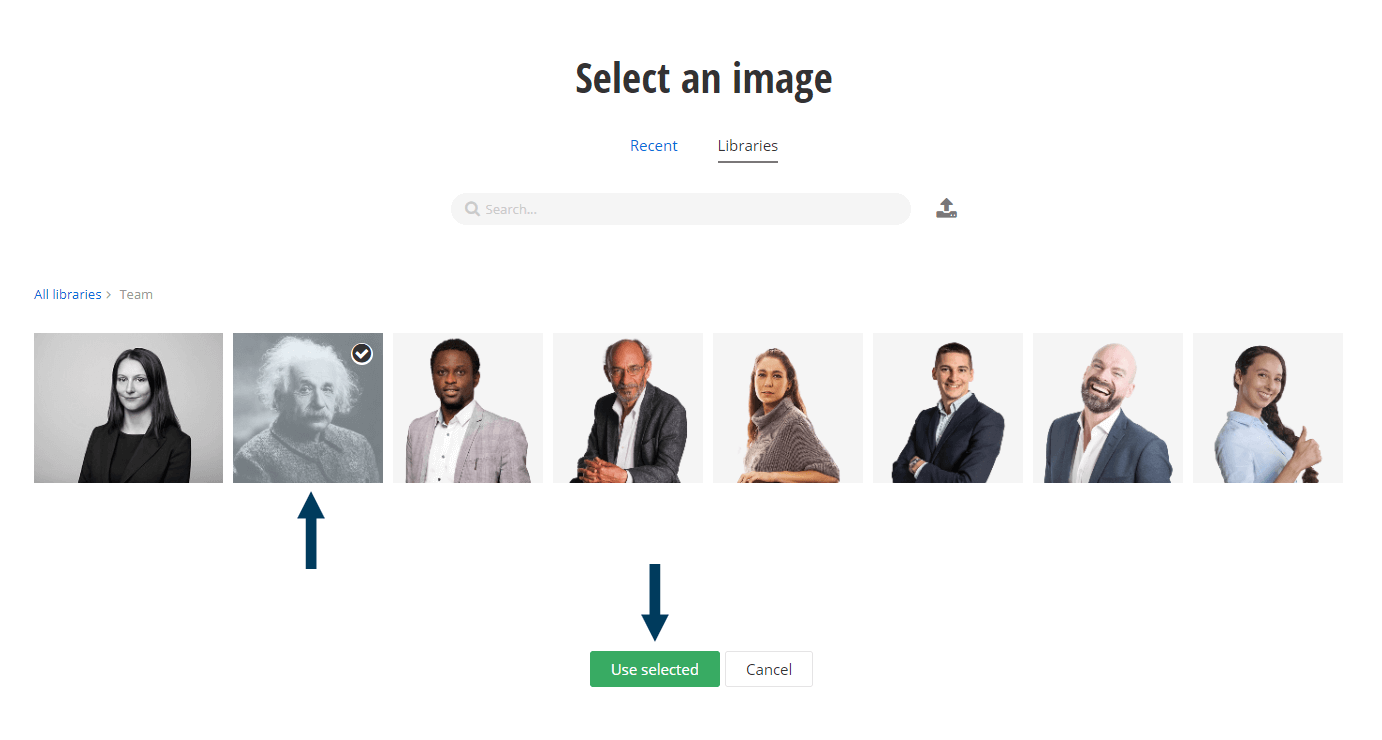
Step 3: Choose the image from an existing library.
This is done by navigating to the library where your image is stored. Then, you select the image you wish to insert by selecting it with your mouse and clicking the Use Selected button.
Step 4: Choose the image display options.
You can choose to edit the Title and Alternative text fields (this content is loaded from the original image properties). You can also control the size (dimensions) of how you want the image to display on screen. This is done by expanding the Image Size drop-down and selecting the desired image size.
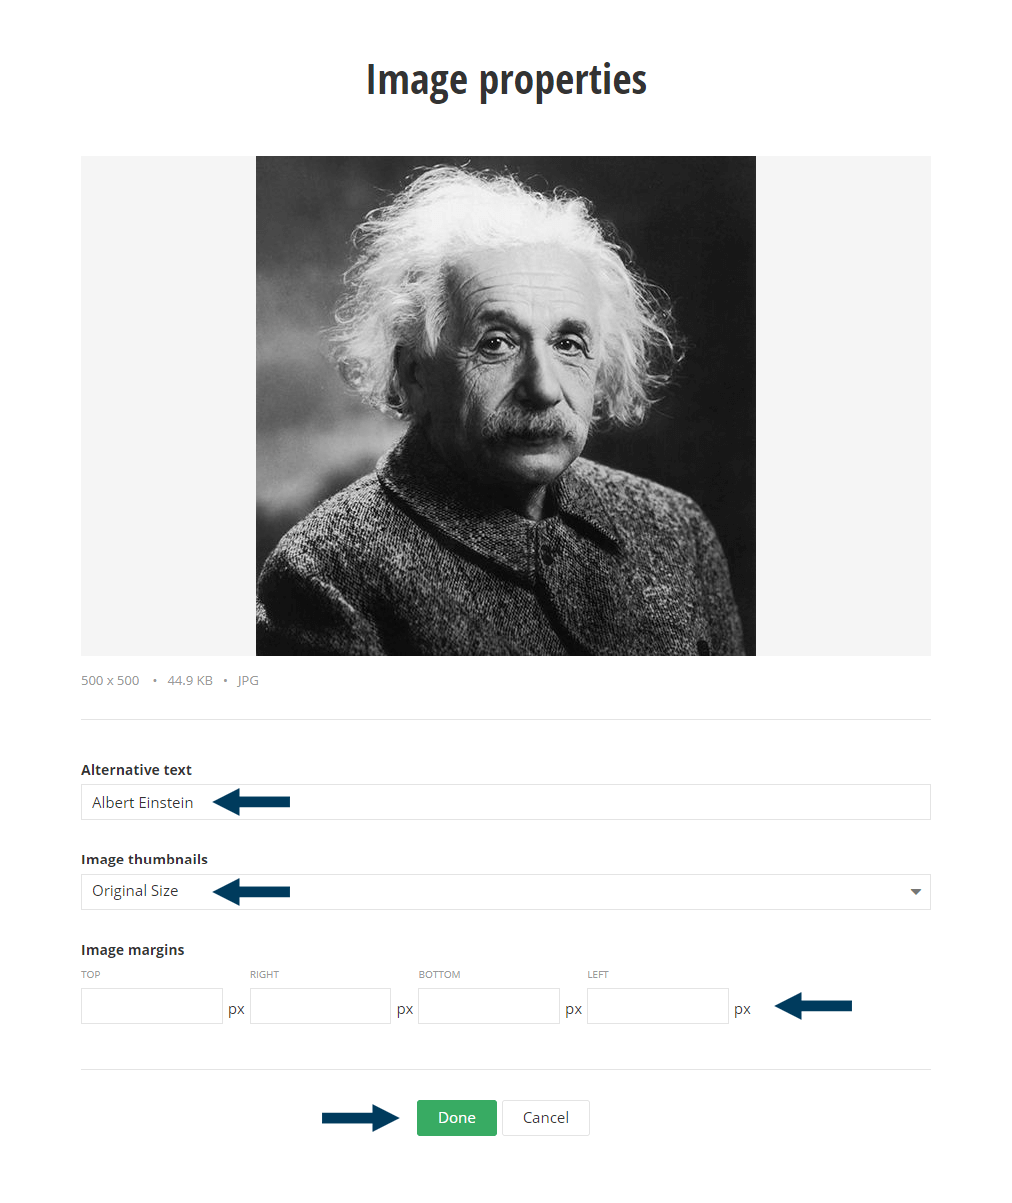
Step 5: Save the options.
Save and insert the image by clicking the Done button.
Step 6: Save your Content Block.
Save the Content Block by clicking the Save button.
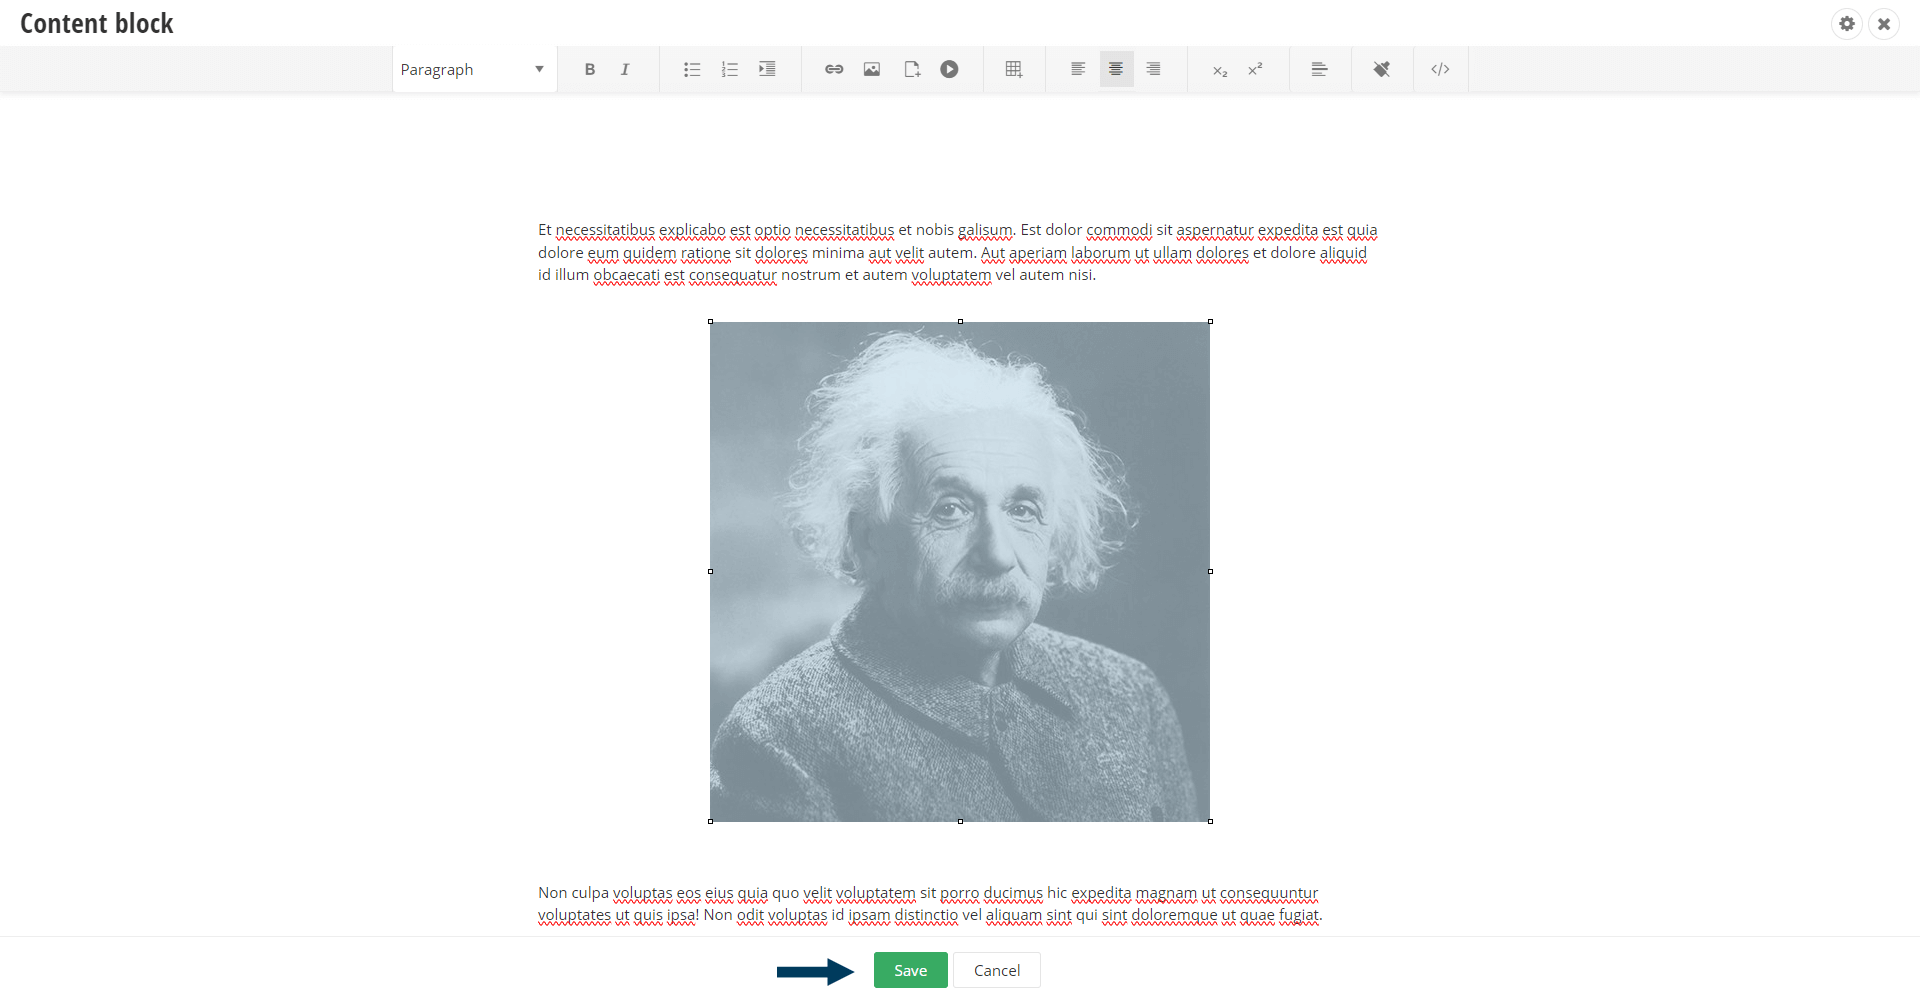
Note: This step is not required if you are editing rich content within a module.
Step 7: Status the Page.
Using the status bar, make the page live on your website by clicking the Publish button.
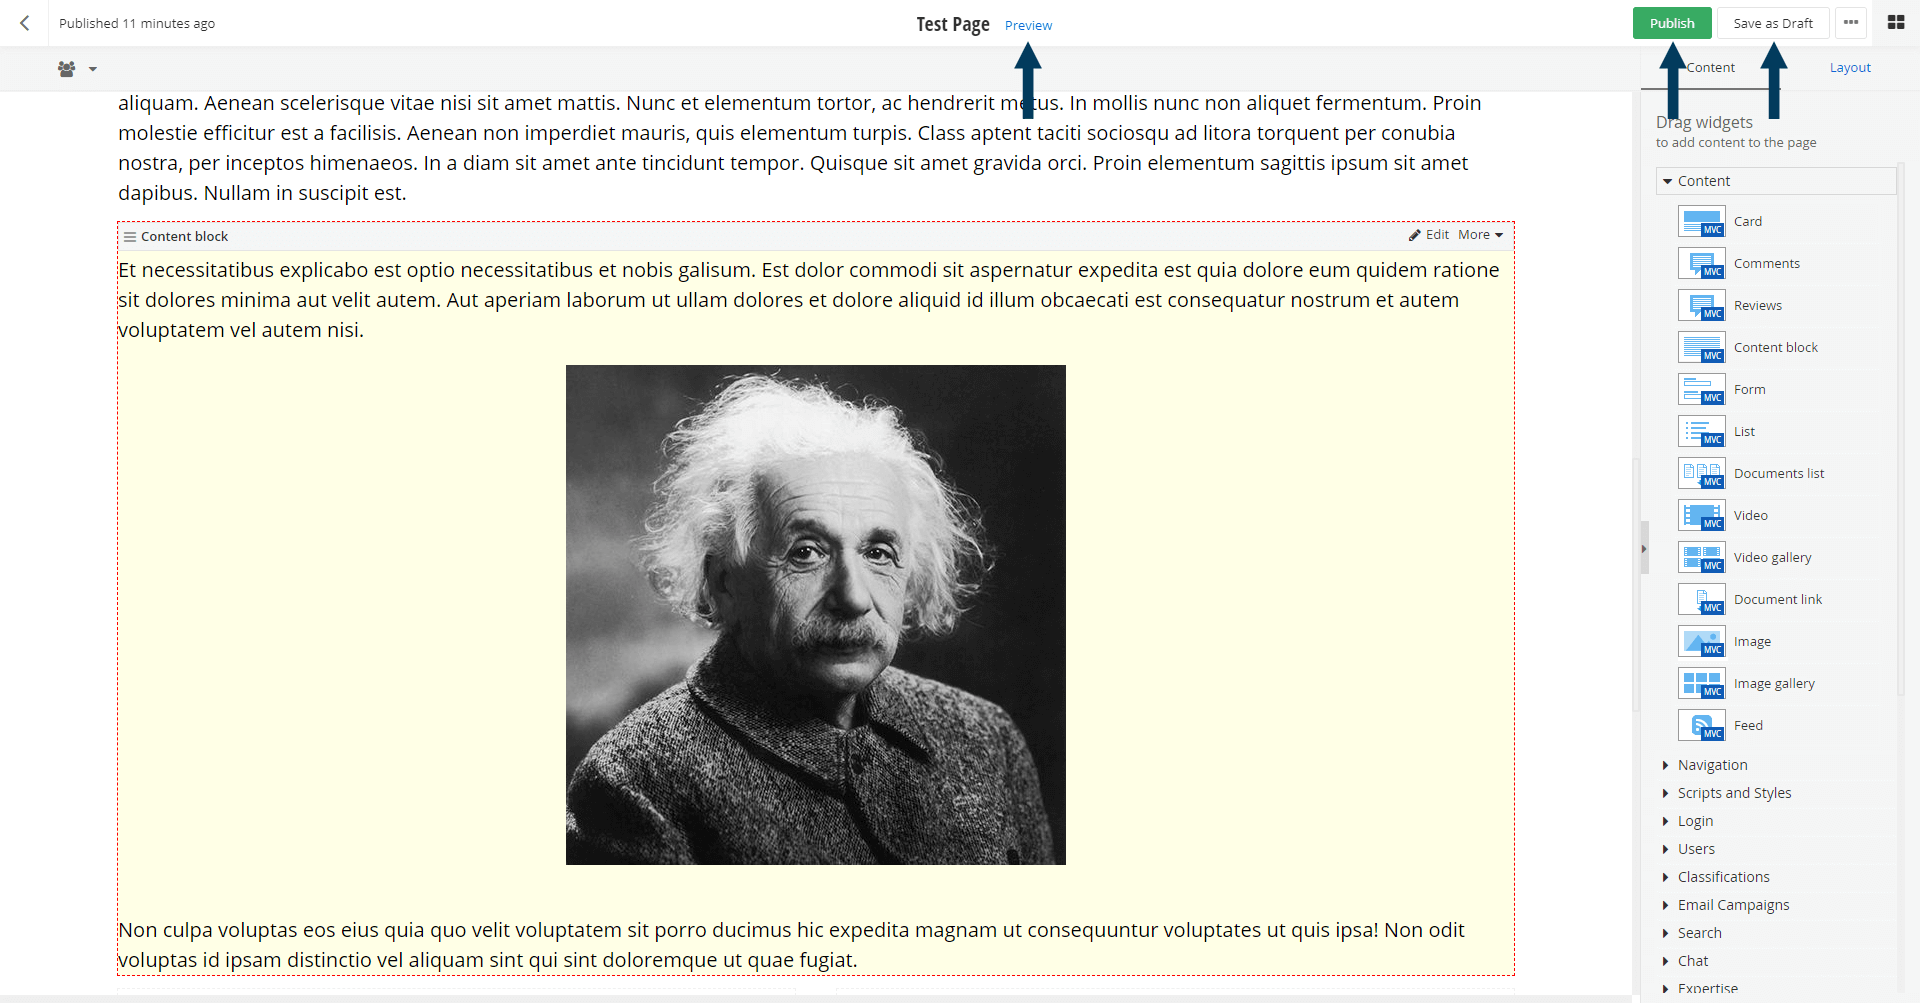
Note: To view the content prior to publishing you can use the preview feature. This will show exactly how the content will look once published. To preview, click the Preview (content must be statused as draft prior to previewing).