Select Parent Service / Parent Practice Area
Introduction:
Videos best viewed full screen at 1080p resolution.
Depending on what version of the CMS your website uses the Content drop down may display Services, or Expertise instead of Practice Areas.
Video Duration: 01:32
Step by Step Instructions:
Step 1: From the top navigation, click on the Content drop-down menu and then Expertises or Practice Areas/Services.
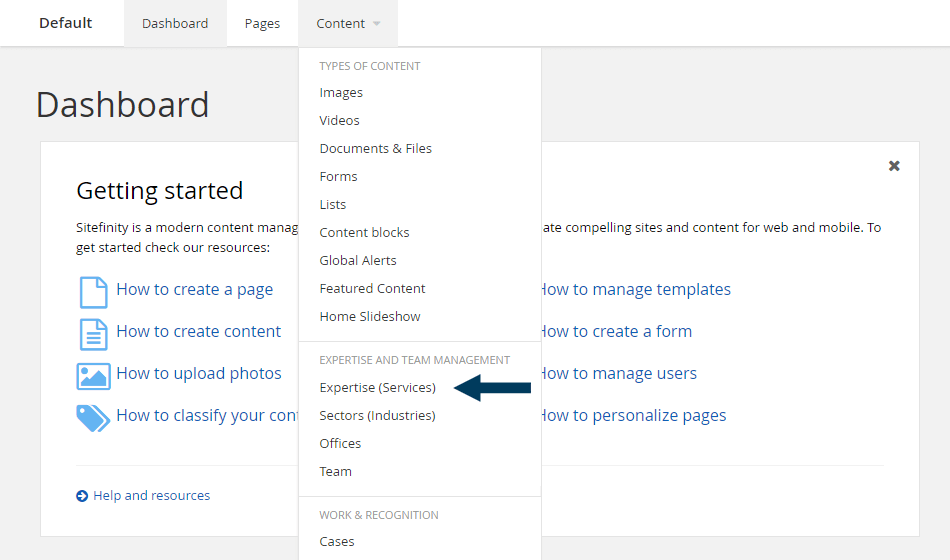
This will bring up the listing page that shows all Expertises or Practice Areas/Services.
Step 2: Find the Expertise you wish to edit. If you have a long list, you could use the search function. Type the full or partial name and then click the Search button. Or browse your list for the Parent Expertise/Service.

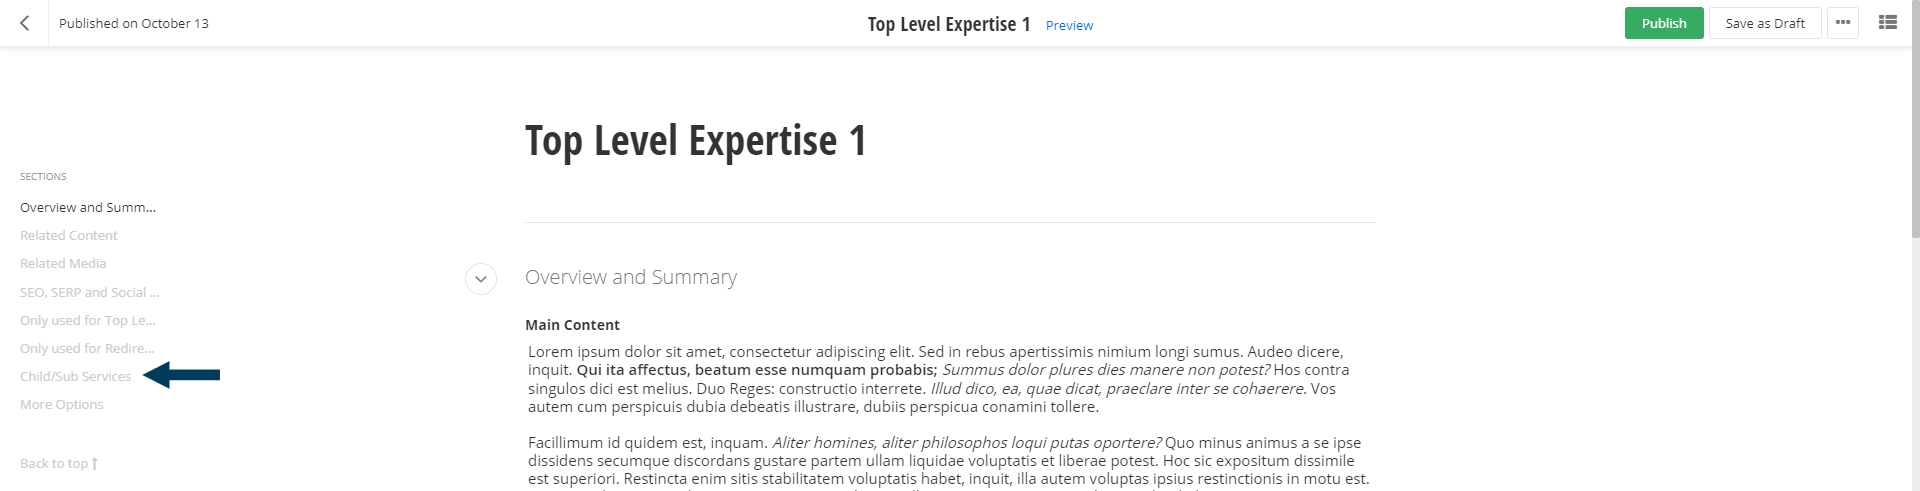
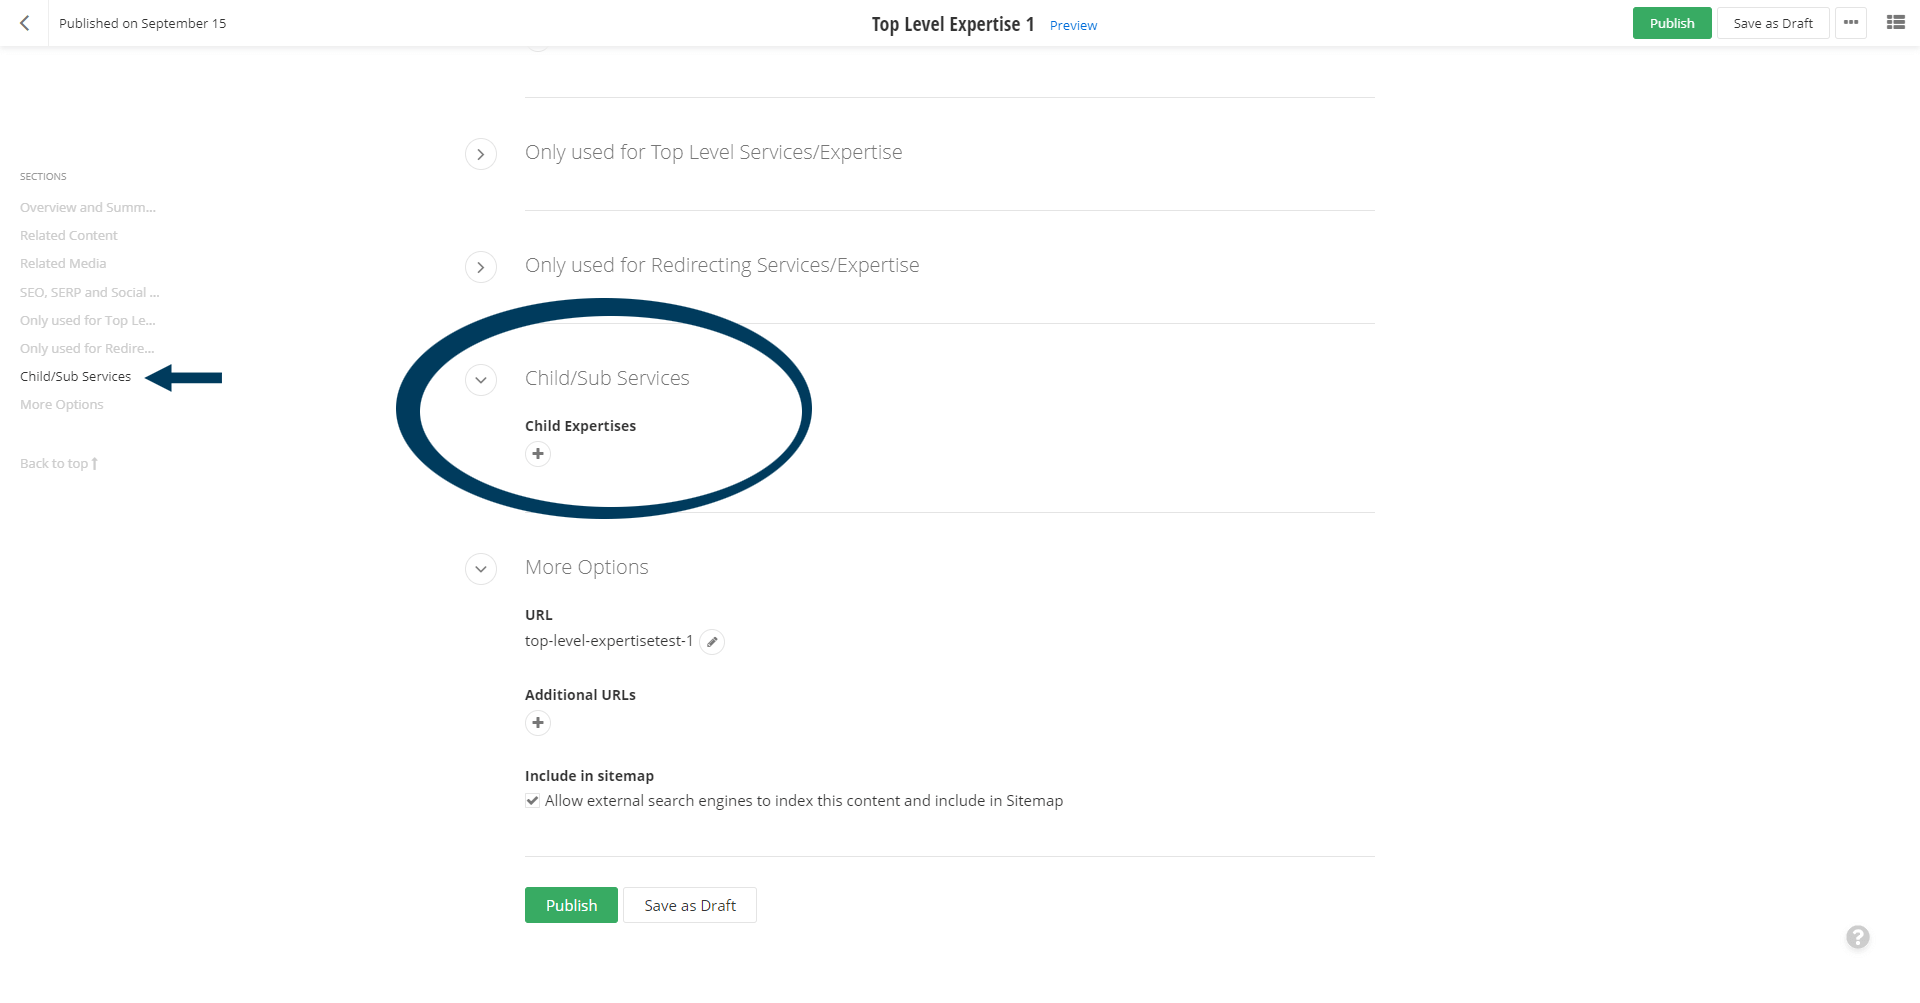
Step 3: To edit the Expertise, click on the Title. This will bring it into Edit mode and populate the Edit dialogue with the existing field's content. Once open in edit mode, scroll down to Child Services or click on Child/Sub Services in the side navigation.
Step 4a: Select the Parent Service/Practice Area. Under the Parent Practice Area section, click the Plus button under Choose Child Expertises to bring up the list of recent expertises within the CMS.
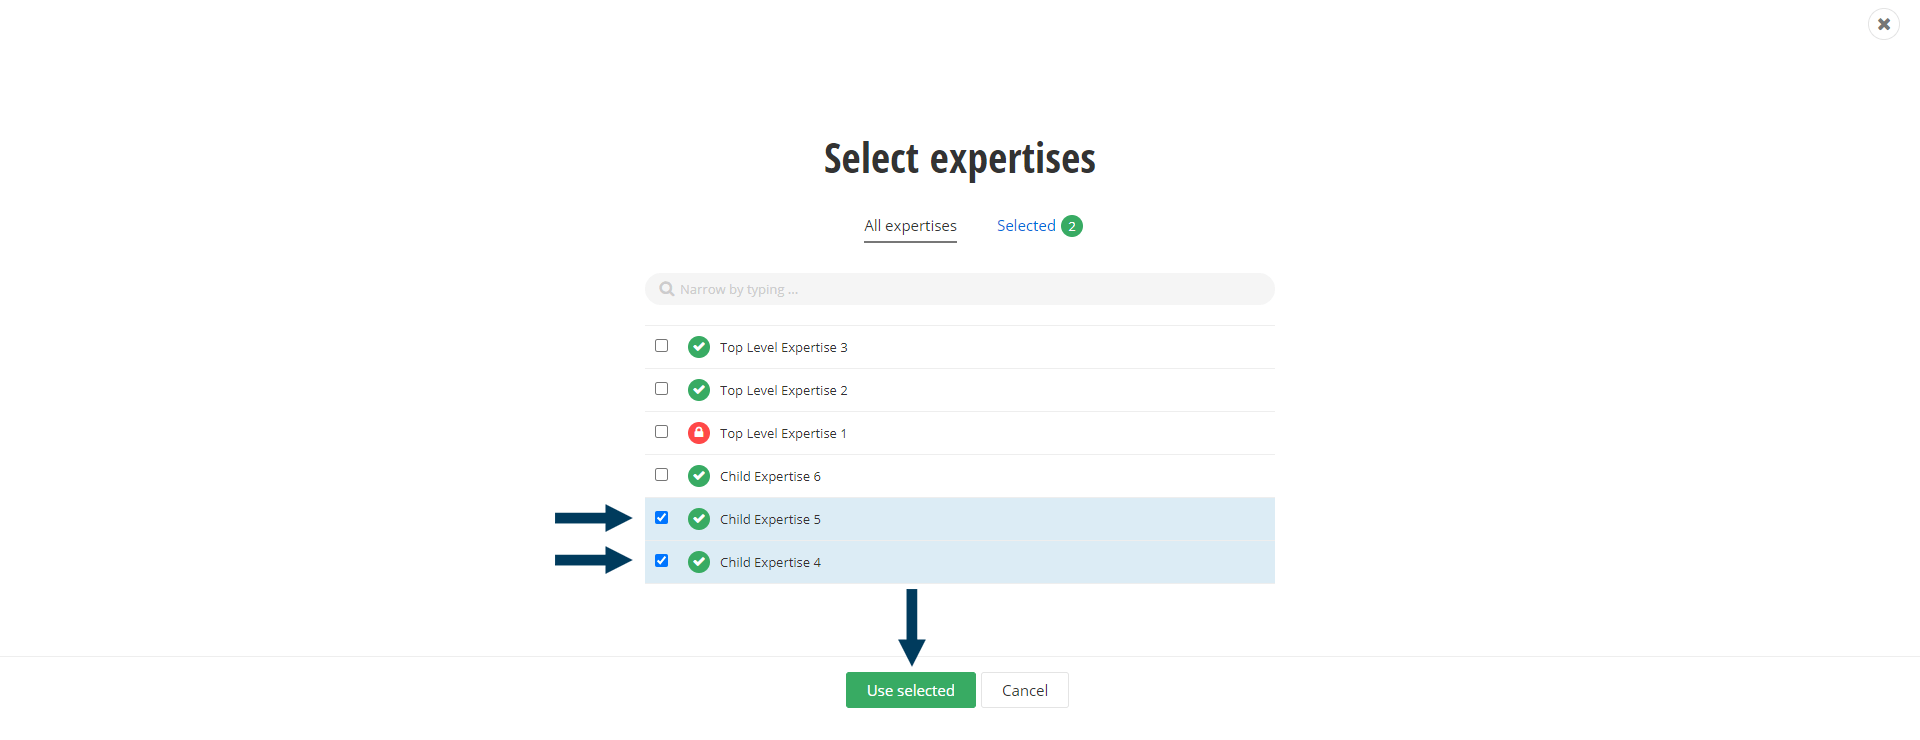
Step 4b: Select the Child/Sub Services (Expertises/Practice Areas). From the list of expertises, click on the service title/name to add it - or click on Show All Expertises to see the full list of services within your CMS.
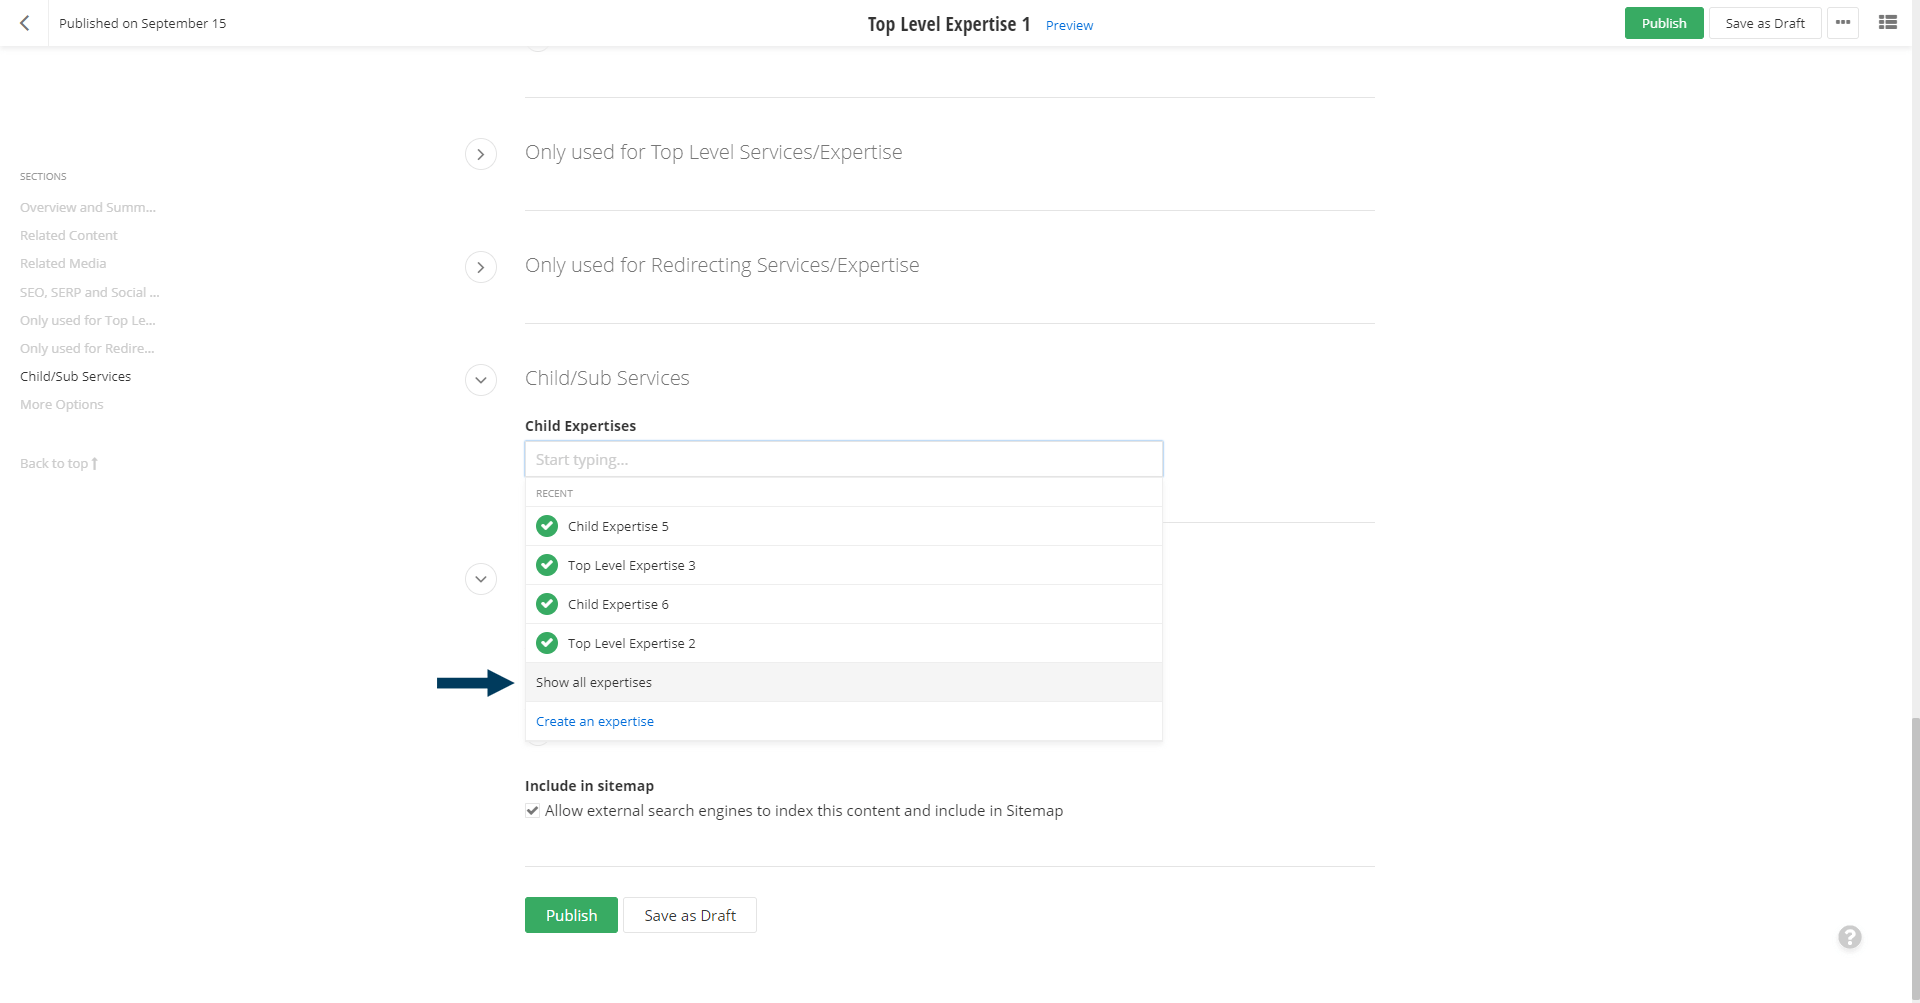
On the show all screen, you can use the checkboxes to select more than one expertise at a time. When you are finished selecting, click the green Use Selected button.
Step 5: Status the Content.
Using the status bar, make the content live on your website by clicking the Publish button.
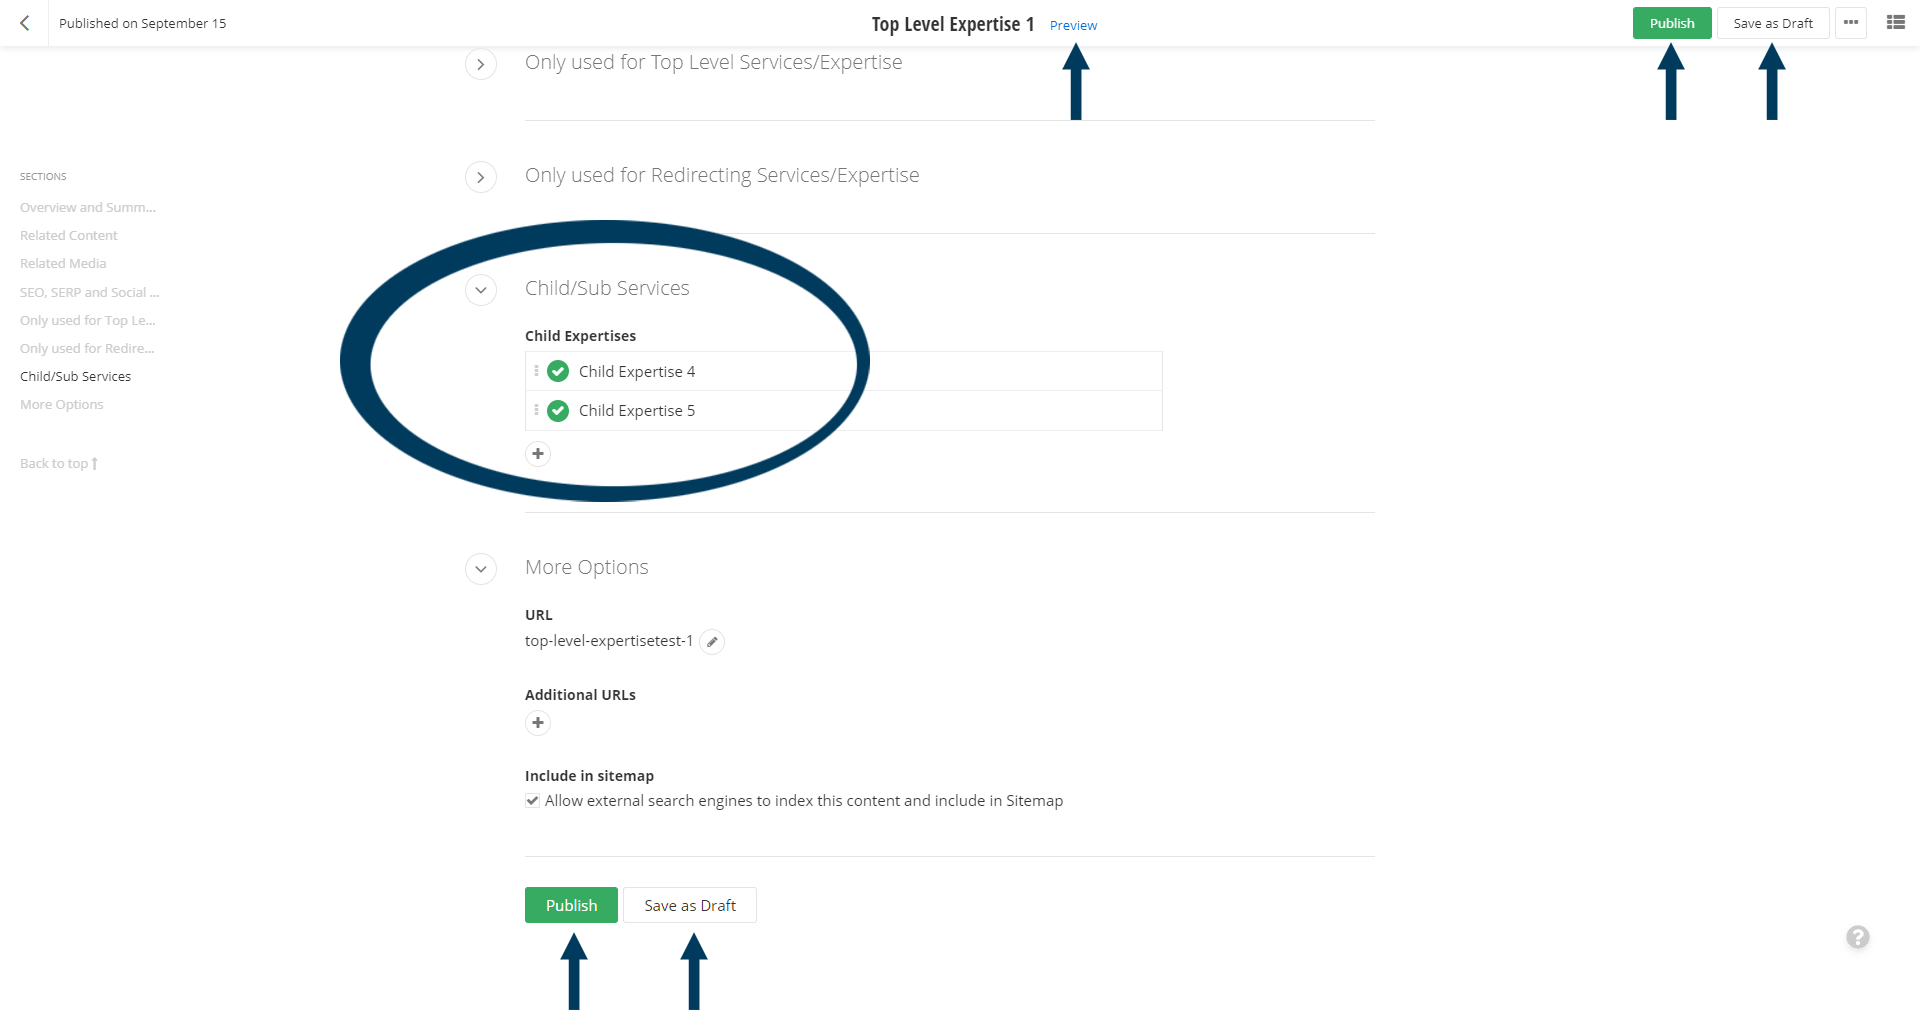
Note: To view the content prior to publishing, you can use the preview feature. This will show exactly how the content will look once published. To preview, click the Preview button (Content must be statused as draft prior to previewing).


