Upload Multiple Documents
Introduction:
Videos are best viewed full screen at 1080p resolution.
Video Duration: 03:21
Step by Step Instructions:
Step 1: From the top navigation, click on Content drop down and then Documents & Files.
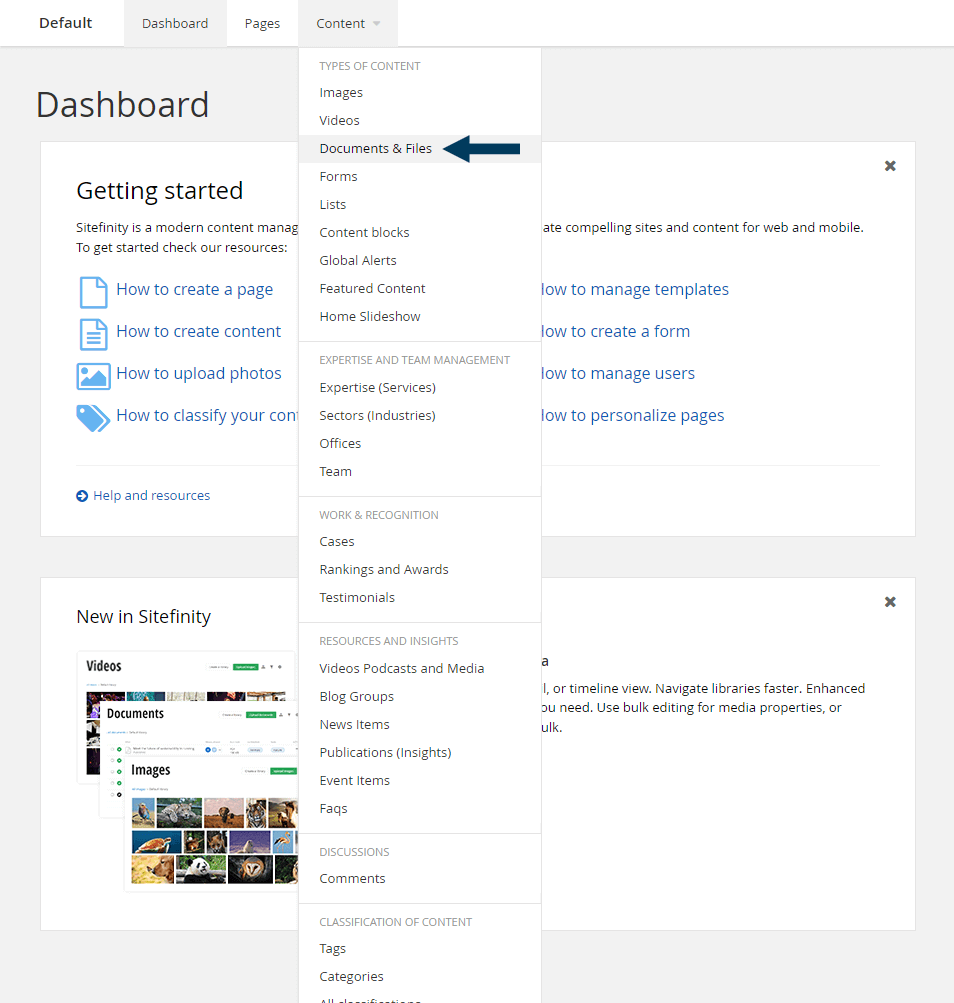
This will bring up the Documents view that shows all document libraries.
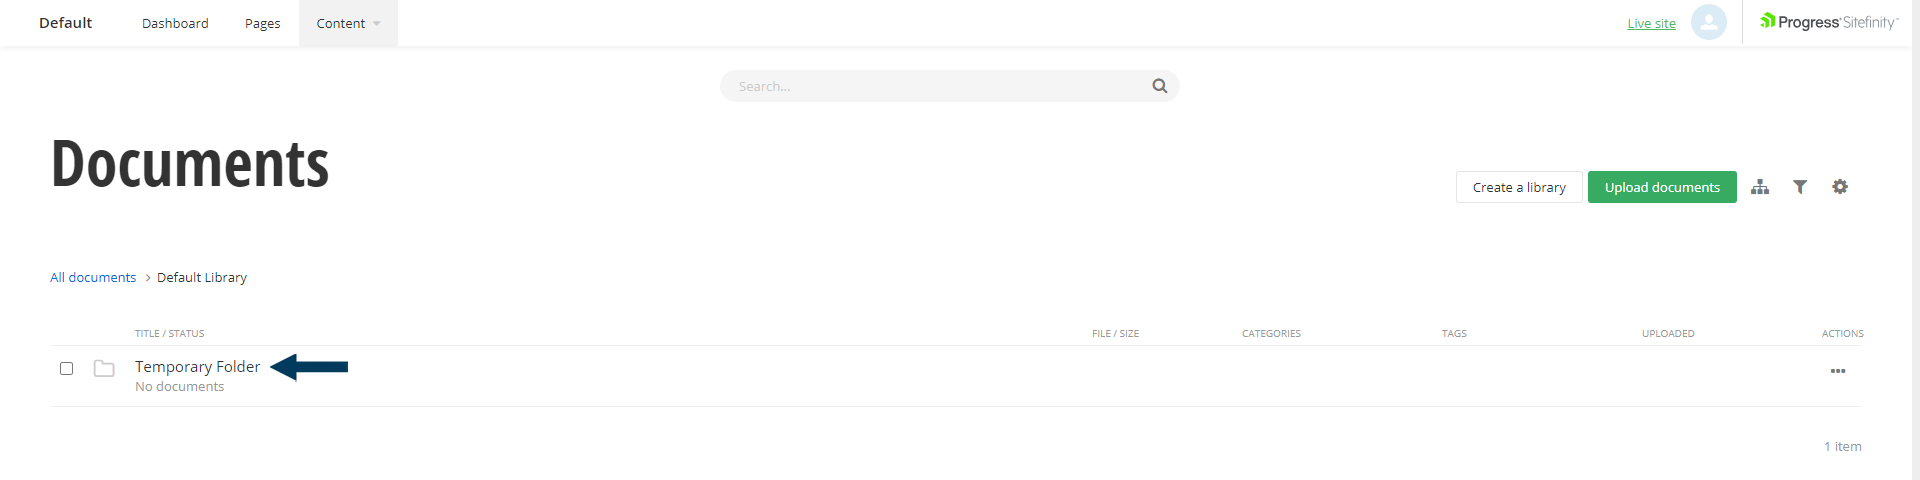
Step 2: Browse to a library.
Click the name of the library you wish to upload documents into (continue to navigate down to child libraries in the same manner if necessary).
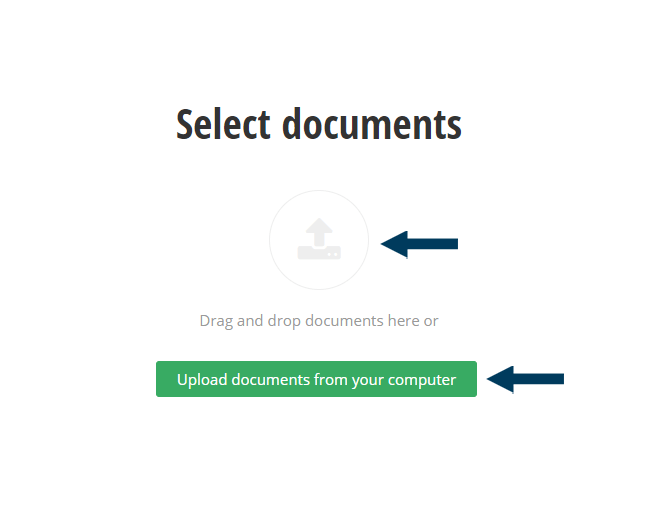
Step 3a: Upload Documents.
Click the Upload documents button which will bring up the Documents Upload dialog. Now click the Upload documents from your computer button.
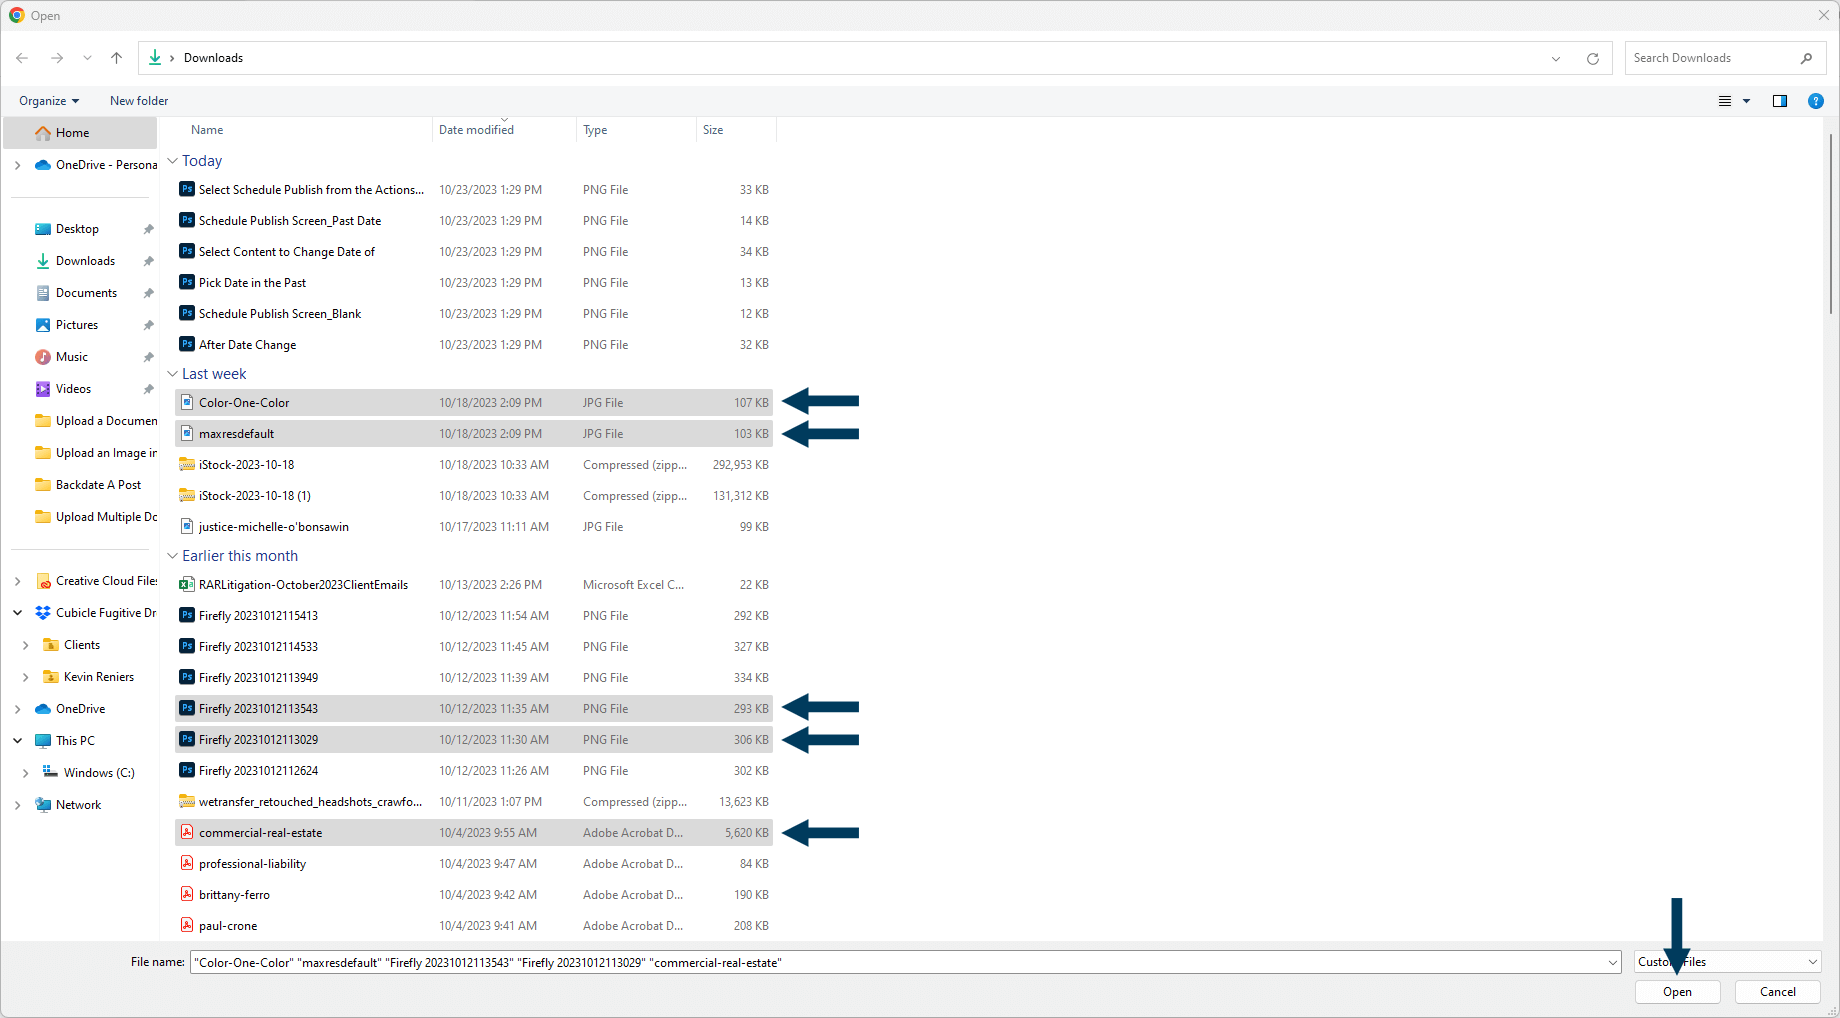
Step 3b: Browse to a folder on your computer and highlight one or more documents that you wish to upload. Once the documents have been highlighted click the Open button.
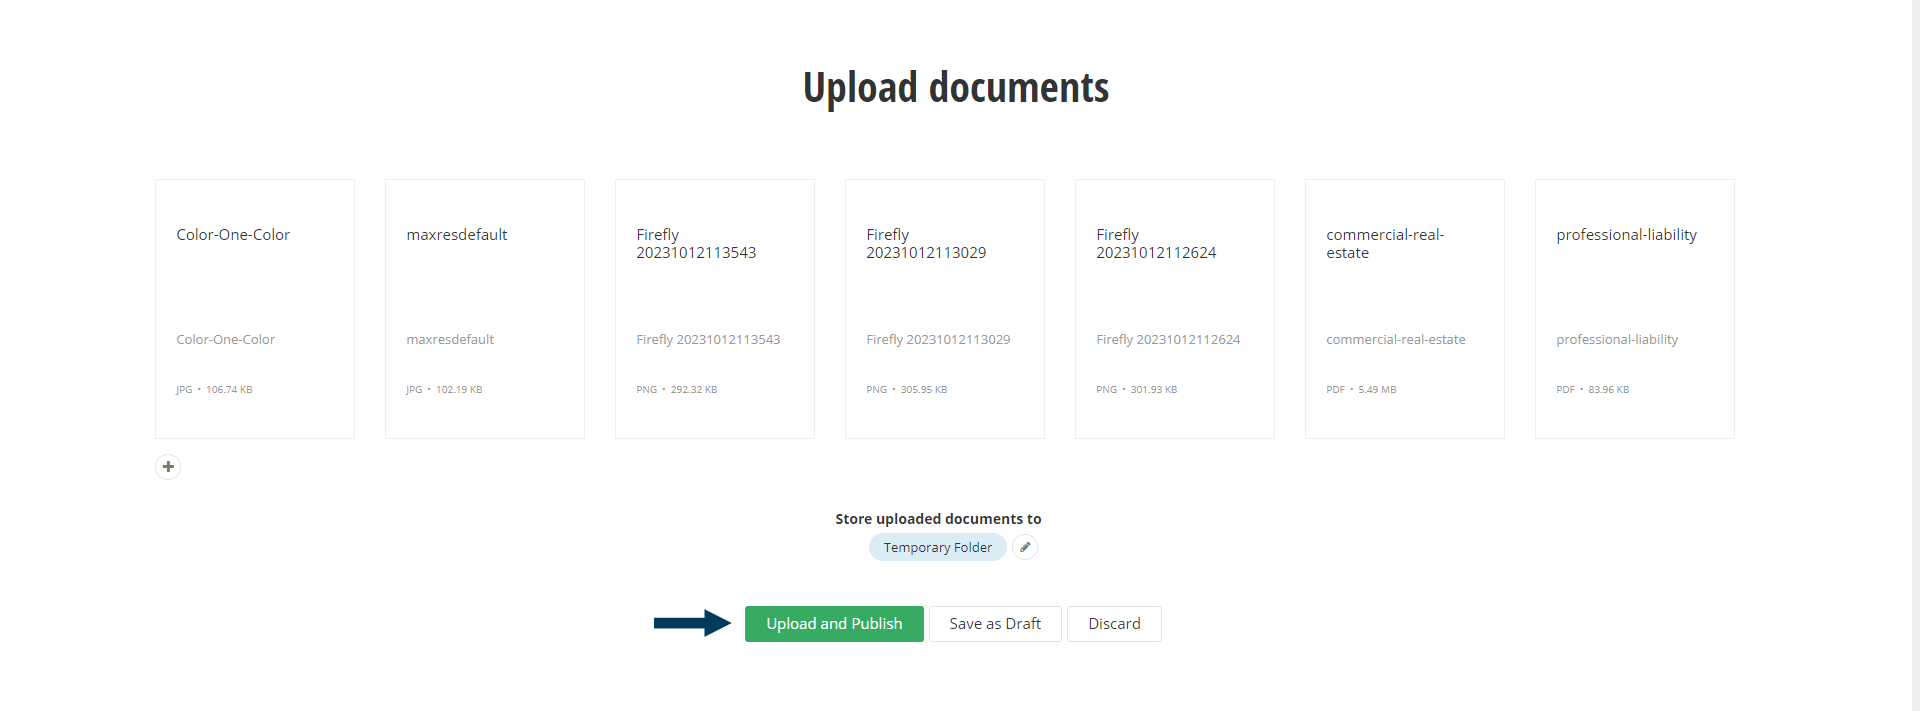
Step 3c: Confirm Upload.
You should now see a preview of all the documents you selected. The library you were inside before hitting the upload documents button should already be filled in as the library for storing the new documents - you could change the library for storage if necessary. When ready, click the Upload and Publish button.
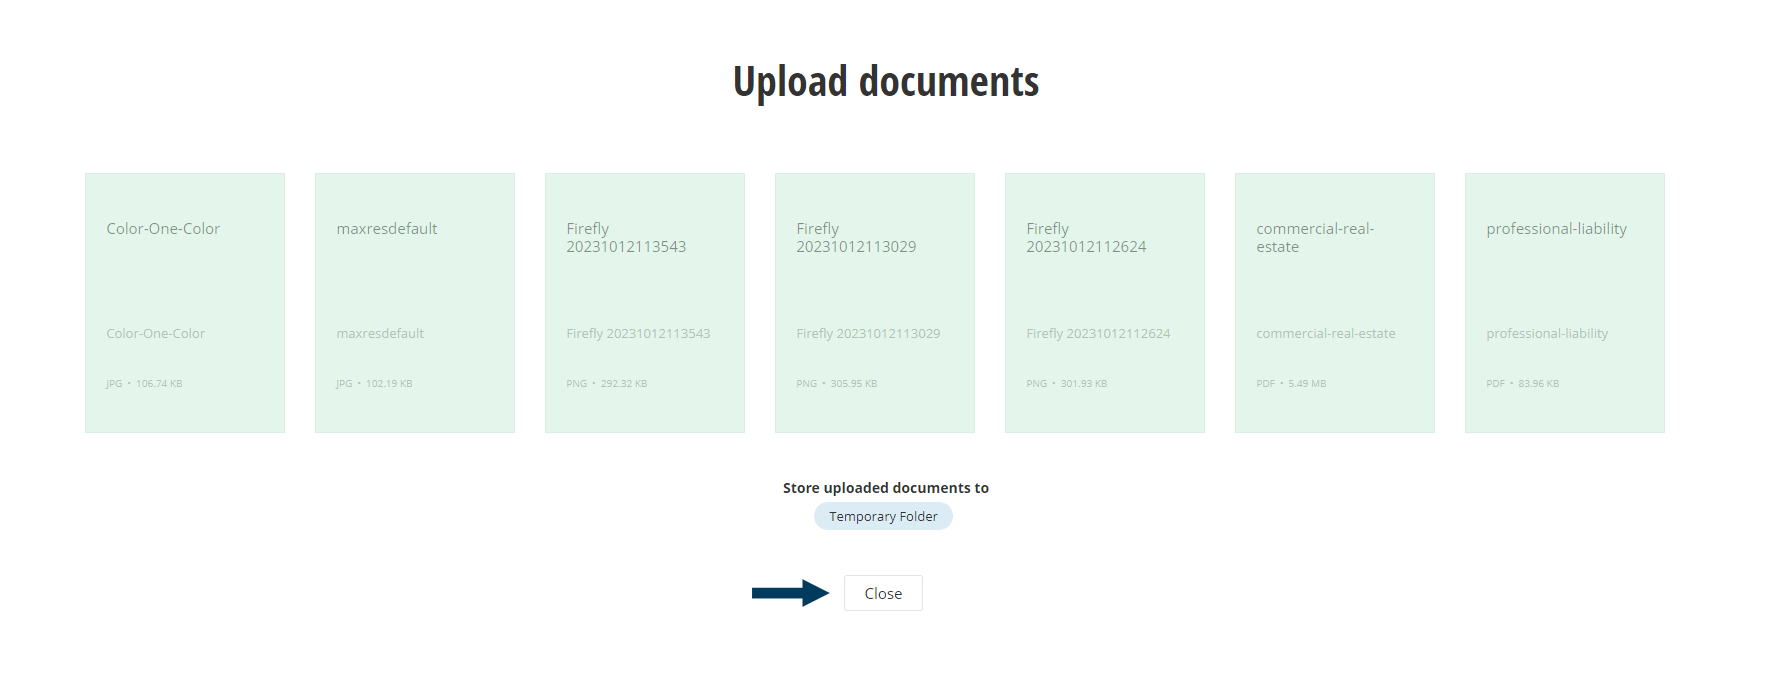
Step 4a: Finishing.
The document preview boxes will fill up with green as the documents upload. When the documents are finished uploading the green bar will be the full height for all documents. Once uploading is complete, click the Close button.
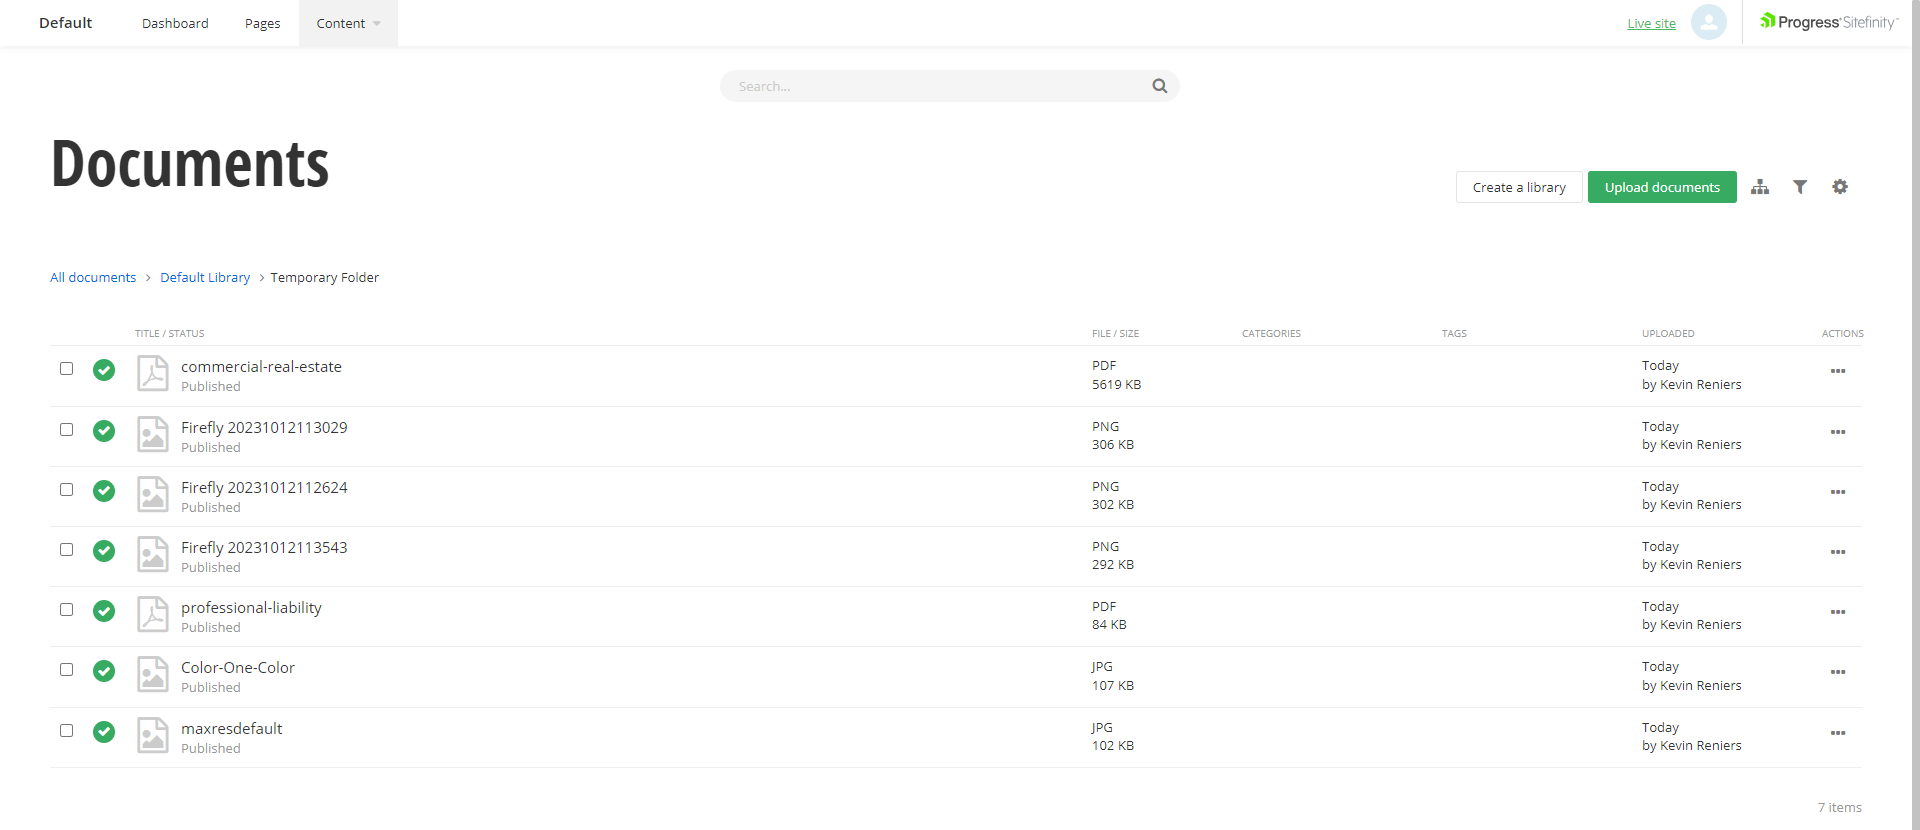
Step 4b: Back in the document library.
This will return you to the document library you were inside before clicking the Upload Documents button. You should see your uploaded documents.
Related Videos
-
 03:44
03:44 -
 04:37
04:37


